


20
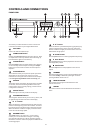
CONNECTING YOUR DIGITAL MUSIC SERVER
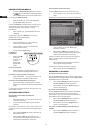
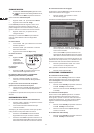
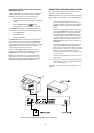
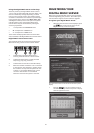
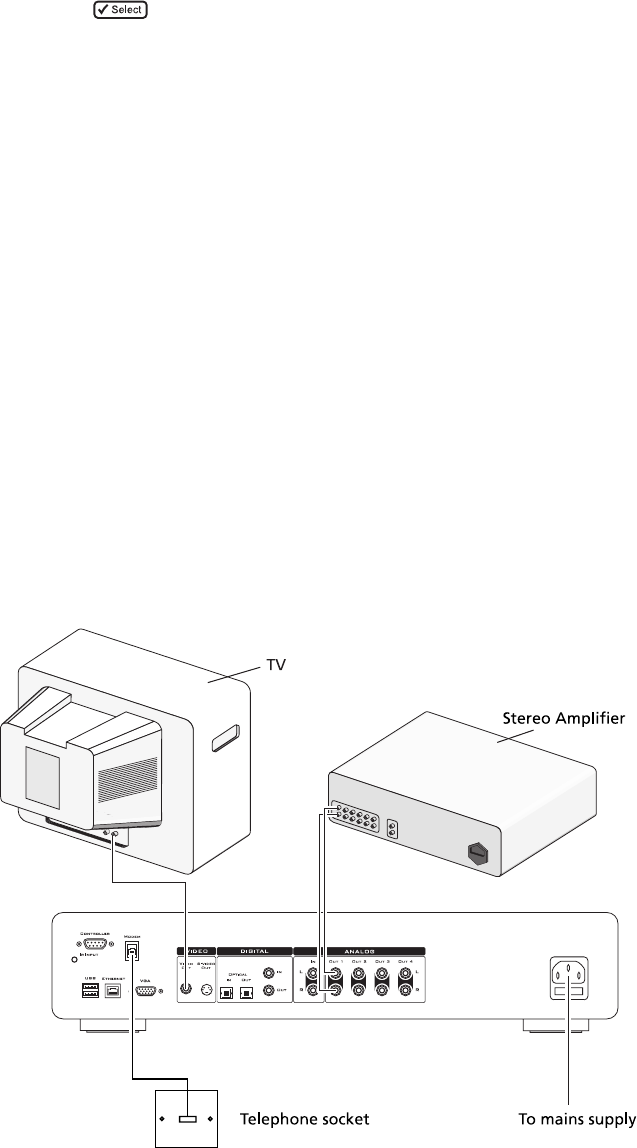
The diagram below illustrates the basic connections
required to use your Digital Music Server.
Note: Do not make any connections to the Digital Music
Server while the power supply is connected and switched
on.
• Connect the supplied telephone lead to a
standard analogue telephone socket. Connect
the other end of this cable to the socket marked
Modem on the back panel of the Digital Music
Server.
• Connect the red plug of the supplied audio lead
to the red Analogue Out 1 socket on the back of
the Digital Music Server. Connect the adjacent
white plug to the white Analogue Out 1 socket
on the Digital Music Server. Connect the other
end of this cable to the AUX or CD inputs on your
amplifier. In the same way connect the other
Analogue Out connectors to other amplifiers as
appropriate.
• Connect the yellow plug of the supplied TV lead
to the yellow Video Out socket of the Digital
Music Server. For the European TV lead* connect
the Scart plug to the ext. 1 or 2 socket on the rear
of your TV. For the non-European TV lead
connect the yellow plug to the video input on the
rear of your TV.
• Connect the supplied power cord to your mains
power supply.
• Switch on your television. Select the appropriate
video channel to view the Digital Music Server TV
User Interface display.
* For Scart connection, the red and black plugs are not
required.
Reassigning volume control when using the
Digital Music Server.
The Nand OMute keys buttons may be configured to
control the volume on your amplifier whilst the HDD
Audio device is selected. To configure these keys:
• Ensure that the Amp button is correctly
configured to control your amplifier (as described
above).
• Press the HDD Audio and
buttons
simultaneously; hold them down for 1 second.
The HDD Audio button will remain lit for 20 seconds; the
configuration process must be completed during this time.
• Press the O Mute
• Press the N+ key
• Press the Amp button
The HDD Audio button will blink twice to indicate that
the configuration has been accepted. If the HDD Audio
button does not blink begin the process again, taking
care to press the buttons in the correct sequence. The N
and O
Mute keys should now control the amplifier
when the HDD Audio device is selected.
To return the N and O
Mute keys to their original
configuration repeat the above process, pressing the
HDD Audio button instead of the Amp button.
Note: For more information on configuring the HDD
Audio button to control your Digital Music Server in a
multi-room environment see the chapter called Using
Digital Music Server in a multiroom system p.40.
Basic connections required for Digital Music Server operation