40
USING YOUR DIGITAL
MUSIC SERVER IN A
MULTIROOM SYSTEM
Your XMusic Digital Music Server is capable of playing
different music in several rooms simultaneously. This chapter
explains how the remote control and front panel can be used
to control different outputs of the Digital Music Server.
Multiroom Remote Control Use
Your Digital Music Server remote control can be
configured so that every button press indicates to the
system which output is to be controlled. This means that
whenever infrared is received by the Digital Music Server
the TV display will automatically switch to controlling the
appropriate output.
To configure the remote with a default output
• Press the HDD Audio and
buttons
simultaneously; hold them down for 1 second.
The HDD Audio button will remain lit for 20 seconds; the
configuration process must be completed during this time.
• Enter the 3 digit code corresponding to the output
you would like to control (valid configurations are
listed in Appendix A). For example, to set output 2
as your default output press:
0, 0, 2
• Press the HDD Audio button again.
The HDD Audio button will blink twice to indicate that
the configuration has been accepted. If the HDD Audio
button does not blink twice begin the process again,
taking care to enter the number correctly.
If the Digital Music Server is switched on during the
configuration process the Enter Standby? prompt will
appear once configuration is complete; pressing any
navigation key on the remote should now cause the
Digital Music Server to switch to the correct output. In
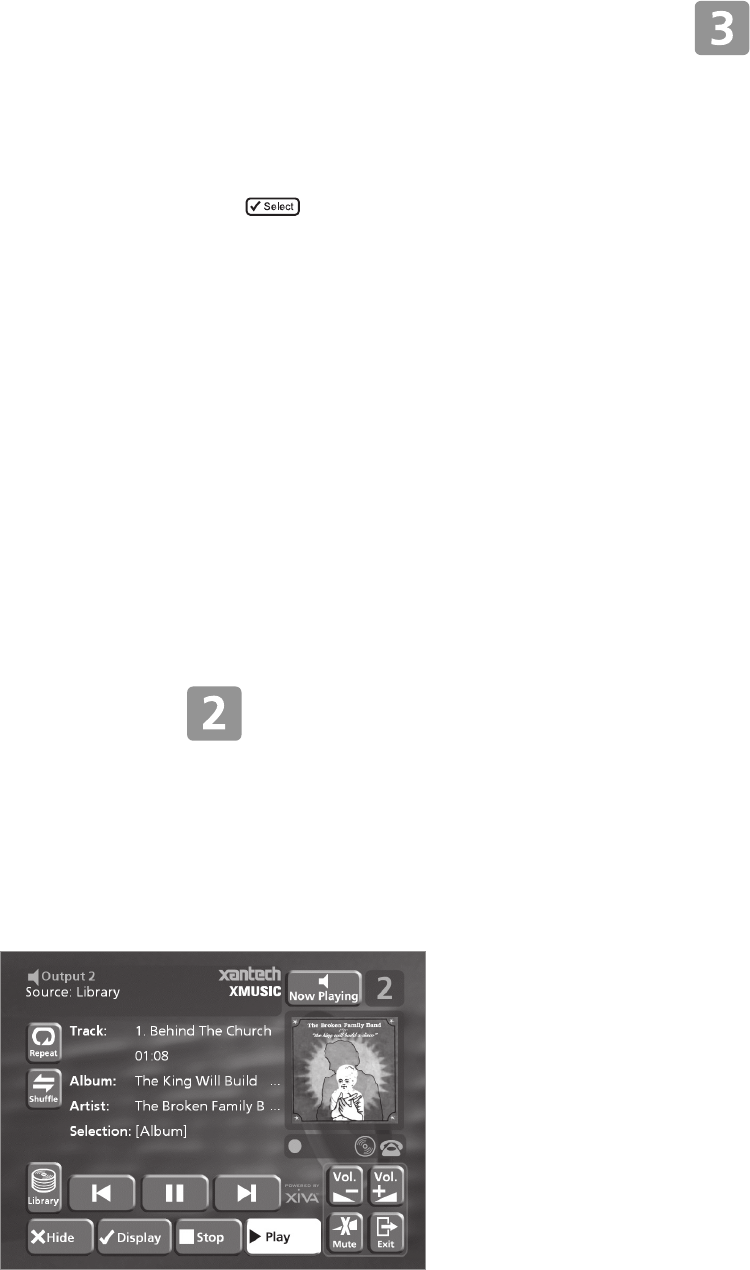
the example above the top-right corner of your television
screen will display the following:
To change output using the remote control
The -Output button on the Digital Music Server remote
control allows you to display information about the
music you are currently listening to. It can also be used
to select another output to control as follows:
• Press the - Output button on the Digital Music
Server remote control.
The following screen is displayed:
The output screen indicates what is playing on the
currently selected output.
• Press the - Output button again to switch to the
next output.
• Once the required output number is displayed,
press the 2Hide key to hide the output display.
In the previous example the television screen would now
show:
Any subsequent press on this remote will now control
output 3.
Press the Default o/p button at any stage to return to
controlling your default output. This button will also
automatically display the Library menu.
Direct Media Select
The Digital Music Server remote control can be used to
select music from the library without any reference to
the TV user interface.
This mode, called Direct Media Select, may be used to
select music from the library and control playback (e.g.
play, pause, stop etc.) using simple infrared commands
with no effect on the TV user interface. To set your
remote control in Direct Media Select mode follow the
instructions in the previous To configure the remote with
a default output section selecting a Direct Media Select
output from the settings listed in Appendix A.
To select music from the library using Direct Media Select
mode
An album, artist, genre or playlist may be selected for
playback using a “sequence” number. The following
examples show how to select music using this method:
Example 1: selecting an album by the number assigned to
it when it was recorded onto the unit:
Album, 5
will play album number five.
Example 2: selecting an artist by its location in an
alphabetical list:
Artist, 7, 7
will play all the tracks by artist number seventy-seven.
Example 3: selecting a genre by its location in an
alphabetical list:
Genre, 2, 2
will select the 22nd genre (Rock) for playback.
Example 4: selecting a playlist by the number assigned to
it when it was created on the unit:
Playlist, 8
will select playlist number eight.
The simple commands used to select your music without
reference to the TV User Interface may also be used by
other “learning” remote controls and simple multiroom
control systems. The presets area of your library is ideal
for an application such as this, allowing you to select
from your current favourites at the touch of a button.
Contact your local dealer for more information on
installing this type of equipment.


