


28
• Select an output using the 9 or 8 keys.
• Press the 5Select key to confirm your selection.
Note: Any music currently playing on this output will
continue to play but will no longer be audible while the
Line-In Record screen is visible. The None option allows
you to make a line-in recording without interrupting
playback on any output.
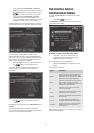
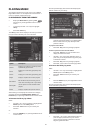
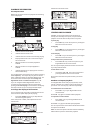
Sound Quality
The Sound Quality menu allows you to specify the
recording quality:
• Use the 9 or 8 keys to choose between
Maximum (no compression used) or one of the
MP3 compression options.
Note: The higher quality options use more space on your
Digital Music Server hard disk.
In each case the display shows the total remaining recording
time available at the specified recording quality.
• Press the 5Select key to confirm your selection.
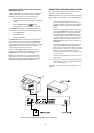
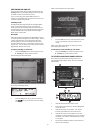
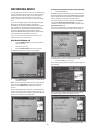
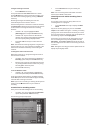
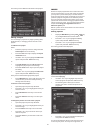
To record from the line-in connectors
Once you have created a new session, the Line-In Record
screen allows you to begin the recording process:
If your Line-in Source is the analogue input connector, you
will need to set the recording Gain to an appropriate
level. To achieve the best quality recording try to play the
loudest passage from the music you are going to record
and set the gain such that the loudest peaks are in the
yellow region of the signal level meters. The Peak Level
dB indicator shows the maximum level reached so far.
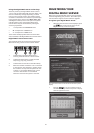
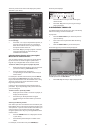
To adjust the recording gain setting
• Use the 9 or 8 keys to highlight the Gain (dB)
option and press the 3Edit action key.
• Use the 9 or 8 keys to highlight the appropriate
gain option.
• Use the 6 or 7 keys to adjust the gain setting to
ensure that the loudest peaks in volume are in
the yellow region of the signal level meters.
Press the 3Clear action key at any time to reset
the peak level marker.
• Press the 5Select action key to confirm your
settings and return to the Line-In Record screen.
Note: If you have selected either the coaxial or optical
digital input as your line-in source the gain setting may not
be altered. The signal indicator in this case will show
whether a valid digital connection has been made. If the
signal indicator shows protected the current digital source
has been copy protected and may not be recorded onto
your Digital Music Server using the digital inputs.
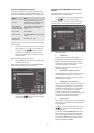
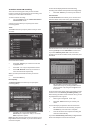
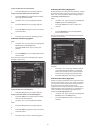
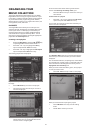
To edit the album details
All the recordings made in this line-in recording session
will be placed in a new album. This album is
automatically assigned a name such as Album 4, Artist 7;
it will also be placed in the Unclassifiable genre. You can
edit these details at any stage in the recording session as
follows:
• Use the 9 or 8 keys to highlight the Album
option and press the 3Edit action key.
To edit the album name and artist name:
• Use the 9 or 8 keys to highlight the item you
want to edit and press the 3Edit action key.
• Edit the album name and artist name using the
alphanumeric keys on your Digital Music Server
remote control or by using the text grid on the
front panel.
• Press the 3OK action key to confirm the new name.
To edit the genre:
• Use the 9 or 8 keys to highlight the Genre
option and press the 3Edit action key.
• Select a genre using the 9 or 8 keys.
• Press the 5Select key to confirm your choice.
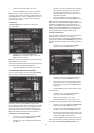
To edit the names of any tracks you have already recorded:
• Use the 9 or 8 keys to highlight the Edit tracks
option and press the 5Select action key.
• Use the 9 or 8 keys to highlight the track name
you wish to edit and press the 3Edit action key.
• Edit the track name using the alphanumeric keys
on your Digital Music Server remote control or by
using the text grid on the front panel.
• Press the 3OK action key to confirm the new name.
For more information on entering and editing names see
the chapter called Entering and editing names, p.37.