


Page 20
Chapter 2
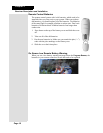
Receiver Description and Installation
Installing the Receiver
This section guides you through the installation of your new satellite receiver,
which includes the following:
• Connecting to your HDTV set or monitor.
• Connecting to your dish antenna and upgrading the software.
• Ordering your programming.
• Setting up to display in HD.
Connecting Your Receiver to an HDTV or HD Monitor
There are two ways to connect this receiver to display high definition
programming quality on an HDTV or HD monitor: using the DVI-HDTV/DISH
DVI connection or the YP
BPR connections.
Note: Your new satellite receiver is factory-set to display in the 480p format at
its HD output connection points.
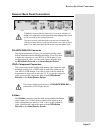
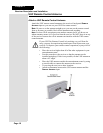
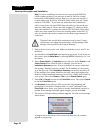
DVI-HDTV/DISH DVI
This video output port is the preferred method of connecting the receiver to a
DVI-equipped HDTV or HD monitor for best picture quality and simplest
installation.
1. Connect a DVI cable between the DVI-HDTV/DISH DVI connection on the
receiver and the DVI input on your HDTV set or monitor.
2. Connect an RCA A/V cable between the receiver P
HONO (RCA) AUDIO
O
UTPUTS and the HDTV audio inputs that go with the DVI input on your
TV or monitor.
3. Turn on your receiver and TV.
4. Consult your HDTV User’s Guide, then set your HDTV to display from the
DVI input. Confirm that you are getting a picture from the receiver.
Note: In most cases connecting the DVI cable will provide plug-and-play
control of the monitor’s display resolution and other settings. However,
your HDTV may require selecting a 480p format to display from the
receiver during this installation phase. Consult your HDTV User’s Guide.
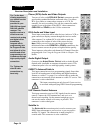
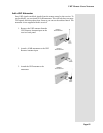
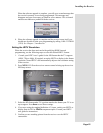
YPbPr Connections
If your HDTV or HD monitor does not include a DVI input port, you can use
the YP
BPR component video connections to provide high definition picture
quality to your HDTV or HD monitor. Make the connection using a color-coded
YPbPr cable.
1. Connect video and audio RCA type cables between the receiver RCA A/V
O
UTPUTS and corresponding input connections on the HDTV or monitor.
2. Connect between the YP
BPR component connections on the receiver and
the HDTV using component video cables.
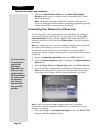
3. Power on the TV and receiver using the front panel power button.
4. Consult your HDTV User’s Guide, then set your HDTV to display from its
RCA input. Confirm that you are getting a picture from the receiver.