


Page 22
Chapter 2
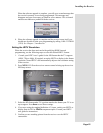
Receiver Description and Installation
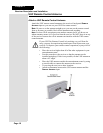
Note: If you are installing your receiver into a system with DISH Pro
LNBFs (and/or switches), you can have as much as 200 feet of cable
between the LNBF and the receiver. However, you must use only RG-6
coaxial cables rated for 950 to 2150 MHz. Some cables may say “Swept
tested for 2150 MHz.” If you have any doubt about this, examine the
cable’s outer jacket, ask your DISH Network retailer, or look on the con-
tainer the cable came in. Do not use cable company TV cables or cables
from other satellite TV systems not rated for 950-2150 MHz. These other
cables may cause signal loss. Do not use existing cables such as RG-59.
Also, be sure that any outdoor connections are made using waterproof F
connectors.
Tighten all the coaxial cable connections only by hand. Using a
wrench may over-tighten the connections, causing damage. Such
damage is not covered by the Limited Warranty.
2. Plug in the receiver's power cord. Make sure both the receiver and TV are
turned on.
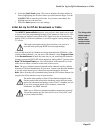
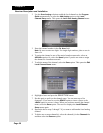
3. You should see the
Point Dish menu appear on the screen. If you do not see
this screen, open the
Main Menu, by pressing MENU followed by 6-1-1 on
the remote.
4. Select
Check Switch. An Attention screen will open. Select Check to run
Check Switch.When Check Switch is complete, you will see an
Installation Summary screen. If the screen shows the correct switch and
the message “Satellite reception verified” for all satellites in your system,
go to the next step. If the
Installation Summary screen does not detect all
of the satellites your system should be receiving, check and retighten (by
hand) the cable connections between your receiver, LNBFs and switches in
your system. Then select
Retest or Test to rerun Check Switch again.
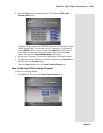
5. Select
OK or Cancel to return to the Point Dish screen. Then select Cancel
to exit the
Point Dish screen.
6. An
Attention screen will open. This screen asks if the mounting and
positioning of your dish is complete with a “Locked” indication in the
Point Dish
screen. Since your system is already installed and your dish is
pointed for the strongest possible signal strength, you can select
Yes.
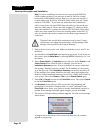
7. The receiver will begin taking a software upgrade. You will see the message
shown below:
A progress bar at the bottom of the screen will show how the software
upgrade is progressing.