


11
Parts and their functions (continued)
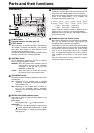
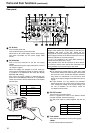
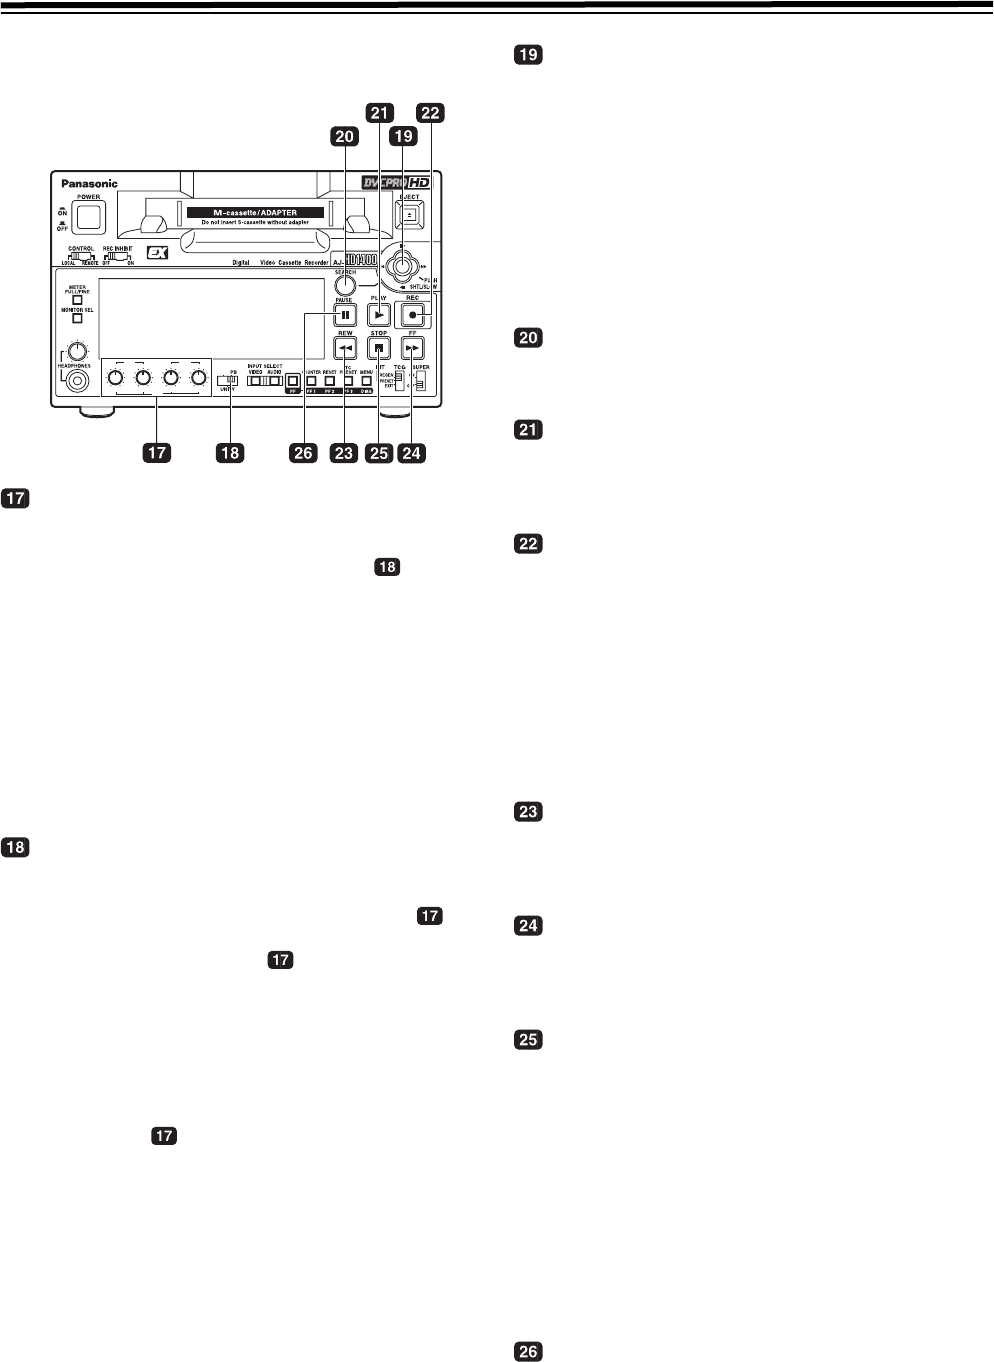
Front panel (3)
Audio level control knobs
These knobs are used to adjust the recording and
playback level of the PCM audio signals.
The audio level control selector switch switches
between the recording/playback level adjustment for
CH1/CH2 and the playback level adjustment for CH1 to
CH4.
<Notes>
z The level of the IEEE1394 digital input/output audio
signals cannot be adjusted.
z For the recording level, only the analog input can be
adjusted.
z For HD SDI and SG, only the playback level is
adjustable.
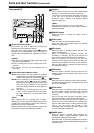
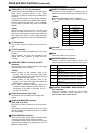
Audio level control selector switch
UNITY:At this position, the audio signals are recorded
or played back at a fixed level regardless of the
position of the audio level control knobs .
REC/PB
:The two switches on the left side of the audio
level control knobs control the recording
level for the audio signal from analog input CH1/
CH2, and the two switches on the right side
control the playback level for the audio signal for
CH1/CH2.
PB: At this position, the audio signals for CH1 - CH4
or CH5 - CH8 are played back at the level which
has been adjusted by the audio level control
knobs .
<Note>
When selecting PB, the recording level is UNITY.
Selecting CH1 to CH4 makes the playback level of CH5
to CH8 UNITY while selecting CH5 to CH8 makes the
playback level of CH1 to CH4 UNITY.
Selecting between CH1 to CH4 and CH5 to CH8 can be
performed using menu No. 783 AUDIO CH SEL.
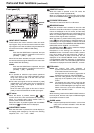
Joystick
This is used for shuttle, slow and other variable-speed
playback. It is also used for the menu settings, etc.
The stick can be moved upward, downward, to the left or
to the right, and it can also be pressed to initiate
operations. (See “Joystick and Variable Speed
Playback” (page 22))
<Note>
When this unit is turnning on, do not use the stick.
Variable-speed playback and menu setting operation
become impossible.
SEARCH button
When this button is pressed, the search mode is
established.
PLAY button
When this button is pressed, playback starts.
When this button and the REC button are pressed
together, recording starts.
REC button
When this button is pressed together with the PLAY
button, recording starts.
When it is pressed during playback, a search, fast
forwarding or rewinding, the EE mode pictures and
audio signals can be monitored while it is held down.
When it is pressed in the stop mode, the EE mode
pictures and audio signals can be monitored. (When it is
pressed during playback, the servo will be disrupted.)
When the STOP button is pressed, the original pictures
and sound are restored.
REW button
When this button is pressed, the tape is rewound. The
rewinding speed can be selected using menu No.102
FF. REW MAX.
FF button
When this button is pressed, the tape is fast forwarded.
The fast forwarding speed can be selected using menu
No.102 FF. REW MAX.
STOP button
When this button is pressed, the tape stops traveling,
and when “TAPE” has been selected for the menu item
No.140 OUTPUT setting, the still images can be
monitored.
Even in the stop mode, the drum continues to rotate,
and the tape remains in close contact with the drum.
When the stop mode continues beyond a specific time
period, the unit is automatically set to the standby OFF
mode or STEP FWD mode in order to protect the tape.
(This is set using menu item No.400 to 403.)
Immediately after a cassette has been loaded in the
unit, the stop mode is established.
PAUSE button
When this button is pressed during recording, the
recording operation stops temporarily. Restart the
recording by pressing the button again.
When this button is pressed during playback, the screen
changes to a static display. Restart playback by pressing
the button again.
REC/PB
CH1/5 CH2/6
CH3/7 CH4/8
REC
PB
CH1 CH2 CH1 CH2
PB
HD