13
Getting Started
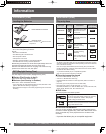
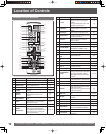
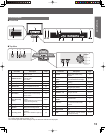
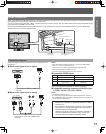
Unit Buttons
Front View
45
No. Part Name Description Page
1
Remote Sensor
Receives infrared signal from
Remote Control.
–
2
POWER Indicator
Lights when power is on.
Standby: Red
On: Green
–
3
Built-in Speaker Equipped with a front speaker. –
4
Disc Tray Place compatible discs here. 34
5
SD Card Slot Place compatible cards here. 34
6
DVD Indicator Lights when in DVD mode. 34
7
SD Indicator Lights when in SD mode. 34
8
SD Indicator
On: When a card is set in this unit.
Flashes: When a card is being
read or written.
34
9
Timer Recording
display
On: When timer recording is on
standby.
Flashes: When the unit couldn’t go
to timer recording standby.
40, 41
10
Disc Type* Displays Disc media being used. –
11
TIME SLIP
Indicator
Lights when simultaneously
playing and recording a DVD.
42
12
Recording mode
Recording Mode Displays Disc of
recording.
(When FR is selected all lights go
out.)
39
No. Part Name Description Page
13
Channel
Displays channel.
Displays title number during
playback.
38
14
Main display
section
Recording and play counter, and
other miscellaneous messages.
38, 44
15
Disc operation
status
Displays condition of playback/
recording.
38, 44
16
POWER Turn the unit on or off. 21
17
INPUT Changes Input position. 25
18
VOLUME +/- Adjusts volume. 25
19
CHANNEL ▲▼ Changes channels. 25, 38
20
OPEN/CLOSE Opens/closes disc tray. 34
21
DRIVE SELECT
DVD/SD
Select the drive. 34
22
PLAY/×1.3
Begins playback. Holding down
for 1 second switches to fast
playback.
44
23
REC Begins recording. 38
24
SKIP Ι◄◄ /►►Ι
Skips to previous/next chapter or
track.
45
25
STOP
Stops playback, cancels resume,
and stops recording.
38, 44
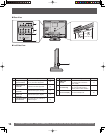
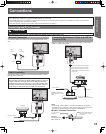
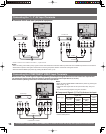
Top View
* D. MIX (Multi-channel DVD-Audio only)
On: Down-mixed audio is played. (p. 70)
Off: The disc prevents down-mixing so only the two front channel can be played.
20 21
22
23
24
25
16 17 18 19
1
2
6 7 8 9 10 11
14 15
1312
3


