49 English
Downloading Recorded Video
b Specifying the Video Download Range
Before you download recorded video, you must define the download range by using the time scale
panel on the main window and specifying the start and end points of the range.
(The following procedure assumes that you set the start point first, but you can also set the end
point prior to the start point.)
1
Display played back video.
Display the played back video from the camera (DVR) whose video files you want to download.
The viewing pane may be in any of the single-view, four-view, and multi-view layouts; when in
the multi-view layout, however, you must specify the sub-pane connected to the camera (DVR)
whose video files you want to download by clicking its title bar.
2
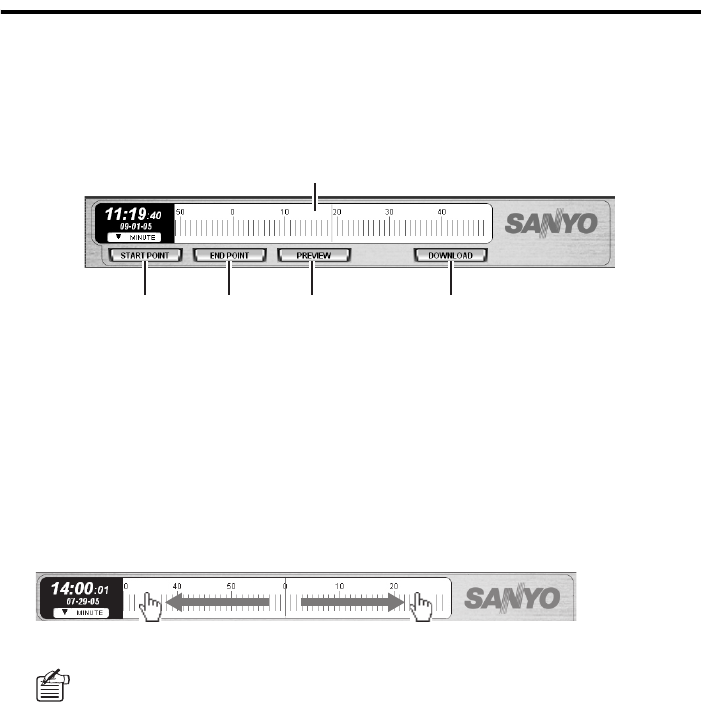
Drag the scale (1) to define the start point.
When you drag the scale and release it at a position, the playback point moves to that position,
and the playback continues from the new playback point. Repeatedly drag the scale until the
appropriate start point is found. You can advance the time by sliding the scale to the left, or
reverse the time by sliding the scale to the right.
• The playback point moves in increments of the scale’s graduations. Depending on
your desired download range, change the scale unit (DAY/HOUR/MINUTE).
For example, when you set the scale unit to “DAY” and drag the scale, it moves in
increments of one day. Since 30 days are displayed at a time, you can advance or
reverse the playback point by up to 1 month (30 days) with a single drag.
• Instead of dragging the scale, you can double-click a graduation on the time scale to
move the playback point to that position.
1
2 3 4 5
Advances the time. Reverses the time.
