


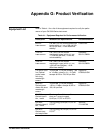

Appendix G: Product Verification
OA 5000 Series User Manual
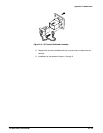
A --- 23
Step 1: Push the MODE button until ATT is backlit and -REF is not
backlit (these LEDs are green);
H The MODE button itself should now be backlit (this LED is red).
Step 2: Push the MIN ATT button; this will cause the instrument to
adjust to zero dB (a few seconds may be needed to complete the ad-
justment if the previous setting was non-zero).
H The MIN ATT button should itself be backlit
H 0.00 should be displayed in the ATTENUATION(dB) display
Step 3: Push the SET REF button.
H The SET REF button should now be backlit; the MODE button
should not be backlit.
H Check that the WAVELENGTH(nm) display is showing “SEt”.
Step 4: Adjust the numerical value displayed in the ATTENUATION(dB)
display by manipulating the COARSE and FINE knobs; the coarse knob
should increment or decrement the value by 1 dB per detent; the fine
knob should increment or decrement the value by 0.01 dB.
H Set the display to read “--10.00 ”
H Push the SET REF button again; the button will then be unlit and the
MODE should now be lit with the ATT only backlit.
Step 5: Push the MODE once again.
H Check to see that “ATT” and “--- RE F” are both backlit
H The ATTENUATION(dB) display should now read “10.00” (This is
because ATT=0.00;REF=---10.00; hence, the result
ATT---REF=0---(---10.00)=10.00)
H Pushing the MODE button repeatedly will toggle the “--- RE F” back-
lighting on and off and the displayed attenuation will toggle between
“0.00” and “10.00”
H Set the MODE so that the “ATT” only is backlit before going to the
next step.
Step 6: Push the WAVELENGTH button once.
H The ATTENUATION(dB) display should read “SEt” and the
WAVELENGTH button will be backlit.
H The COARSE and FINE knobs increment or decrement the value
displayed in the WAVELENGTH(nm) display; the coarse knob should
increment or decrement the wavelength value by 10 nm; the fine
knob should increment or decrement the value by 1 nm.
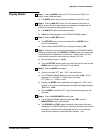
Display Modes