


104 The XML Files: Development of XML/XSL Applications Using WebSphere Studio
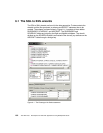
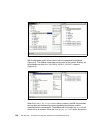
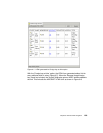
Show table column as option
This option produces three files for each select statement. Accordingly, they are
named after the select statement, and in our example their names are:
The selectPassengerList.html
The selectPassengerList.xml
The selectPassengerList.xsl
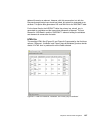
The most important files here are the XML and XSL files, because the HTML file
can also be generated from these two files. To generate the HTML file, select
both of them, right-click, and from the pop-up menu, select Apply XSL, and then
select As HTML.
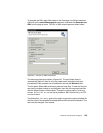
If the Recurse through foreign keys check box is ticked, another three files are
produced:
The selectPassengerList_AIRCRAFT.html
The selectPassengerList_AIRCRAFT.xml
TheselectPassengerList_AIRCRAFT.xsl
However, this only works if the Foreign key as links option is chosen. For the
other three options, ticking this check box has no effect.
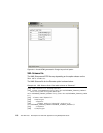
XML and XSL files
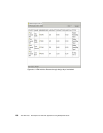
For the first option, Show table columns as ‘Elements’ implies, all table columns
are generated as elements. Each element name follows the table column name.
In our example, the elements are <FLIGHT>, <NAME>, <MEMBERSHIP>,
<AIRCRAFT>, etc. The elements are part of the
<PASSENGER_SCHEDULE_AIRCRAFT> element, which is a derivation from the names
of the three tables. The <SQLResult> is the root element for all the options.
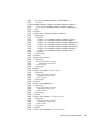
Example 6-1 XSL file for Show table columns as ‘Elements’
<?xml version="1.0" encoding="UTF-8"?>
<xsl:transform exclude-result-prefixes="sqltoxml" version="1.0"
xmlns:xsl="http://www.w3.org/1999/XSL/Transform">
<xsl:output method="html"/>
<xsl:template match="/">
<HTML>
<HEAD>
<META content="text/html; charset=iso-8859-1" http-equiv="Content-Type"/>
<META content="0" http-equiv="Expires"/>
</HEAD>
<BODY>
<DIV>
<xsl:apply-templates/>
</DIV>
</BODY>