


184 The XML Files: Development of XML/XSL Applications Using WebSphere Studio
9.1.5 Generate XML file
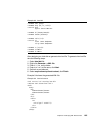
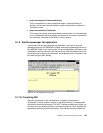
Now we are going to generate the XML File and add some sample data to it. This
data it’s going to be transformed and presented in a HTML output page.
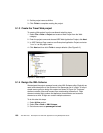
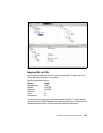
1. Select
passengerList.xsd.
2. Right-click Generate—>XML File.
3. Select
Airline as the folder name.
4. Enter passengerList.xml as the filename, click
Next.
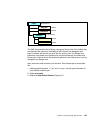
5. Select
Flight as root element, select Create required and optional content,
click
Finish.
We need to add some sample data to the XML file. (See Example 9-2.)
Example 9-2 Static XML file
<?xml version="1.0" encoding="US-ASCII"?>
<passenger:Flight departure="8:00pm" flightNo="Air Canada 700"
xmlns:passenger="http://www.airline.com"
xmlns:xsi="http://www.w3.org/2001/XMLSchema-instance"
xsi:schemaLocation="http://www.airline.com passengerList.xsd ">
<passenger:Customer>
<name>John Doe</name>
<membership>123456</membership>
</passenger:Customer>
</passenger:Flight>
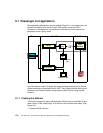
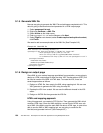
9.1.6 Design an output page
Since XML is not a markup language specialized in presentation, we are going to
design an HTML output page to show the data. XSL Transformations (XSLT) will
be used to transform the XML to HTML data. To create the XSL, there are
several approaches as follows:
1. Design an HTML file, then map to the XML using mapping tool. We can use
XSL generator to generate the XSL using the map file.
2. Develop the XSL from scratch. We can use the different wizards in the XSL
editor.
3. Design an XHTML file then generate the XSL file.
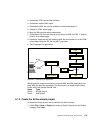
HTML and mapping approach
Using this approach, we created a DTD file first. Then generate the XML which
contains HTML tags. Given the XML definition, we can think of HTML as a sub
set of XML. We need to map the static XML file data to HTML tags, in order to be
able to use the XML to XML mapping tool, we are going to create the file
html.dtd, and generate html.xml. (See Example 9-3.)