118
Chapter
2
File
Menu
300
File – Import – Digitizer – One Scan (When VIVID 300 is Selected)
Performing One Scan with the VIVID 300
This command is used to cause the VIVID 300 (VI-300) to scan the object one scan at a time using the remote
control function of this software.
Warning
Never stare into the laser emitting window.
Do not place a lens, mirror or optical element in the passage of the laser beam. Doing so may converge the
laser beam, resulting in damage to your eyes, burns or re. To prevent the above accidents, make sure that a
wall or similar which can block the laser beam is located behind the object.
Operating Procedure
1
From the [File] menu, select [Import],
[Digitizer] and then [One Scan].
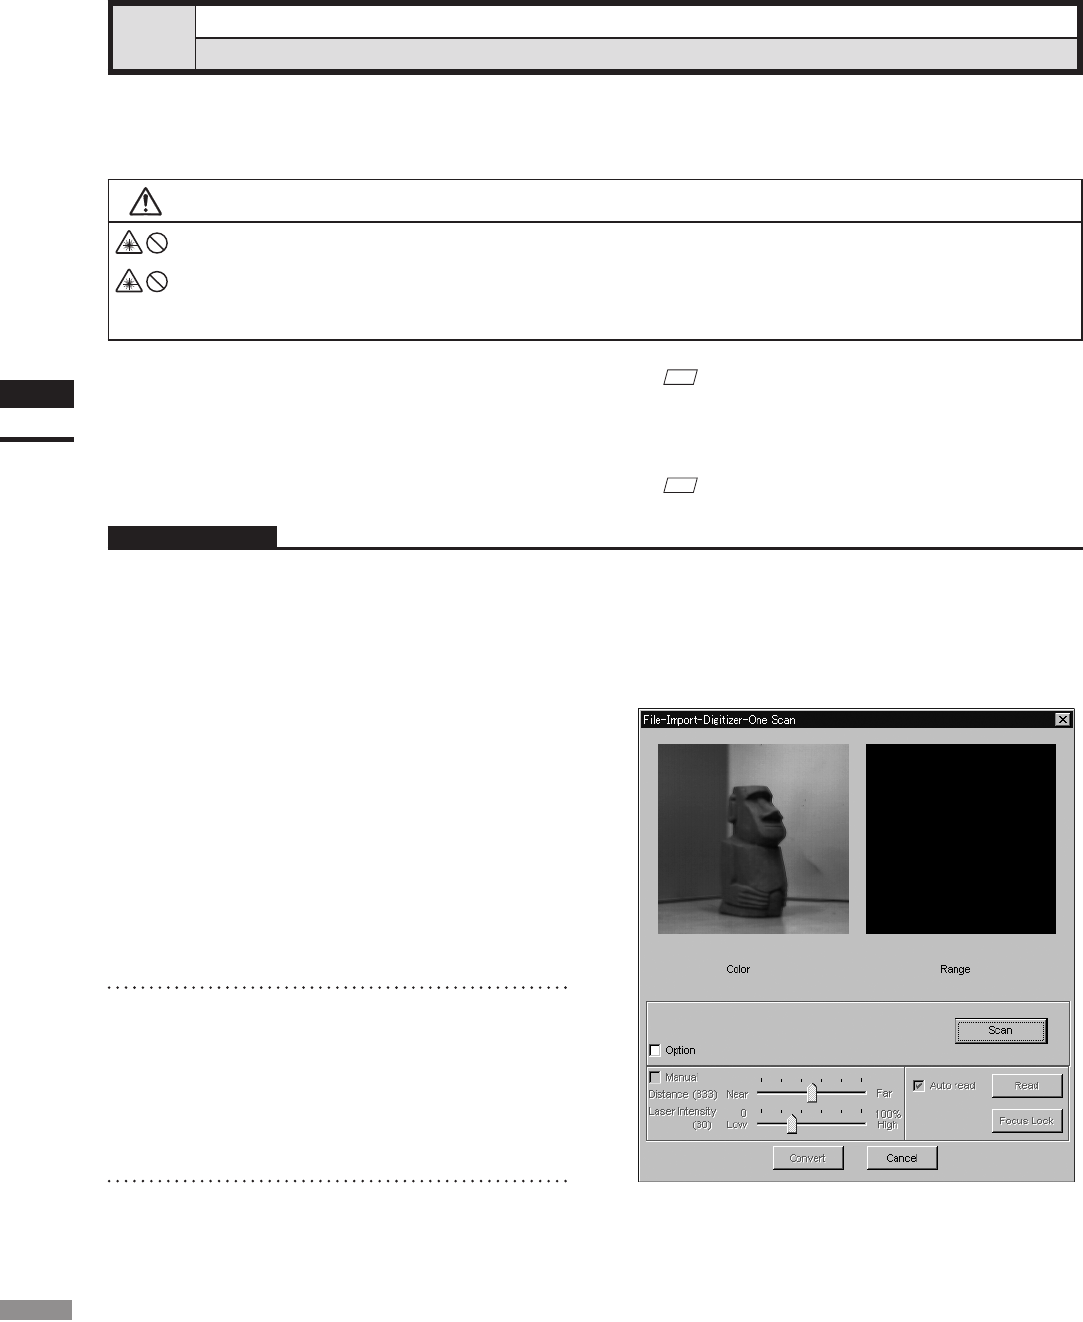
The [File-Import-Digitizer-One Scan] dialog
box will appear.
M
emo
Before performing the procedure below, make sure that
the digitizer you are going to use is selected by the File
– Select Digitizer command.
Ref.
For details of the File – Select Digitizer command,
refer to page 144.
• To set the scan reference position (Distance) and
laser intensity (Laser Intensity), perform the fol-
lowing procedure.
q Check the [Option] checkbox.
w Check the [Manual] checkbox.
e Move the Distance bar or Laser Intensity bar to
the desired position.
• If you are not going to scan both color and range
images at the same time, uncheck the [Auto read]
checkbox.
• The color monitor image currently captured by
the VIVID 300 will appear in the “Color” area of
the dialog box. (No color image will appear if the
[Auto read] checkbox is unchecked even if the
[Option] checkbox is checked.)
2
Set an object in place.
3
Set optional parameters.
Check the [Option] checkbox, and make nec-
essary parameters.


