202
Chapter
2
Build
Menu
9i
910
900
700
300
Build – Fill Holes – Auto
Filling Holes Automatically
This command is to create polygon data automatically for the holes (i.e. areas where no data is present) locat-
ed in the area selected in the currently displayed element. However, some complicated holes may not be lled.
Operating Procedure
1
From the element list, select one desired
element.
2
Select the points on the boundary of
the hole for which you want to create
polygon data.
3
From the [Build] menu, select [Fill
Holes] and then click [Auto].
The system will search for holes present within
the area of the selected points. A bar will be
displayed during search to indicate progress. If
a hole is found, only the points on its boundary
will be selected.
• If no holes are found, a message dialog box will
appear. Clicking the [OK] button will close the
dialog box and exit the menu.
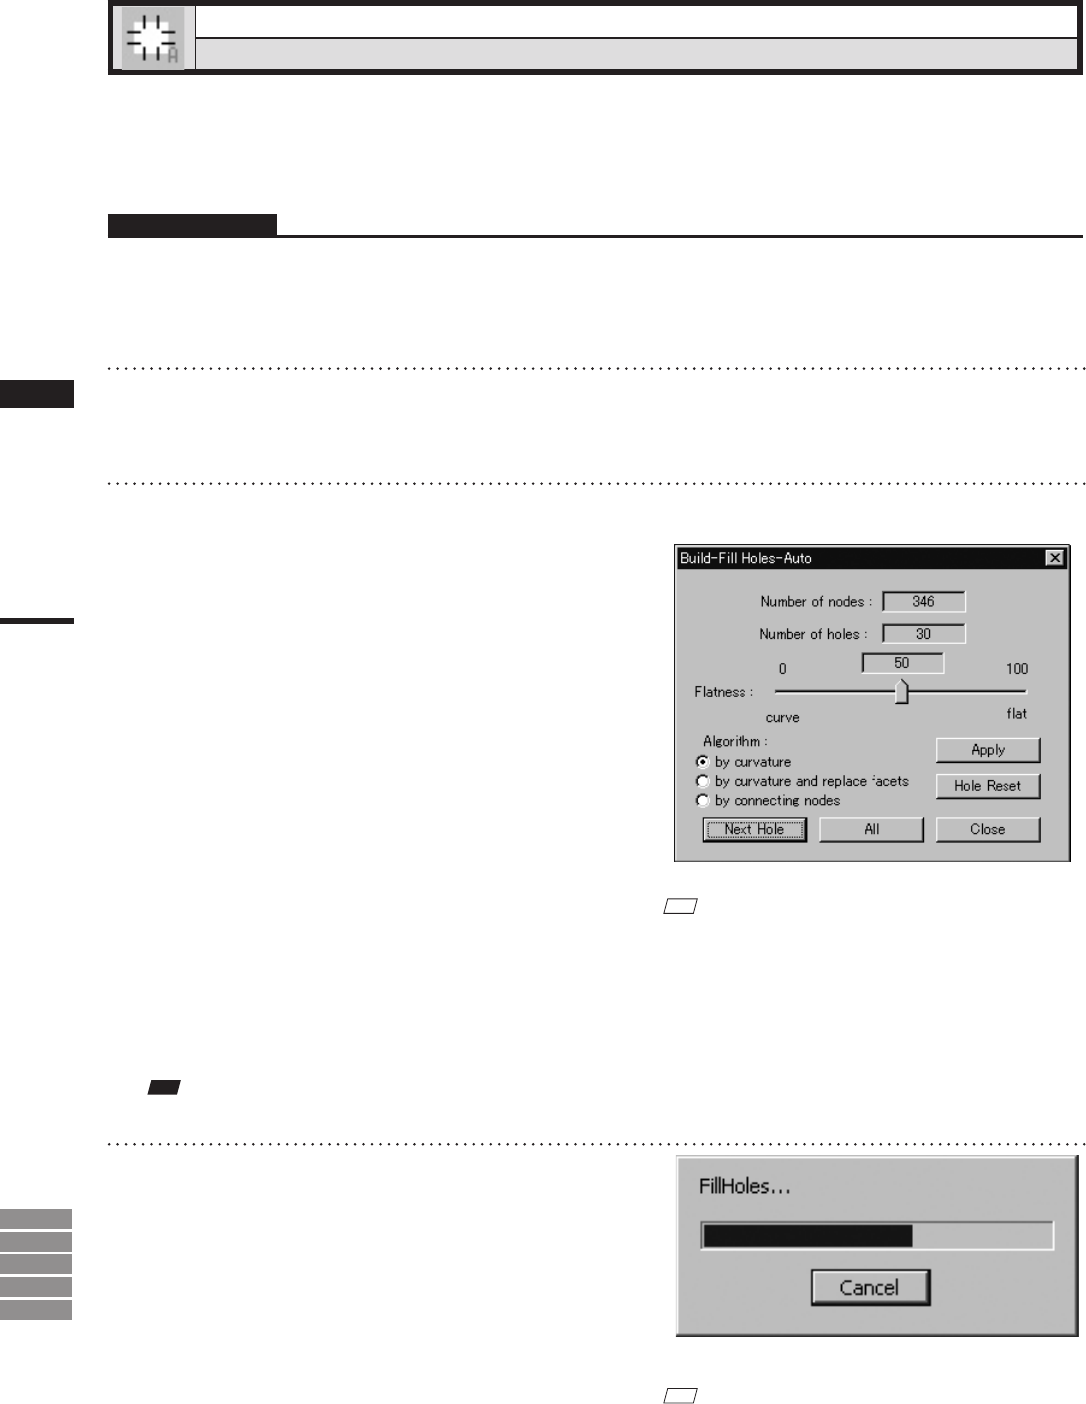
All the element view windows will be hidden,
and the temporary window and [Build-Fill
Holes-Auto] dialog box will appear.
• The hole for which you want to create polygon
data will be displayed in the temporary window.
The points comprising the hole will be highlight-
ed (yellow). The selected holes will be processed
one by one, starting with the hole composed of
the largest number of points.
M
emo
If the number of remaining holes (Number of holes) is
1, the [OK] button will be displayed instead of the [Next
Hole] button.
Note
Itisnotpossibletoclosethetemporarywindow.
4
Set the [Flatness] and [Algorithm] pa-
rameters, and click the [Apply] button.
The program merges the elements to create
a new element. The new element is given the
name that you just entered.
A progress bar shows the progress while
the ll is being carried out. If you click the
progress bar’s [Cancel] button, the program
suspends ll processing and displays a dialog
showing results up to that moment.
M
emo
The program retains the ll data generated up to the time
when you clicked the [Cancel] button. If you wish to
resume the ll operation, click the [All] button. Filling
will then continue from the hole at which the operation
was suspended.


