17
RECORD
ALARM / MOTION
CLOCK/ TIMER
COMMUNICATION
DISK
SYSTEM
MAIN MENU
GOTO CLOCK/ TIMER PAGE
RECORD
ALARM / MOTION
CLOCK/ TIMER
COMMUNICATION
DISK
SYSTEM
MAIN MENU
GOTO CLOCK/ TIMER PAGE
00:00- 00:00
00:00- 00:00
00:00- 00:00
00:00- 00:00
00:00- 00:00
00:00- 00:00
00:00- 00:00
REC SCHEDULE
OK
START END
00:00- 00:00
00:00- 00:00
00:00- 00:00
00:00- 00:00
00:00- 00:00
00:00- 00:00
00:00- 00:00
START END
CANCEL
S
M
T
W
T
F
S
TO MOVE TO CHANGE
3.2 Recording Operations
This section details the way to record video
into hard-disk drives. Before commencing with
the recording function, please configure the
recording setting properly according to your
needs.
3.2.1 Manual Recording
Take the following steps to start and stop
recording:
(1) Press the REC button
6
to record video
into a hard-disk drive with the corresponding
programmed recording settings. The REC
button
6
will light up indicating the DVR is
in the recording status.
(2) Press the REC button
6
for 3 seconds to
stop recording any time.
(3) To access just recorded video, please refer to
section 3.4 for more details.
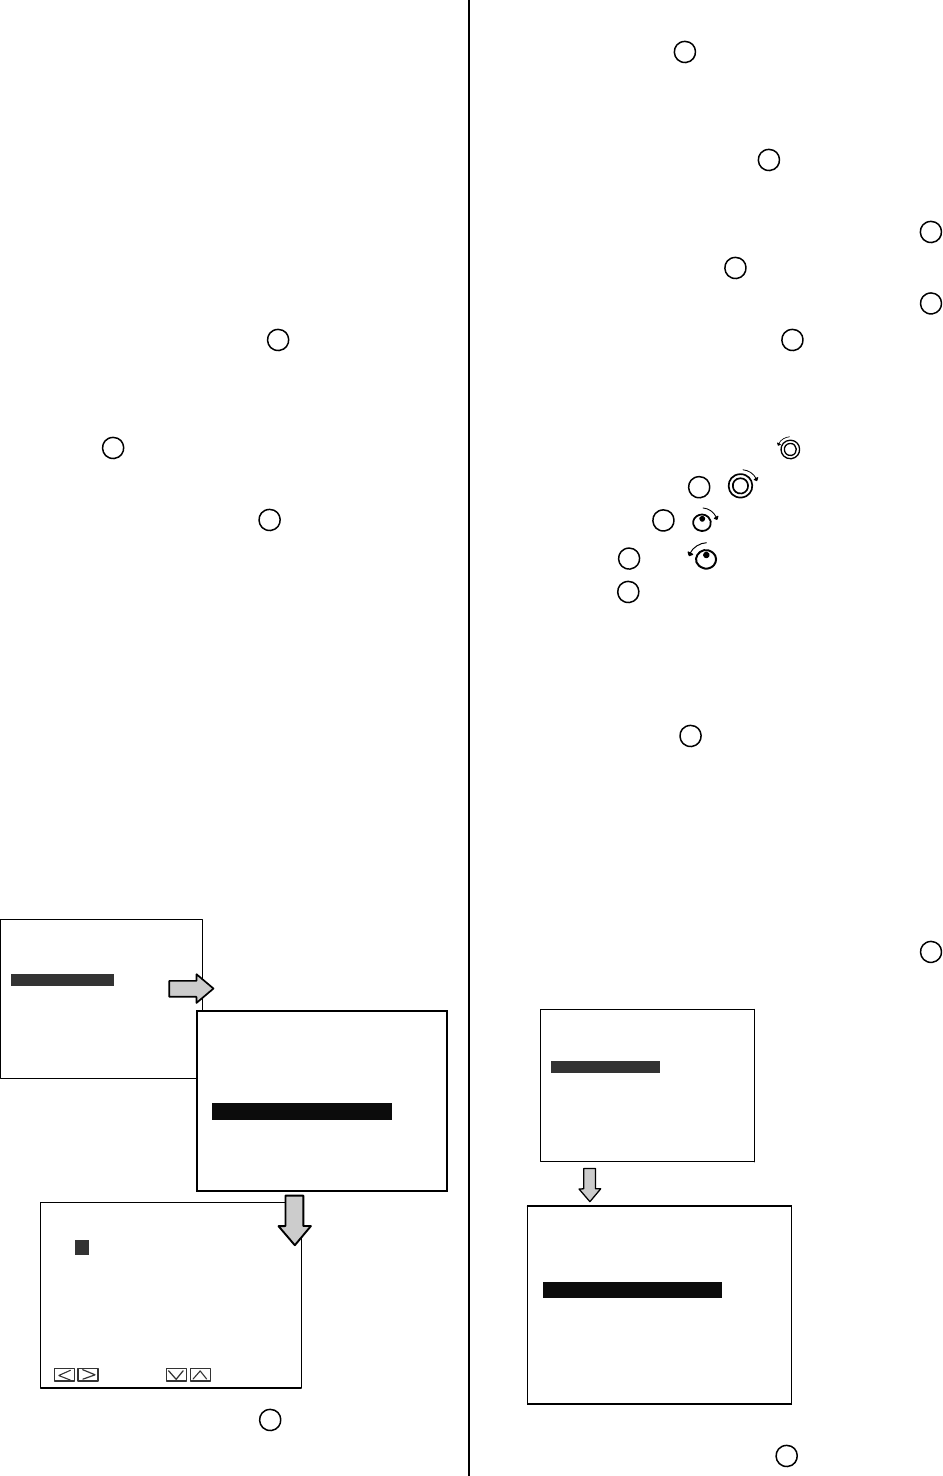
3.2.2 Timer Recording
Timer recording provides 2 periods of time
each day in a weekly table which programs
the DVR to turn on and off at specified times.
This way the DVR will start/ stop recording
according to the programmed schedule.
(1) Press the Setup button
9
to enter the
MAIN MENU.
(2) Select the CLOCK / TIMER and press the
Enter button
15
to enter the CLOCK /
TIMER page.
(3) Select the TIMER-SET.
(4) Press the Enter button
15
to enter the REC
SCHEDULE table.
(5) You can set up by using the “<” button
11
and the “>” button
14
to locate the specific
day/hour/minute and use the “
^” button
12
and the “v” button
13
to set the
day/hour/minute you wish.
You can also set up by using the Shuttle
Ring and the Jog Dial.
is the equal of
the “<” button
11
, is the equal of the
“>” button
14
, is the equal of the “^”
button
12
and is the equal of the “v”
button
13
.
The time is displayed in a 24-hour clock
format.
(6) After scheduling is completed, press the
Enter button
15
and set OK to save the
setting or select CANCEL to leave the page
without saving.
(7) To activate/ deactivate the programmed
recording schedule, set the REC ENABLE
to ON/ OFF. If the scheduled recording is on,
the red indicator of the Timer Record
17
will be on as well.
(8) Press the REC button
6
for 3 seconds
CLOCK/TIMER
CLOCK :SET
DAYLIGHT SAVING :OFF
REC ENABLE :OFF
TIMER :SET
TITLE :SET
MAIN PAGE
CLOCK/TIMER
CLOCK :SET
DAYLIGHT SAVING :OFF
REC ENABLE :OFF
TIMER :SET
TITLE :SET
MAIN PAGE


