


56
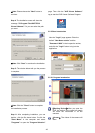
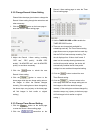
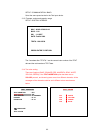
5.3.2 Change Record / Alarm Setting
Please follow the steps given below to change the
Record / Alarm setting through the network as and
when necessary.
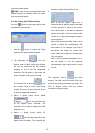
1. Click the
button on the home page to
enter the Record / Alarm setting page.
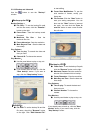
2. Adjust the Record / Alarm setting, including
“REC rate”, “REC quality”, “ALARM REC
enable”, “ALARM REC rate”, and “ALARM REC
quality” as and when necessary.
3. Click the
button to submit the new
Record / Alarm setting.
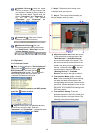
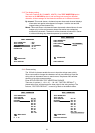
4. Click the
button to return to the
home page while the new image setting acts on
the images to effect the desired changes
instantly. (If the setting has not been changed by
the above steps, any (re)entry to the home page
will find images in their earlier or original
setting. )
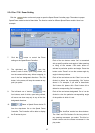
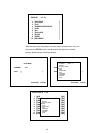
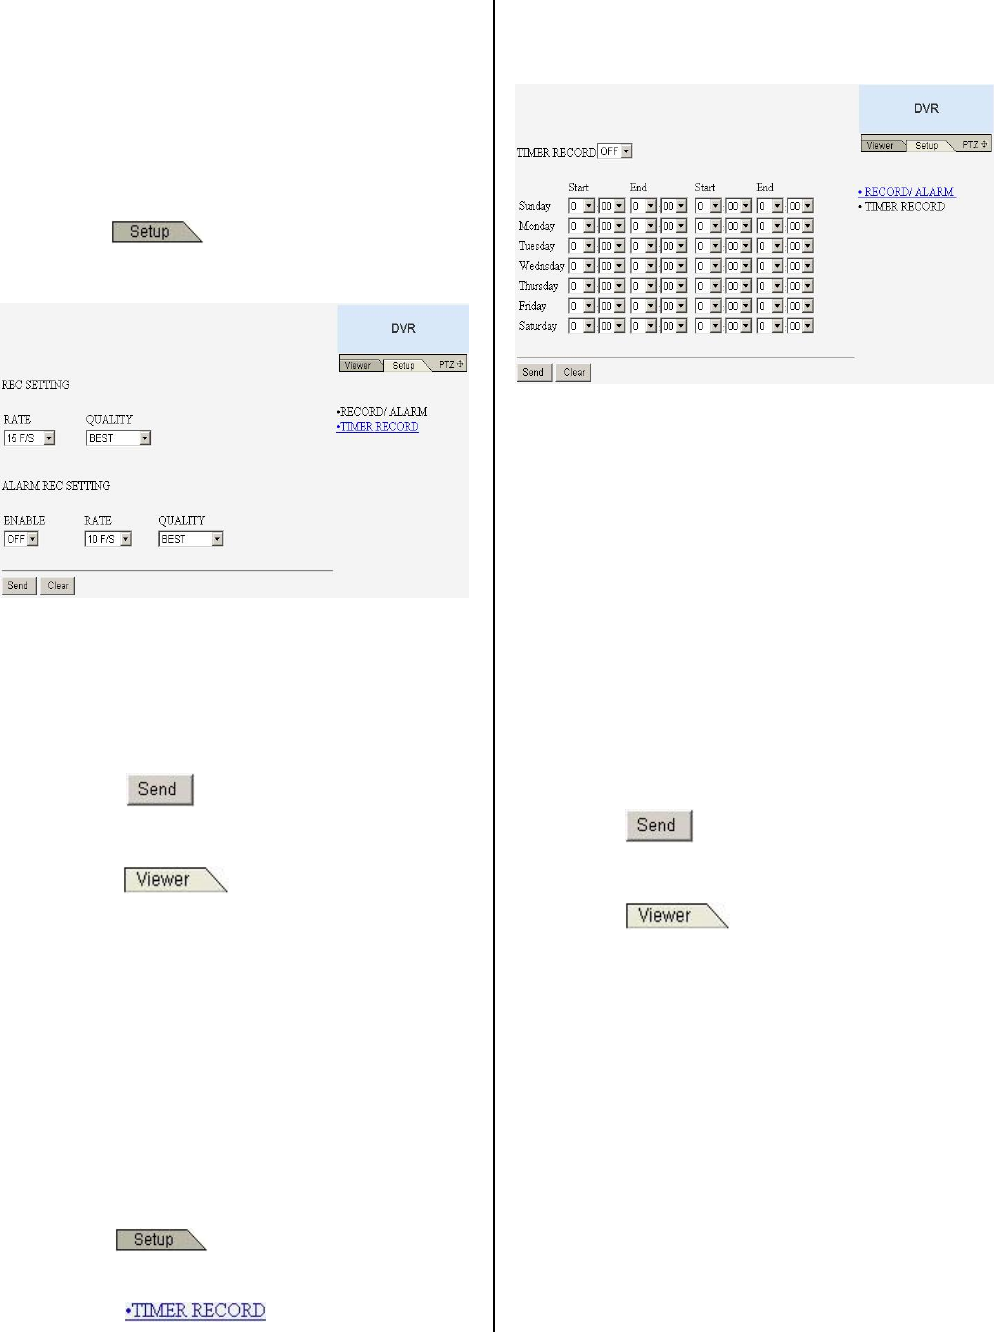
5.3.3 Change Timer Record Setting
1. Click the button on the home page
to enter the Record / Alarm setting page.
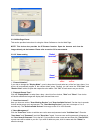
2. Click the
connection on the
Record / Alarm setting page to enter the Timer
Record setting page.
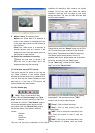
3. Set the TIMER RECORD to ON to enable the
TIMER RECORD function.
4. There are two time-periods available for
scheduling each day. The Timer Record setting
page allows users to program the time each day
that the DVR will start and stop recording. The
time is displayed in a 24-hour clock format. If
there is a time overlap showing between two
continual time-period settings, the device will
automatically combine the two time-period
settings into one combined time-period setting.
5. Click the
button to submit the new
Timer Record setting.
6. Click the
button to return to the
home page while the new image setting acts on
the images to effect the desired changes
instantly. (If the setting has not been changed by
the above steps, any (re)entry to the home page
will find images in their earlier or original
setting. )