57
5.3.4 Pan / Tilt / Zoom Setting
Click the
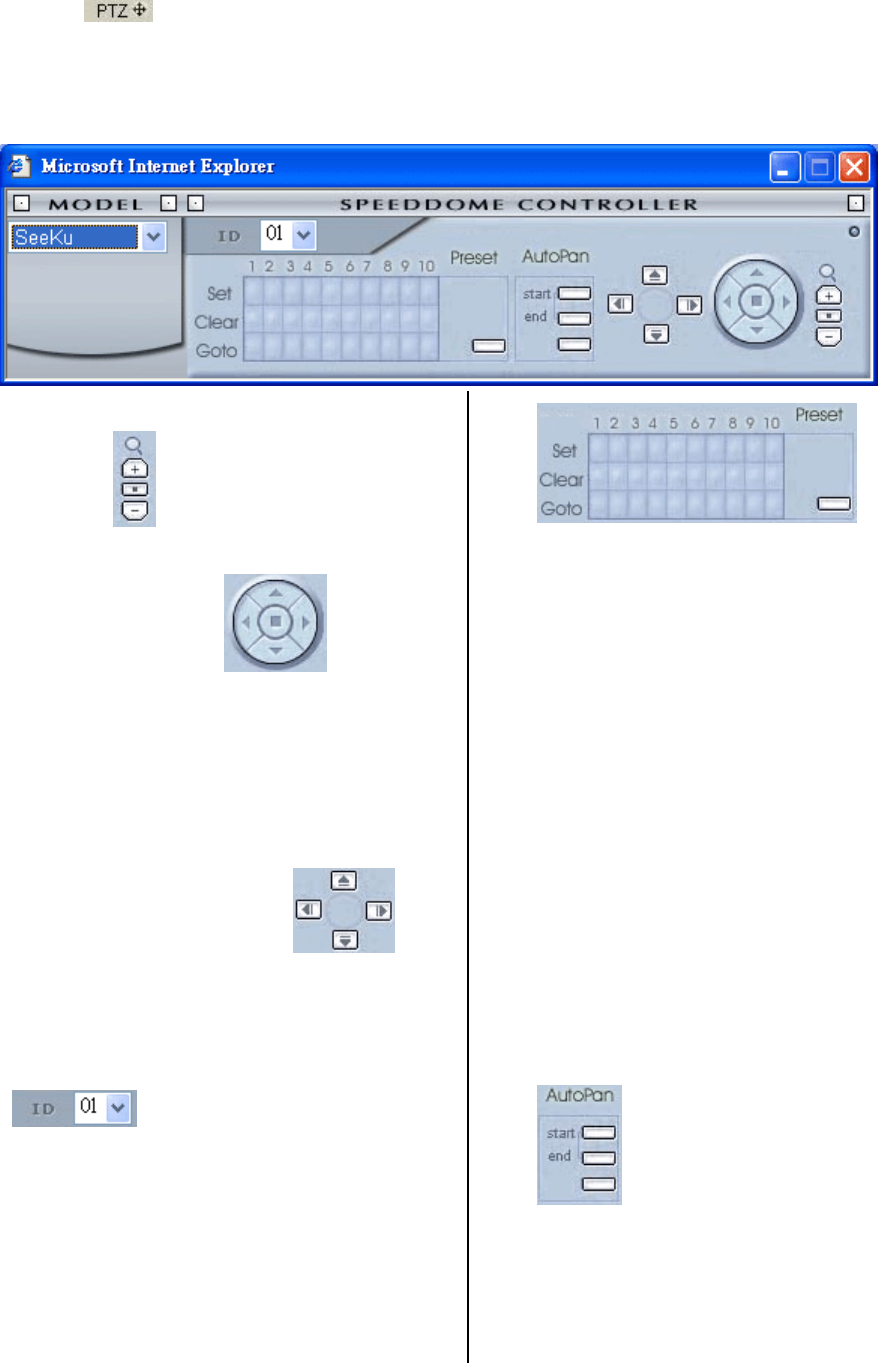
button on the main page to open the Speed Dome Controller page. Then select a proper
Speed Dome model on the left hand side. The function varies for different Speed Dome models. Here is an
example.
7. Click the button to control the Zoom
setting on the Speed Dome Controller.
8. The right-hand set,
, has four
buttons, each of which, upon being clicked, will
turn the camera all the way, without stopping, in
one of the four designated directions. The fifth
button, in the center, will stop the camera at any
point you prefer.
9. The left-hand set of buttons,
, has
four buttons, each of which, upon being clicked,
will move one short step only in any of the four
designated directions.
10.
Select a Speed Dome device ID
from the drop-down list on the Speed Dome
Controller. The Controller will be able to display
the ID entries by turn.
11.
Each of the ten buttons under ‘Set’ is connected
with a specific position and angle of either panning
or tilting of the camera. Click each button to
activate its particular position and angle. Press the
button under “Preset” to turn the camera angle by
angle in the set positions.
Each of the ten buttons on the “Clear” row can be
clicked to delete the corresponding “Set” button
above it. For example, if you wish to de-activate
‘Set’ button #4, please click ‘Clear’ button #4 to
delete its corresponding ‘Set’ counterpart.
Each of the ten buttons designated ‘Go to’ can be
clicked to view the particular corresponding angle
of the position in which it is set.
12.
The ‘AutoPan’ section has three buttons.
The ‘Start’ and ‘End’ buttons fix the two points of
any panning movement you select. The third or
bottom button sets the chosen movement in the
play mode.


