


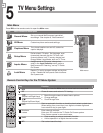

4. TV Operation and Features 37
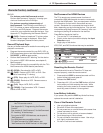
Media Setup Menu
Media Setup menu
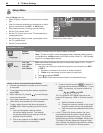
In the Media Setup menu you can adjust the slide
show display, number of repetitions, or display interval.
• Select either Auto or Manual advance. During
manual operation, press or
ENTER
to advance to
the next slide.
• For automatic advance, select the number of times
(frequency) to play the complete slide show: Once,
Twice, or Continuous.
• For automatic advance, select the time interval for
display of each slide. The interval you select here is
the minimum time between slides; actual time may
be longer for larger files.
• Press
EXIT
to close the Media Setup menu and
return to the USB Photo menu.
USB Photo Menu Compatible Picture Files
• Still images recorded on digital cameras using the
Exchangeable Image File Format, version 2.1 (EXIF
2.1) standard for digital still cameras and Design
Rules for Camera File Systems version 1.0 (DCF
1.0)
• Some images opened and resaved on a computer
may not play back or may not display in the thumb-
nail list. This happens if the files were resaved in an
incompatible format.
• Full path file names can be no longer than 50 char-
acters and must end in a .jpg extension. Only the
first 20 of the 50 characters will display.
• Images on storage devices with a capacity of over
256 MB can take a longer initial time to display.
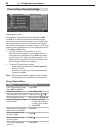
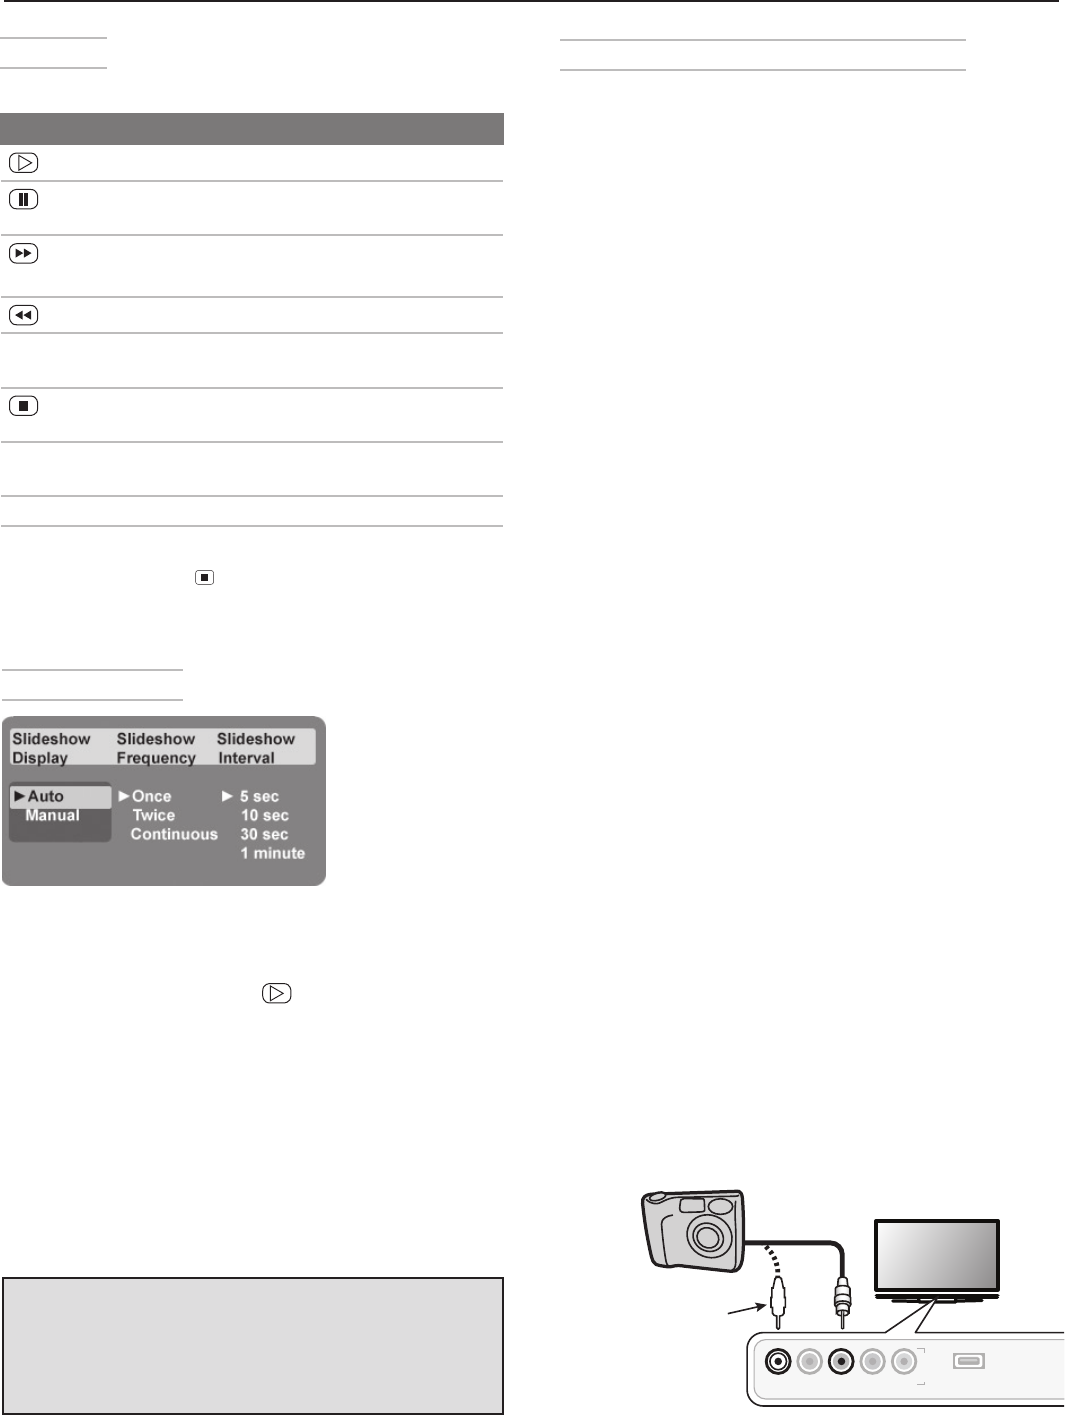
Photos and Moving Video as Composite
Video
Connect the camera to the TV using a composite video
cable if:
• You are unable to see images using the USB photo
port.
•
You wish to view moving video from the camera.
The TV’s USB Photo menu will be unavailable and
you must control the slide show through the camera.
Display resolution is standard-definition (480i).
1. Refer to the owner’s manual supplied with the
camera for instructions needed for this setup.
2. Set the camera’s output signal type to NTSC and
put the camera into playback mode.
3. With the camera still turned on, connect your digital
camera’s composite video cable (usually yellow)
to the
INPUT 3
VIDEO/Y
jack on the front of the TV.
To hear audio, connect the camera’s audio output
cable to the
INPUT 3
L-AUDIO
jack.
4. When the Auto Input Sensing screen displays,
press
EXIT
or assign the name Camcorder.
5. Press
INPUT
to display the Input Selection menu.
6. Highlight the icon for the camera input and press
ENTER
.
7.
If viewing photos, advance through the images
manually or set the camera to advance automatically.
I
N
P
U
T
L-AUDIO-R
VIDEO/Y
Pb
Pr
3
USB
L-AUDIO-R
VIDEO/Y
$PNQPTJUF
7JEFP$BCMF
0QUJPOBM
"VEJP$BCMF
Camera connection using a composite video cable
IMPORTANT
The TV can read JPEG files as created by the
camera. If you edit a picture file on a computer
and resave the image, the TV may be unable to
read the resaved file.
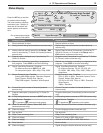
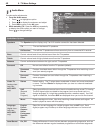
Slide Show
Use these keys during the slide show:
Keys for JPEG Picture Slide Show
Begin or resume slide show playback
Pause or resume playback while in auto-
matic advance mode.
or
ENTER
Advance to the next slide.
Go to the previous slide.
F
ORMA
T Rotate the slide clockwise in 90˚ incre-
ments.
Stop slide show and display the USB Photo
menu.
INFO
Display status for the viewing device and
current image.
INPUT
Display the Input Selection menu.
MENU
Display or remove the TV Main menu.
Note: Always press (
STOP
) to stop slide show play-
back before disconnecting from the USB Photo
port.