


62 6. NetCommand
• To erase the IR code just “learned,” press
CANCEL
while the name is highlighted.
5. Press to highlight the name Input1. You can
enter a custom name using the letters/numbers on
the remote control. It is best to assign names to
“learned” inputs that match the input names dis-
played on the A/V receiver. For this example, enter
the custom name TV using these guidelines:
• To select a character, repeatedly press a
number key on the remote control to cycle
through the characters associated with the key.
Special characters are available with the 1 key (!,
&, blank space) and
0
key (/,
*
,-).
• Press
ENTER
to set the character and move the
highlight to the next character.
• To delete a character, highlight the character
and press
CANCEL.
• To highlight the first character, repeatedly press
CANCEL
.
6. Press to move the highlight to the Assign
column.
7. Use to highlight AudioOut (TV audio output).
The triangular marker is always next to the assigned
sound source.
8. Press
EXIT
if finished or continue with setup for
another TV source.
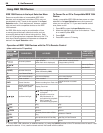
Completed NetCommand setup described for
controlling A/V receiver switching to the A/V receiver’s
audio input labelled “TV.”
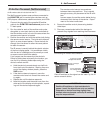
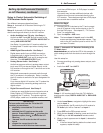
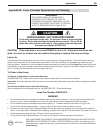
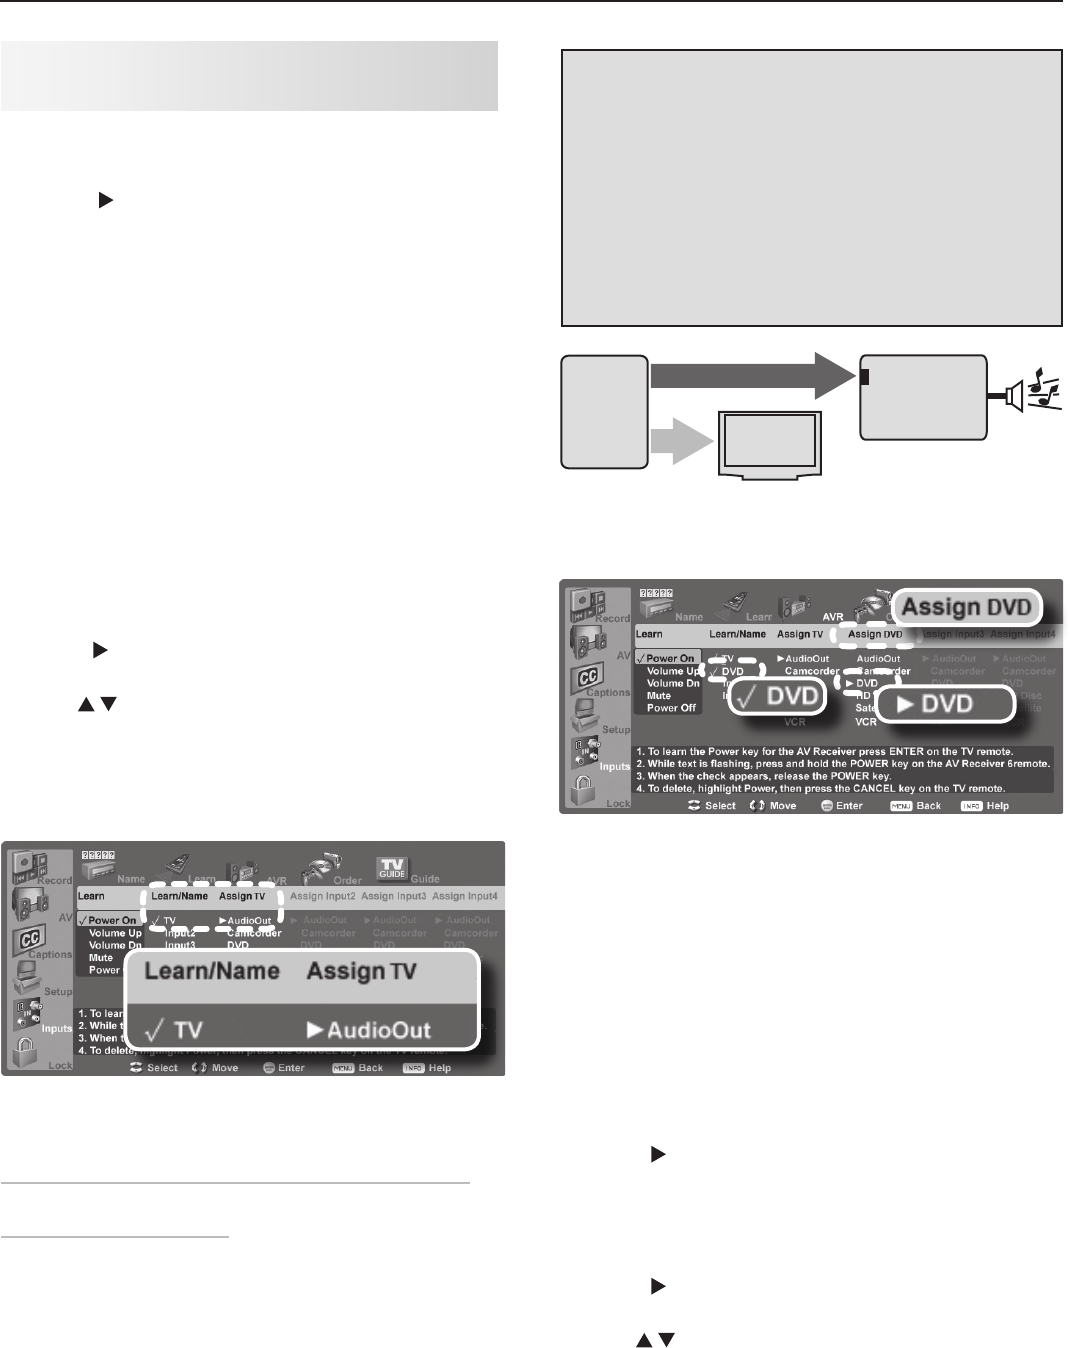
Setup 2: Automatic A/V Receiver Switching for a
Surround Sound Device
Use this setup to send digital surround sound directly
from a device to an A/V receiver.
1. Under Learn/Name, navigate to highlight the area
next to Input2.
In this example, the IR code for the A/V receiver’s
DVD Audio
input will be “learned” as Input 2.
2. Press
ENTER
on the TV’s remote control.
57
BVEJPWJEFP
*ODPNJOH
$PBYJBM
$BCMF
"73FDFJWFS
%7%BVEJP
JOQVU
%7%1MBZFSXJUI
%JHJUBM4VSSPVOE4PVOE
WJEFP
WJEFP
EJHJUBMTVSSPVOETPVOE
EJHJUBMTVSSPVOETPVOE
WJEFP
BOBMPHBVEJP
%7%1MBZFS
XJUI
%JHJUBM
4VSSPVOE
4PVOE
Setup 2: A/V receiver audio from a device providing
surround sound directly to the A/V receiver
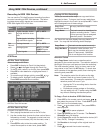
Completed NetCommand setup described for
controlling A/V receiver switching to an A/V receiver
input labelled “DVD.”
3. While the text Input2 is flashing, press and hold the
DVD INPUT
key on the A/V receiver’s remote control.
4. When a check appears next to Input 2, release the
DVD INPUT
key.
• If the text stops flashing before the check mark
appears, repeat this step.
• To erase the IR code just “learned,” press
CANCEL
while the name is highlighted.
5. Press to highlight the name Input2. Assign a
custom name that matches the input name dis-
played on the A/V receiver. For this example, enter
the custom name DVD using the number keys and
the guidelines given earlier.
6. Press to move the highlight to the second Assign
column.
7. Use to highlight DVD in the list of devices
recognized by the TV. The triangular marker always
shows the assigned sound source.
8. Press
EXIT
if finished or continue for additional TV
sources.
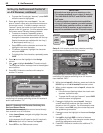
Setting Up NetCommand Control of
an A/V Receiver, continued
IMPORTANT
All audio from what you are watching on the
TV is always available as an output on both the
TV’s AVR AUDIO OUTPUT and DIGITAL AUDIO
OUT jacks.
To use the digital surround sound capabilities
of your A/V receiver however, you must connect
your DVD player, satellite receiver, or cable box
directly to the A/V receiver, as surround sound
may not be available from the TV’s audio output.