


6. NetCommand 67
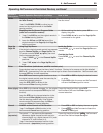
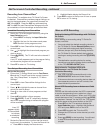
Copying A/V Disc Recordings
Tracks you record to disc may have copy restrictions
assigned to them. To learn a track’s copy restrictions,
highlight the track in the Track List and press
INFO
. Tracks
can be assigned one of these ratings:
Copy Free
(or no status shown)
No copy restrictions apply.
Copy Never The track cannot be transferred to
another recording device. Tracks
of this type may have an assigned
retention period. See below.
The Track List may also display the copy status for a
track. You may see the following status displays:
Copy Once The track can be copied once only.
Copy No More If a retention value is shown, the
track may be movable using your
other A/V equipment. Mitsubishi
TVs do not support this function.
Retention Period
Some
Copy Never tracks have a retention period
assigned by the content provider. The retention period is
the length of time you can keep and view the recording.
The initial retention period, if any, is shown next to the
copy status in the Track List
INFO
display. To check how
much remains of the retention period, start viewing the
recording and press
INFO
.
Note: The retention period for all tracks on the disc
expires if there is any loss of power to the TV,
even momentary. For example, expiration of the
retention period will occur if you:
• Unplug the TV or recording device from the
AC power source.
• Experience a power outage or fluctuation.
You can safely turn off TV power using the
POWER
key without affecting the retention period.
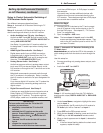
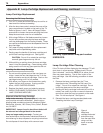
To Copy a Track to Another IEEE 1394 Device
1. Press
INPUT
on the remote control and press
to select the source A/V disc. Press
GUIDE
to open
the Track List if not already open.
2. Press or to select a track. Then press
ENTER
to
start playback.
3. Press
(
PAUSE
) to pause playback.
4. Press
(
RECORD
) on the TV remote. The Record >
Schedule menu will display.
5. Under Record To, review the destination device (A/V
Disc, DVCR). Change if necessary.
6. Set Duration to the length of the original track or
longer.
7. Press a second time to start recording.
A/V Disc Search by Time
To search to a specific time in a recording:
1. Start playing the desired track on the A/V disc.
2. Use the number keys to enter the time code of hours
followed by minutes. For example, to start one hour
and twenty-two minutes (1:22) into the track, enter
1
,
2
,
2
.
3. Press
ENTER
to skip to the time code position. To
cancel the request or to start over, press
CANCEL
.
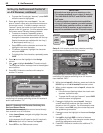
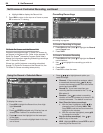
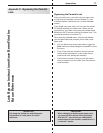
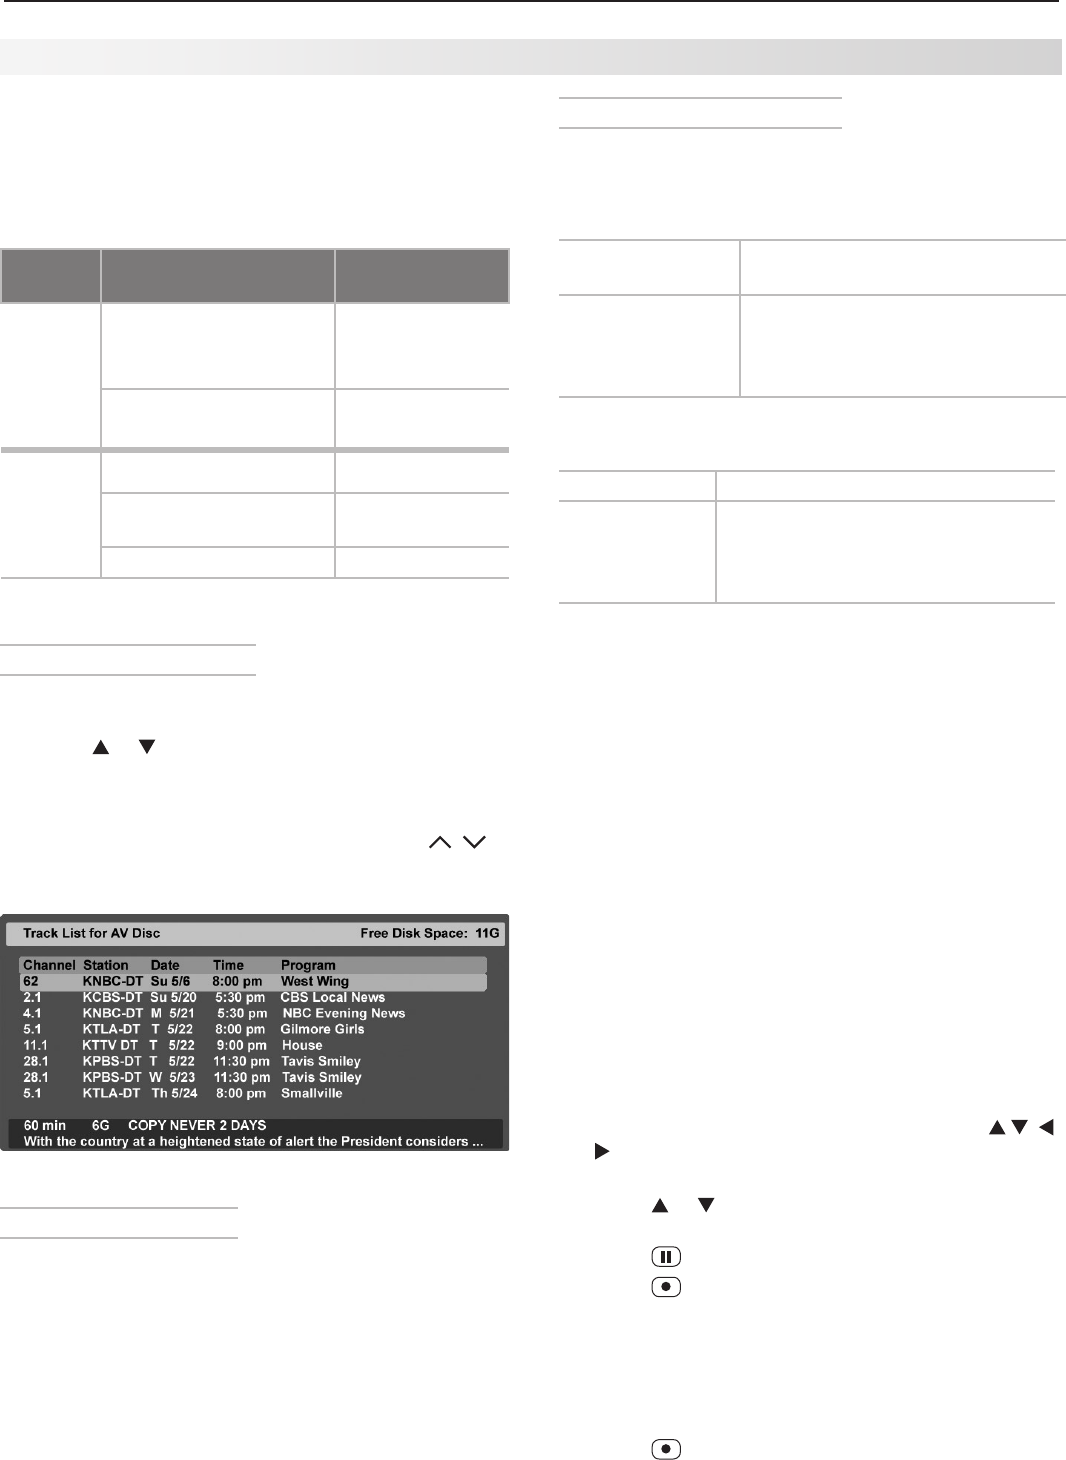
A/V Discs
A/V Disc Track List Screen
When viewing an A/V Disc:
• Press
GUIDE
to display its Track List (see below).
• Press or to navigate through the Track List.
• To play a track, select it on the list, then press
ENTER
.
• Press
INFO
to view details for a highlighted track, if
available.
• To move through listings quickly, press
PAGE
/ .
• To delete a track, highlight it and press
CANCEL
.
Press
CANCEL
a second time to confirm.
A/V Disc Track List screen
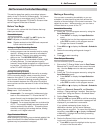
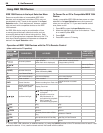
Recording to IEEE 1394 Devices
You can use the TV’s NetCommand recording functions
to control recording to IEEE 1394 devices. The follow-
ing table shows which signals can be recorded to an
IEEE 1394 digital VCR or A/V disc.
Avail-
ability
Signal Type TV Input
Record-
able
Digital channels, includ-
ing high-definition chan-
nels
ANT 1
,
ANT 2
Digital signals, including
high-definition signals
IEEE 1394
devices
Not
Record-
able
Analog channels
ANT 1
,
ANT 2
Analog signals
INPUT 1
-
3
,
COM-
PONENT
inputs
Digital signals
HDMI
inputs
Using IEEE 1394 Devices, continued