74 Chapter 6. Using the TV with a Personal Computer
Setup
1. SeetheTVspecificationsinAppendixBtoconfirm
thatyourcomputervideosignaliscompatiblewiththe
TV.
2. Notewhetherthecomputersuppliesadigitalor
analogvideosignal.Youwillneedthisinformation
duringthesetupprocedure.
• Digitalvideosignal:Comesfromthecomputer’s
DVIorHDMIoutput.
• Analogvideosignal:Comesfromthecomputer’s
VGA15-pinoutputandrequiresaVGA-to-DVI
cableoraVGAcableandVGA/DVIadapter.
3. PowerontheTV.
IMPORTANT
In the next step, select the correct video signal
type (analog or digital) in the Input Name menu.
Otherwise, the TV will be unable to display a
picture from the computer.
4. Press
MENU
toopentheMainmenu,highlighttheInput
Nameiconandpress
ENTER
.
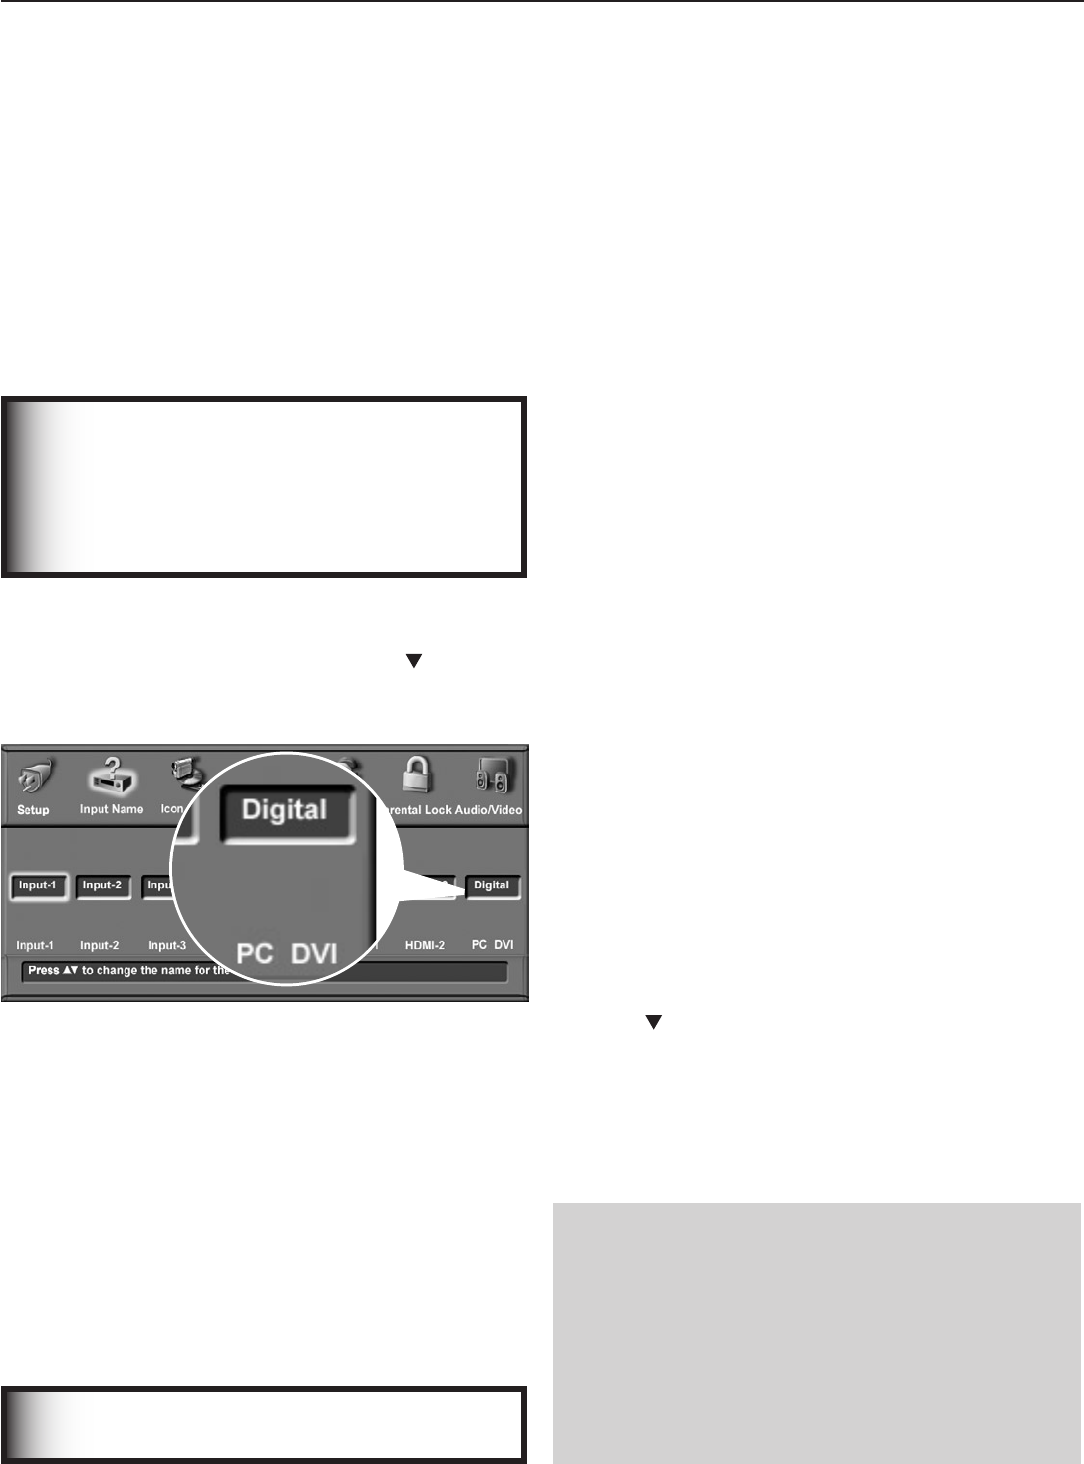
5. HighlightthePC-DVItextboxandpress tochange
thesettingtomatchyourcomputer’svideosignal
type,eitherDigitalorAnalog.
Figure 1. Specify your computer’s video signal type
(analog or digital) in the Input Name menu.
6. Press
EXIT
tocloseallmenus.
7. Connectthecomputer’svideooutputtotheTV’s
PC
-
DVI
jack.Seetheconnectiondiagramsinthis
chaptertofindthemethodbestsuitedtoyourequip-
ment.
8. Connectthecomputer’saudiooutputusingoneof
theseoptions:
• Connectanalogleft/rightaudiototheTV’s
PC -DVI AUDIO
jack.
• Ifyourcomputeroffersdigitalaudiooutput,
connectittoadigitalA/Vreceiverinstead.
IMPORTANT
SeeAppendixBforsignalcompatibility.
Note
• The
PC-DVI
inputontheTVcanaccepteither
analog(DVI-A)ordigital(DVI-D)signals.
• YoumustspecifythePC-DVIsettingintheInput
NamemenuaseitherAnalogorDigital,depend-
ingonthesignaltypesentbyyourcomputer.
• Ifyourcomputeroffersdigitalaudiooutput,you
canconnectyourcomputer’sdigitalaudioouttoa
digitalinputonadigitalA/Vreceiver.
Video Adjustments
1. Poweronthecomputerifitisnotalreadyon.
2. SelectPCfromtheInputSelectionmenu.Todothis,
press
INPUT
toopentheInputSelectionmenu,movethe
highlighttothePCicon,andpress
ENTER.
3. Changetheresolutionofthecomputerimage.The
goalistomaximizethecomputerresolutionwhile
maintainingasuitableaspectratiofortheimage.See
theexplanationlaterinthischapter.
4. PerformTVvideoadjustments.Press
VIDEO
repeat-
edlytocyclethroughthevideo-adjustmentoptions.
Thefollowingadditionaladjustmentsareavailablefor
computervideo:
Auto Position. Press
ENTER
toautomaticallycenter
thepositionofthePCvideo.
HorizPosition(HorizontalPosition).Manually
adjustthehorizontalpositionofthePC.This
selectionoverridestheAuto Positionselection.
VertPosition(VerticalPosition).Manuallyadjust
theverticalpositionofthePC.Thisselection
overridestheAuto Positionselection.
Fine Detail(analogDVI-Asignalsonly).Manually
adjustthepicturequalityofthePC.Thisselection
overridestheAuto Positionselection.
5. ChangetheTVpictureformattosuittheimage.
Press
FORMAT
tocyclethroughtheavailablepicture
formats.Seethechartlaterinthischaptershowing
howvariouscomputerresolutionsaredisplayedon
theTV.
To Remove the Computer Icon from
the Input Selection Menu
Whenyoudisconnectananalogvideoconnectionofa
personalcomputer,thecomputericonremainsintheInput
Selectionmenuuntilyouremoveit.
1. I
ntheInputNamemenu,highlightthePC DVI Inputbox.
2. Press toselectDigital.
3. Press
EXIT
tocloseallmenus.
ThenexttimeyouopentheInputSelectionmenu,the
computericonwillnolongerappear.


