


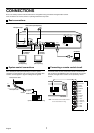
RECORDING IMAGES IN THE
ALARM RECORDING AREA
Alarm recording
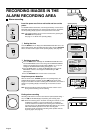
Insert the power cord into a wall outlet and turn on the
power.
The POWER indicator illuminates, and after approximately 15 seconds, the
EXIT/OSD indicator illuminates. The camera images appear on the monitor,
and the operating display appears in the top-left corner of the screen.
Note: The operating display can be moved or switched off by pressing the
EXIT/OSD button repeatedly.
See page 11 for details of the operating display.
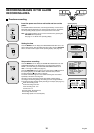
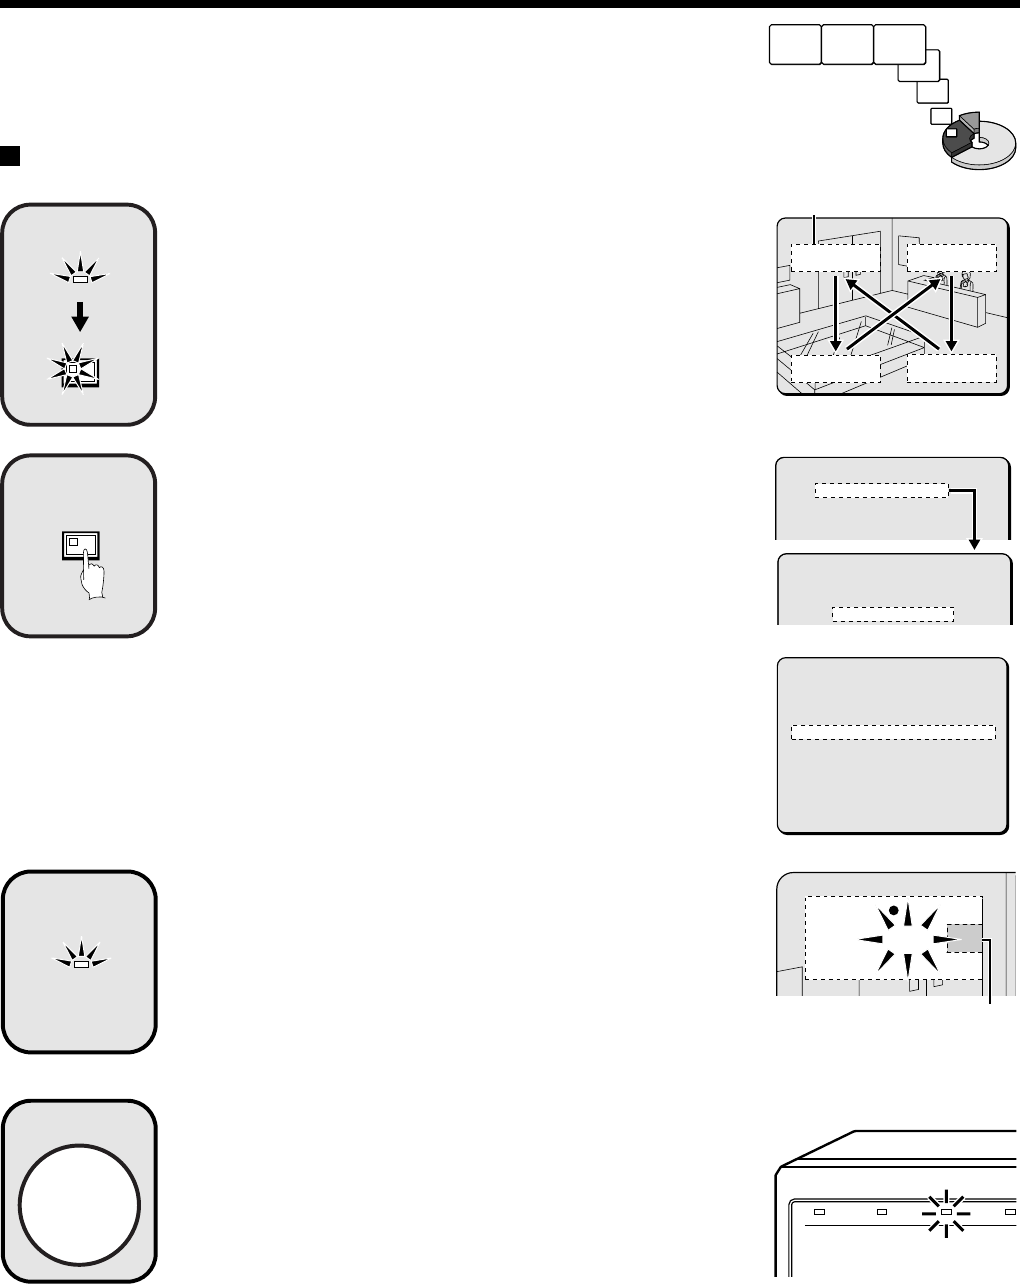
1 Setting the time
Press the MENU button to display the LANGUAGE/CLOCK SET menu, and
set the date and time. After the setting has been made, press the EXIT/OSD
button, the date and time appear in the operating display. (See page 40.)
2 Set alarm recording.
•
Press the MENU button to display the ALARM REC MODE SET menu
from the MAIN MENU screen. Then change the ALARM RECORDING
setting to the desired alarm recording setting (MODE1, 2, 3 or 4) and
change the ALARM TRIGGER setting. (See page 52 – 54.)
•
Press the MENU button, to display the BUZZER SET menu from the
MAIN MENU 2 screen, and change the ALARM setting to “ON”.
(See page 60.)
•
Press the EXIT/OSD button to return to the normal screen.
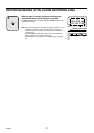
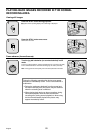
Suspicious person detection
When an alarm occurs, “ALARM” appears in the operating display, the
ALARM indicator flashes and alarm recording (a symbol) starts. Alarm
images are recorded in the alarm recording area. Furthermore, the number of
alarms in the operating display is increased by one each time an alarm
occurs.
Note: Normal recording and timer recording stop when an alarm occurs
during normal recording or timer recording.
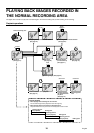
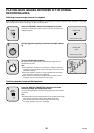
Ending alarm recording
Recording ends after the end of the alarm duration period (default setting: 1
sec). The “a” and ALARM displays stop flashing and recording stops.
Note: When the remaining area in the alarm recording area reaches 1%, the
ALARM FULL indicator on the front panel flashes. If recording is
continued under these conditions, the recording area is filled and the
recording stops. In the RECORDING AREA SET settings, carry out the
AREA FULL RESET operation for the alarm recording area.
Overwriting will be canceled and recording will be possible from the
beginning again. (See page 44.)
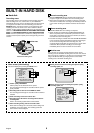
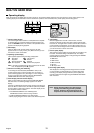
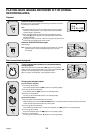
POWER
EXIT/OSD
1
Operating display
01-01-01
00:00:00 EN 0.12SEC
MENU
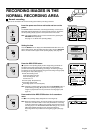
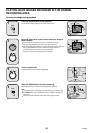
2
<MAIN MENU 1>
1.LANGUAGE/CLOCK SET ->
2.VIDEO INPUT SET ->
3.RECORDING AREA SET ->
4.RECORDING CONDITIONS SET ->
<LANGUAGE/LANGUE/SPRACHE/IDIOMA>
ENGLISH
<CLOCK SET>
01-01-2001 MON 00:00:00
SS
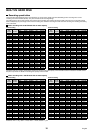
<ALARM REC MODE SET>
PICTURE QUALITY : ENHANCED
FRAME/FIELD RECORDING : FIELD
AUDIO RECORDING : OFF
ALARM RECORDING : MODE1
REC CYCLE : 0.12SEC. DURATION: 1SEC
PRE-ALARM RECORDING : ¤¤¤
REC CYCLE : ¤¤¤ SEC. DURATION: ¤¤¤
=> (55682 ALARMS CAN BE RECORDED)
ALARM TRIGGER : ALARM
MOTION SENSOR ->
ALARM
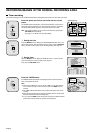
3
10-05-01 ALARM 0001
18:10:25 EN 0.12SEC
The number of
alarms is counted.
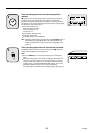
4
POWER FULL
ALARM FULL
LOC
Alarm images are
recorded
English
15