SAVING (COPYING) RECORDED IMAGES
4
Use the jog dial to select ARCHIVE AREA and then turn
the shuttle dial clockwise.
The cursor moves to HOW MANY.
5
Turn the shuttle dial clockwise, use the jog dial to change
the setting to “10”, and then turn the shuttle dial
clockwise.
The cursor moves to PICTURES.
6
Use the jog dial to select the SECONDS setting, and then
turn the shuttle dial clockwise.
•
PICTURES: Specify the number of images to be copied.
•
SECONDES: Specify the number of seconds of images to be copied.
•
MINUTES: Specify the number of minutes of images to be copied (up to
60 minutes).
The cursor moves to START.
7
Turn the shuttle dial clockwise.
Copying of images to the archive area starts. When copying is complete,
“COPY FINISHED” appears.
Note: If you press the COPY button while copying is in progress, copying is
canceled.
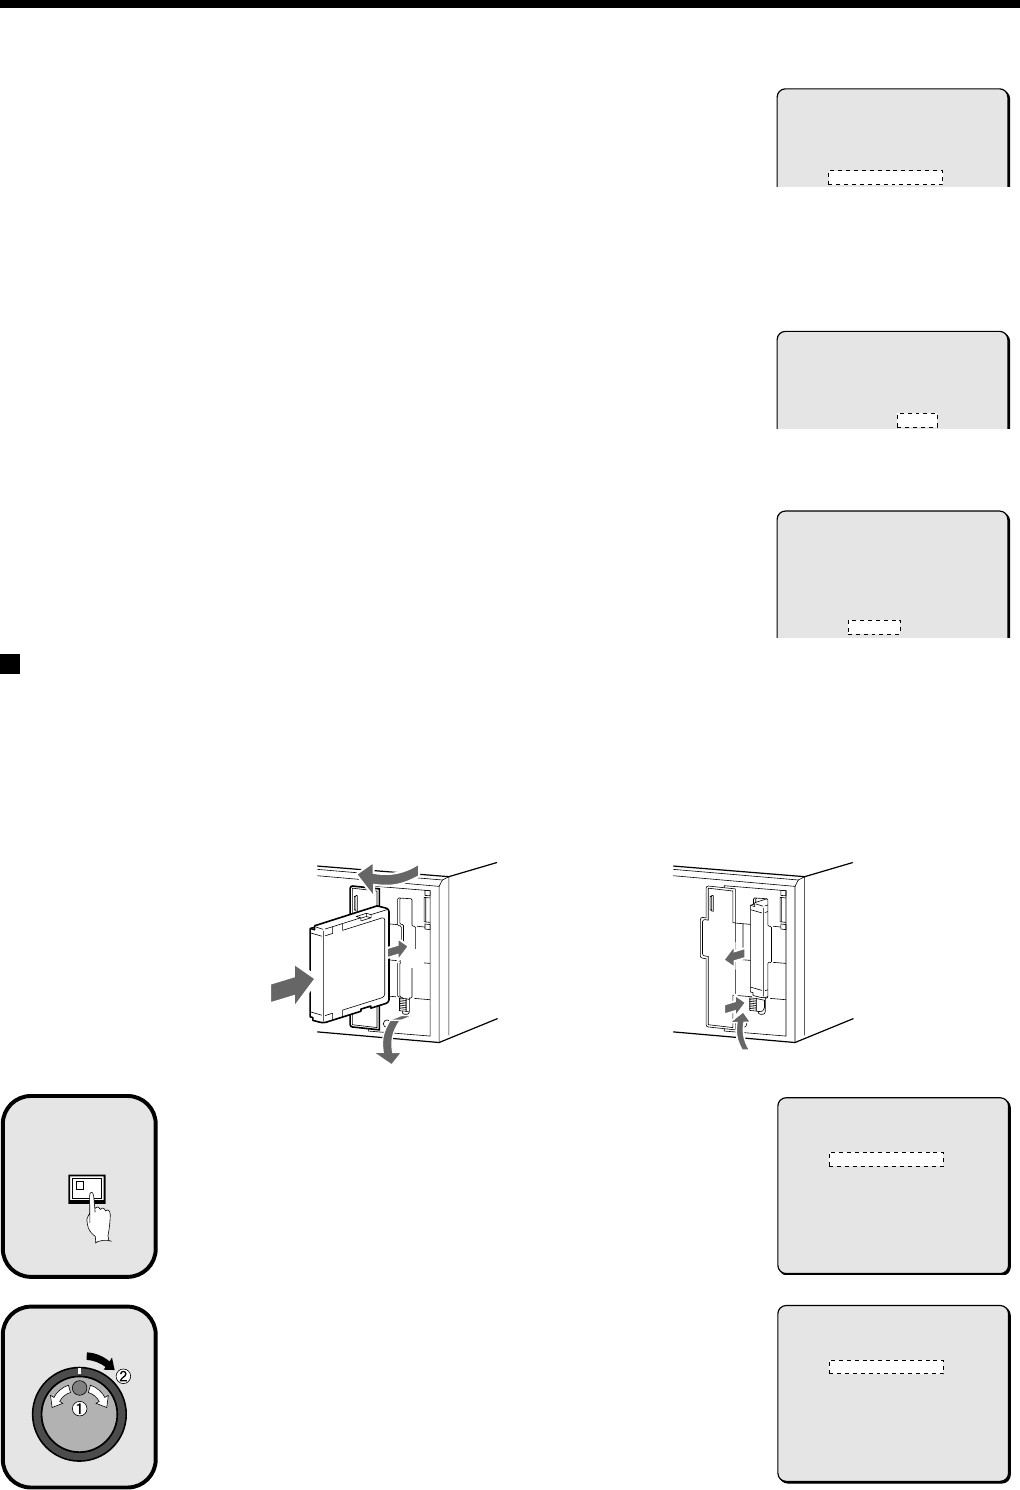
Copying images from archive area to a CompactFlash card
1
Insert a CompactFlash card into the CompactFlash slot
on the front panel.
When inserting the CompactFlash card, make sure that the direction of
insertion is correct.
A microdrive can also be used for copying images.
Display an image from the archive area as a still image,
and then press the COPY button.
The copying screen appears.
Refer to page 28 for details on playing back images from the archive area.
Use the jog dial to select COPY TO and then turn the
shuttle dial clockwise.
The ARCHIVE AREA display flashes.
COPY TO : ARCHIVE AREA
HOW MANY : 1 PICTURES
COPY TO : ARCHIVE AREA
HOW MANY : 10 PICTURES
COPY TO : ARCHIVE AREA
HOW MANY : 10 PICTURES
START ->
1
2
3
2
1
3
(Inserting) (Removing)
COPY
2
COPY TO : ARCHIVE AREA
HOW MANY : 1 PICTURES
START ->
CHANGE WITH JOG. SET WITH SHUTTLE
3
COPY TO : ARCHIVE AREA
HOW MANY : 1 PICTURES
START ->
CHANGE WITH JOG. SET WITH SHUTTLE
English
33


