38
EN
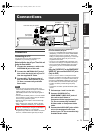
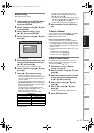
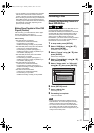
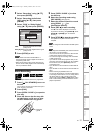
Settings for External Equipment
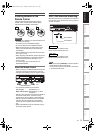
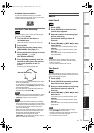
Connection to External Equipment
Connect the external equipment using either the input
jacks, AV1, AV2 (Rear) or AV3 (Front). However, for
AV3 jacks, you have to select S-VIDEO input or
VIDEO input jacks depending on the connected
devices.
Use a commercially available Scart, S-Video or Video
cable and an Audio cable for this connection.
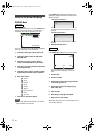
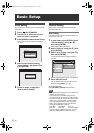
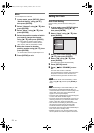
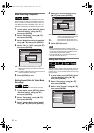
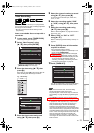
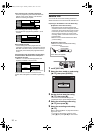
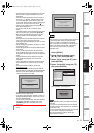
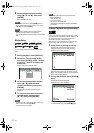
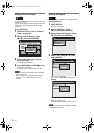
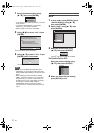
1 In stop mode, press [SETUP]. Select
“General Setting” using [U / D],
then press [ENTER].
2 Select “Video” using [U / D], then
press [ENTER].
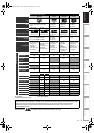
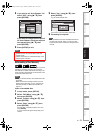
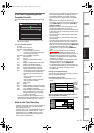
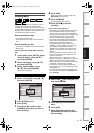
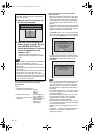
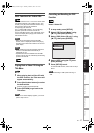
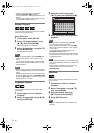
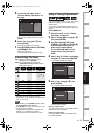
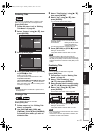
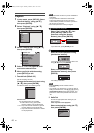
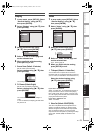
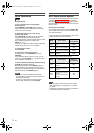
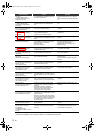
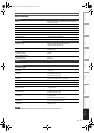
3 Select “Select Video” using [U / D],
then press [ENTER].
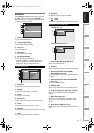
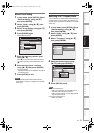
4 Select the input jack type to be used
using [U / D], then press [ENTER].
• If you want to use VIDEO input jack (Composite),
select “Video In”.
• If you want to use S-VIDEO input jack, select
“S-Video In”.
5 Press [SETUP] to exit.
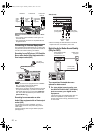
Recording from External Equipment
Before recording from external equipment, see page
20 for connection instructions.
1 Turn the TV and the unit on, and
select the input of the TV to which
the unit is connected.
2 When you want to record to the disc:
Press [DVD].
Press [OPEN / CLOSE O] to open the
disc tray, then place the disc to
record on.
Press [OPEN / CLOSE O] again to
close the disc tray.
When you want to record to a tape:
Press [VCR].
Insert the tape with a record tab into
the cassette compartment.
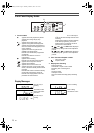
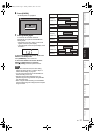
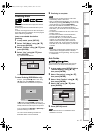
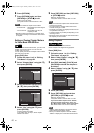
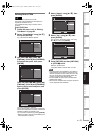
3 Select the input terminal to which the
external equipment is connected.
(AV1, AV2, or AV3)
To use the input jacks on the back of the unit,
select the “AV1” or “AV2” position by pressing
[INPUT SELECT ] on the remote control or
using [PROG. / ].
To use the input jacks on the front of this unit,
select “AV3” position by pressing
[INPUT SELECT ] on the remote control or
using [PROG. / ].
• You can also select the input terminals by using
[the Number buttons]
.
- For AV1, press [0], [0], [1].
- For AV2, press [0], [0], [2].
- For AV3, press [0], [0], [3].
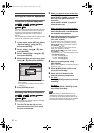
4 Select a recording mode using
[REC MODE].
Refer to “Recording Mode” on page 26 for DVD or
page 72 for VCR.
5 Press [I REC] (DVD / VCR) on the
unit to start recording.
6 Press the PLAY button on the
external recording component.
7 For disc:
Press [S (STOP)] on the unit to stop
recording.
For tape:
Press [O/S (STOP / EJECT)] on the
unit to stop recording.
Note
• During recording, if a signal other than PAL is
detected (such as NTSC), recording is paused.
• If you want to monitor the programme that you are
recording, make sure the device such as a Satellite
Box is turned off when it is connected to AV2.
DVD-RWDVD-RW
Video
DVD-RWDVD-RW
VR
DVD-RDVD-R D
VD+R
W
DVD+RW
D
VD+R
DVD+R
VCR
VCR
TV Aspect
Select Video
Video Out
General Setting
Playback
Display
Clock
Channel
DivX
Reset All
Recording
Video
Select Video - AV3(Front)
Video In
S-Video In
DVD-RWDVD-RW
Video
DVD-RWDVD-RW
VR
DVD-RDVD-R D
VD+R
W
DVD+RW
D
VD+R
DVD+R
VCR
VCR
E9GA0BD_EN.book Page 38 Monday, March 26, 2007 10:14 AM