


54
✎ It may help to set the Scale Mode to one to one in
the Aspect Ratio menu before starting the logo
capture. (although it will work from any scale
mode). This will allow you to visualize the true size
of the captured image relative to the screen.
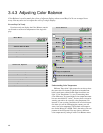
3. Select Scaling to specify the aspect ratio of the cap-
tured image. Choices are:
4. Select RLE Compression Factor to reduce the bitsize
of the image.
RLE (Run Length Encoding) is a very simple method
of compressing an image where multiple pixels that are
the same will be stored as a count and a value rather
than as individual pixels, thus saving space. The RLE
Factor is the number used to determine when a pixel is
“the same”. As long as each color of the new pixel is
within the RLE factor of the old pixel it will be consid-
ered the same. For analog images, it is best to put the
RLE factor at 1 so that the analog noise will be elimi-
nated and a flat image can be compressed. There are
only 576 kilobytes available for the captured logo
which is not large enough for a full screen image with-
out compression. If you get the error message that the
logo is too large, you can try increasing the RLE factor.
However, the results will probably be more blurry than
you may like.
✎ The larger the capture image (in number of pixels,
not scale mode) the slower it will be to draw.
Repeated pixels draw faster than non repeated so
a higher RLE factor can also increase draw speed
somewhat.
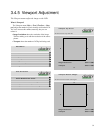
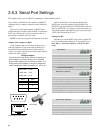
5. Move the capture area (indicated on screen by the red
rectangle) to the portion of the screen you want to cap-
ture.
a) Select Move Area Up/Down or Move Area
Right/Left and then use the + and - keys to position
the upper right corner of the red rectangle to the
upper right corner of the image.
6. Resize the red rectangle by selecting Shrink/Grow
Width and Shrink/Grow Height and using the + and -
keys to increase or decrease the size of the red
rectangle.
✎ The background color for the logo will be the color
of the pixel in the upper left corner of the capture
area. This background color will be used even if
the scaling is set to full screen, since the aspect
ratio of what they captured will probably not be the
same as the screen. The captured image will
reach to the outside of the red line. There's a “bite”
taken out of each corner to allow you to better see
what's under the line.
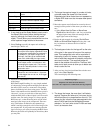
7. After you have sized and positioned the selection rect-
angle, select Start Capture.
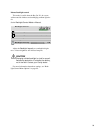
The screen displays the following note:
✎ The larger the image, the more time it will take to
capture. Capture can take up to 5 minutes, during
which time there is no response from the unit. The
reason for this is that the logo gets captured to the
same FLASH part that the embedded firmware
resides in. You can't write to the FLASH and read
from it at the same time.
Bottom Center Centered left/right, at the bottom of the
screen
Bottom Right At the bottom right corner of the screen
Tile Repeat the image across and down to fill
the screen with the captured image
Top Left At the top left corner of the screen
Top Center Centered left/right at the top of screen
Top Right At the top right corner of the screen
one to one Each captured pixel of the logo will appear
as one pixel of the display regardless of how
the image was scaled when you captured it.
For example, if you capture a logo from a
VGA input, it will take up at most 640x480
pixels of the 1920x1080 pixel logo screen.
full screen The captured image will be stretched until it
fits the output screen in one direction, with-
out changing the aspect ratio. This is analo-
gous to the “letterbox/pillarbox” choice in the
aspect ratio menu
n percent The image will be scaled somewhere in
between the two choices above. 10 percent
is a little bigger than one to one, 20 is bigger
than that etc.
Capturing Logo...
Capture can take several minutes
Unit will not respond to commands during capture