


51
FR-2
Field Memory Recorder (Chapter 5: Recording/playback)
<Notes>
•
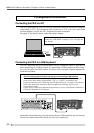
Adjust the recording level appropriately so that the level meter does not exceed "0
dB". To get the maximum signal-to-noise performance, set the recording level
appropriately so that the meter indication does not exceed "0 dB" but goes up near to
the "0 dB" at the loudest part of the input signal.
The reference level is set to the "-20 dBFS" relative to digital full-scale.
"20" on the meter is labeled in inverse video, showing that it is the reference position.
•
You can set the unit to generate the error tone when the input amplifier clips due to
over level by using the "Error tone" menu item on the Setup menu in the MENU
mode. See "Setting error tone output condition" on page 87 for details.
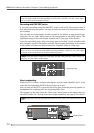
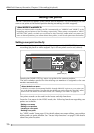
The recording level for each channel can be adjusted using the [LEVEL] controls
after pressing the [REC STBY] key to enable "input monitor". The L and R [LEVEL]
controls are ganged.
Pressing the [REC STBY] key again releases "input monitor".
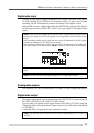
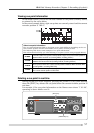
Adjusting the recording level
According to the situation, select the track mode (whether making recording in
mono or stereo) using the [TRACK MODE] switch.
The [TRACK MODE] switch setting is shown on the Home screen.
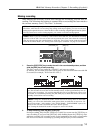
Selecting the track mode
MONO
The FR-2 records only the analog "L" input channel signal to a single file.
STEREO
<Note>:
You cannot change the track mode during recording.
The FR-2 records the L and R analog stereo input signals to two individual files.
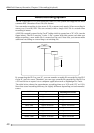
176.4
192
96
88.2
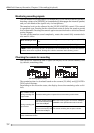
MIC
LINELINE
MIC
-26
-60+4
-30
PRE REC
ON
OFF
LINE
/MIC
FS(kHz)
OFF
ON ON
OFF
ST
MONO
TRACK MODE
24BIT
16BIT
QUANTIZATION
OFF
ON
LIMITER
TRIM
44.1
22.05
48
-30
+4
-60-26
L
R
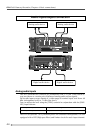
[TRACK MODE] switch
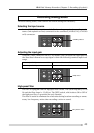
REC STBY REC
0
1
2
3
46
7
8
9
10
5
ACCESS
PEAK
R
L
SHIFT
/ENTER
RELEASE
CARD
MENU
HOME /
FILE
CUE
PREV.
NEXT
CONTRAST
DEL CUE
LIGHT MARK CUE
HOLD RESET
E
R
[LEVEL] controls
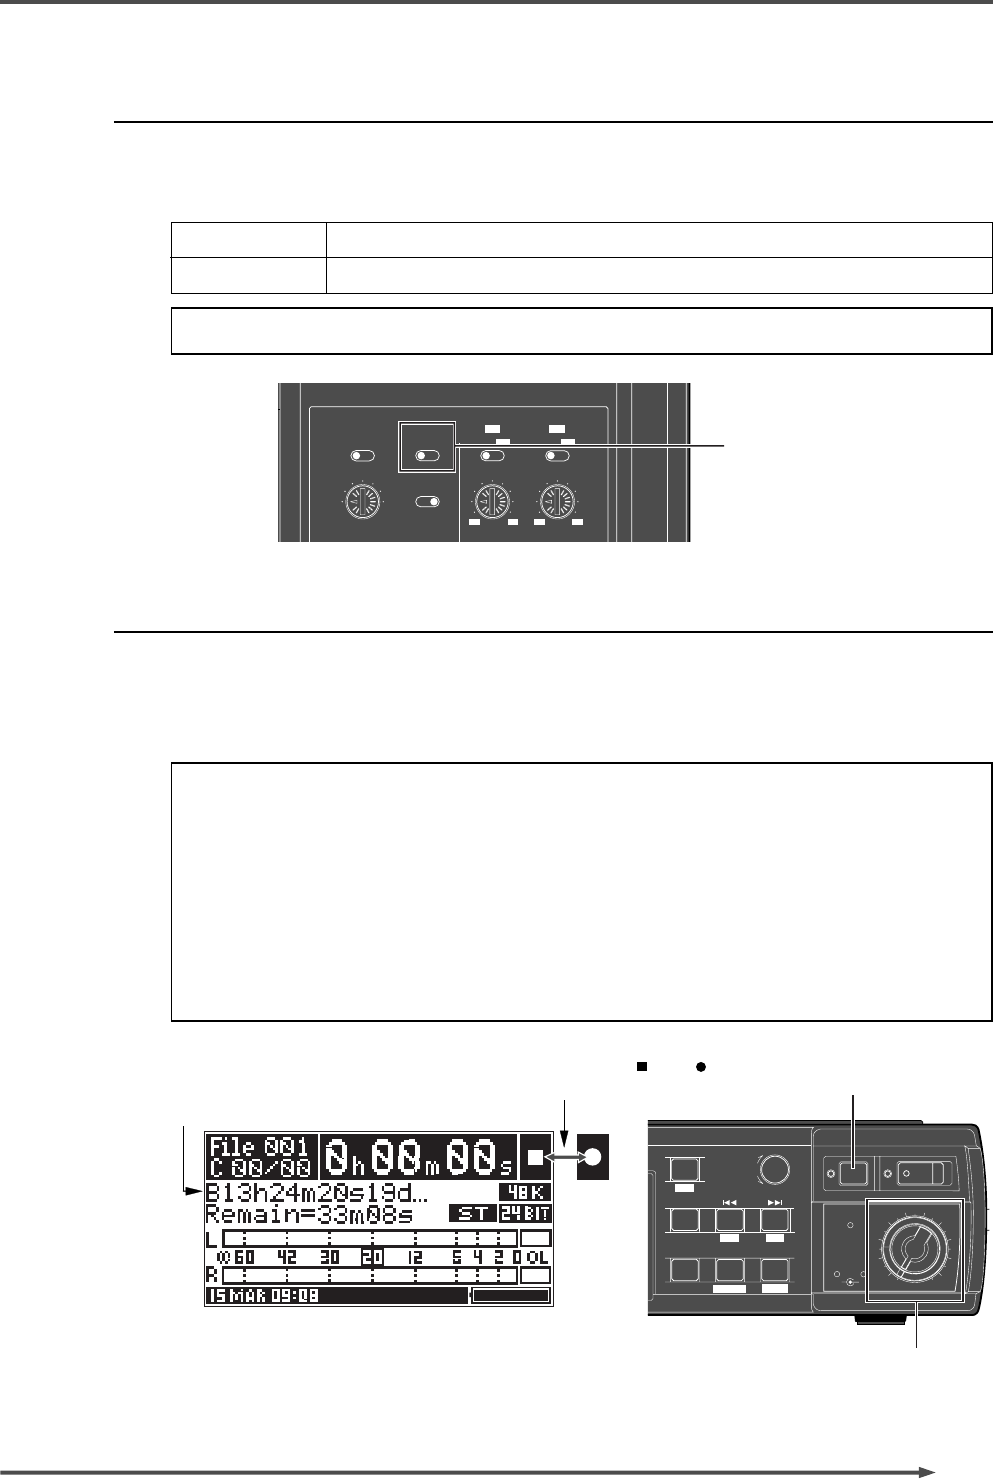
[REC STBY] key
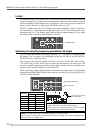
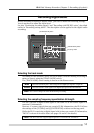
During record standby, " " and " "
are alternately flashing here.
The file name field shows realtime
counter data which is running.
<Screen example during input monitor>