


Before using your unit
01
16
En
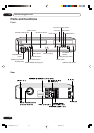
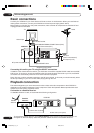
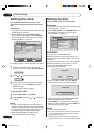
Basic connections
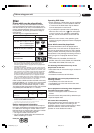
Connect your VCR/DVD to your main aerial and TV set as shown in the illustration. When you have finished
making these connections, connect your VCR/DVD to the mains power supply (230V / 50Hz).
Before making or changing any rear panel connections, make sure that all components are switched off and
unplugged from the wall outlet.
TV
AC power cord 230V/50 Hz
VCR/DVD
Aerial-Input
To SCART socket
RF-Input
(from house antenna)
TV Scart socket (AV1)
RF-Output (to TV)
Aerial
Supplied Coaxial cable
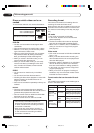
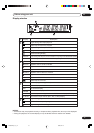
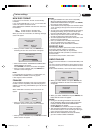
In addition to the coaxial cable connection, you should also connect the supplied SCART cable from the VCR/
DVD to your TV as shown. As well as transferring the high quality pictures and sound to your TV, the SCART
connection can automatically switch the TV to its AV channel for playback.
Connecting this unit to your TV using the SCART connections
Some TVs may not allow automatic switching to the AV input channel. In this case you should manually select
the AV input setting on your TV's controls when playing through this unit.
Supplied SCART cable
DECODER/EXTERNAL SCART Socket (AV2)
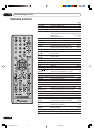
Playback connection
The exact arrangement you use to interconnect various video and audio components to the VCR/DVD is
dependent on the model and features of each component. Check the Operation Manual provided with each
component for the location of SCART socket.
SCART-cable (not supplied)
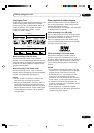
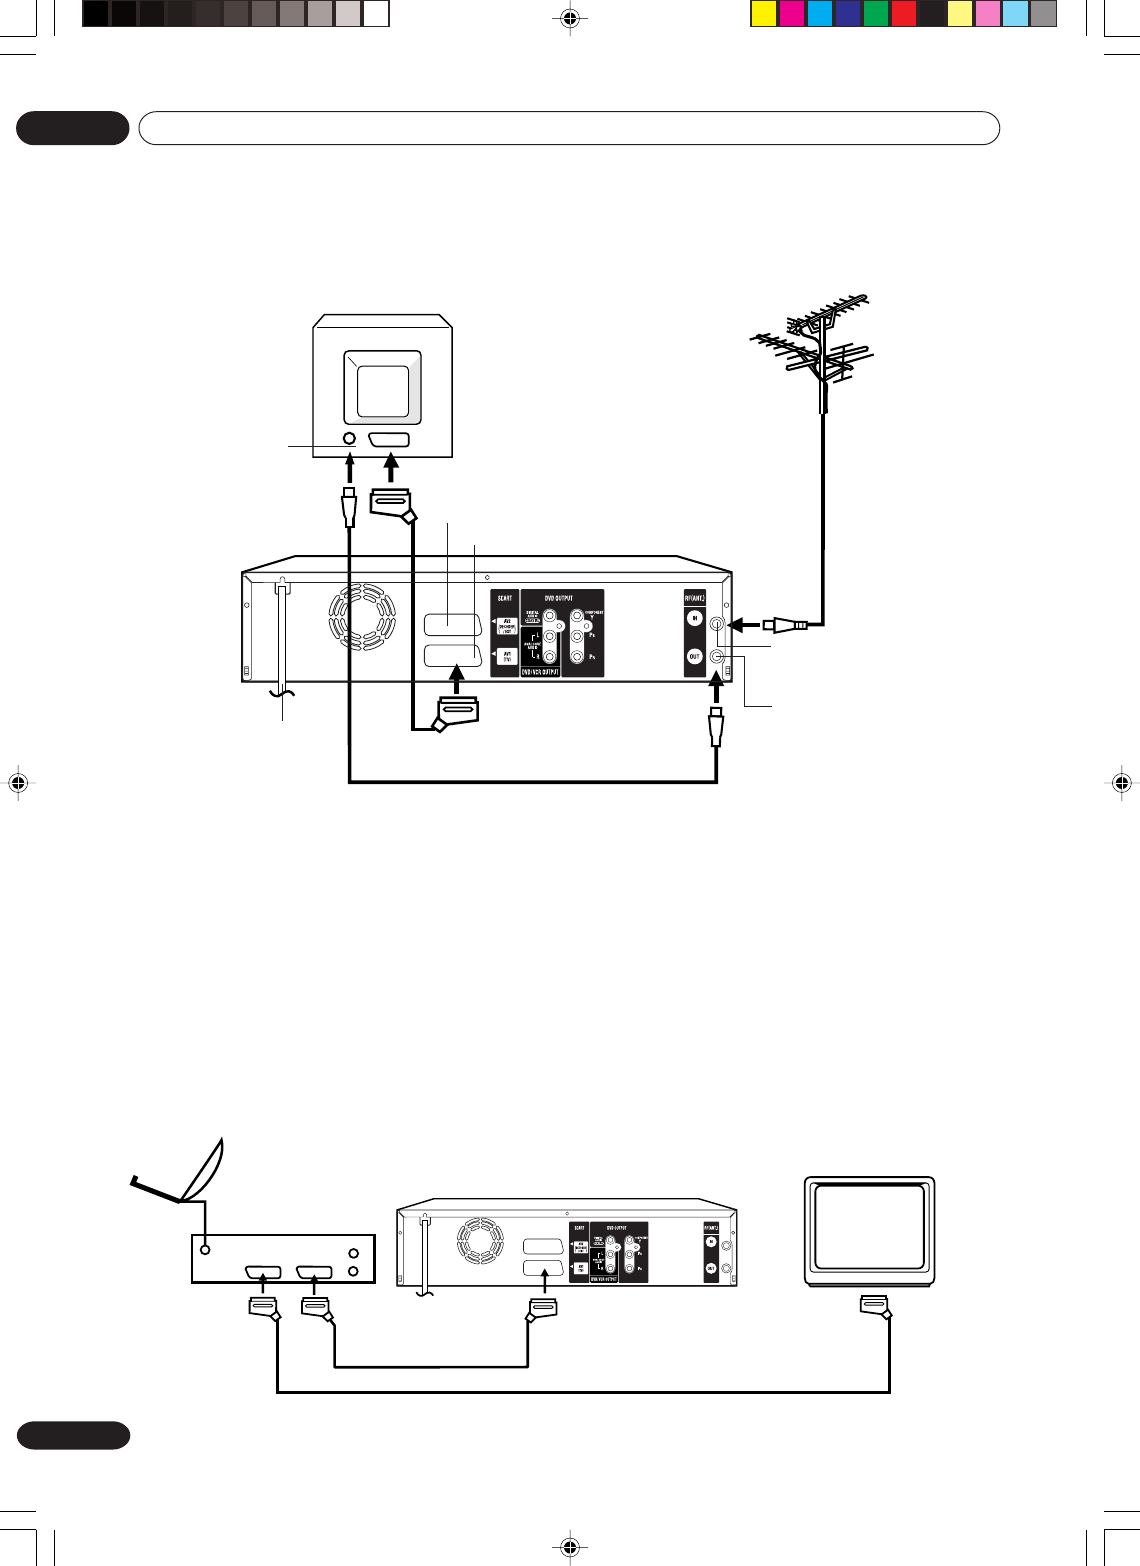
If a Satellite Receiver is used, we recommend the following configuration:
Connection to a Satellite Receiver
To record from Satellite Receiver press INPUT SELECT on the remote control of the VCR/DVD. “A1”
will appear on the front display. Select the particular satellite channel on the Satellite Receiver.
Satellite
Antenna
Satellite
Receiver
VCR/DVD
TV
SCART-cable (supplied)
2H30301B_En_12_17 8/4/05, 19:2016