


EN-41
Adjusting projected images (continued)
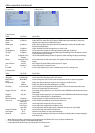
To adjust the ratio of change in brightness (Gamma Correction):
You can select a preset Gamma Correction using the menu.
(See page 34 for menu setting.)
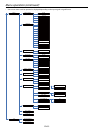
1. Display the Picture 1 menu.
2. Select Gamma Correction by pressing the p or q button.
3. Select your desired Gamma Correction by pressing the t or u button.
To cancel the menu:
4. Press the MENU button.
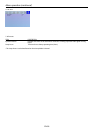
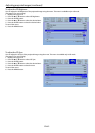
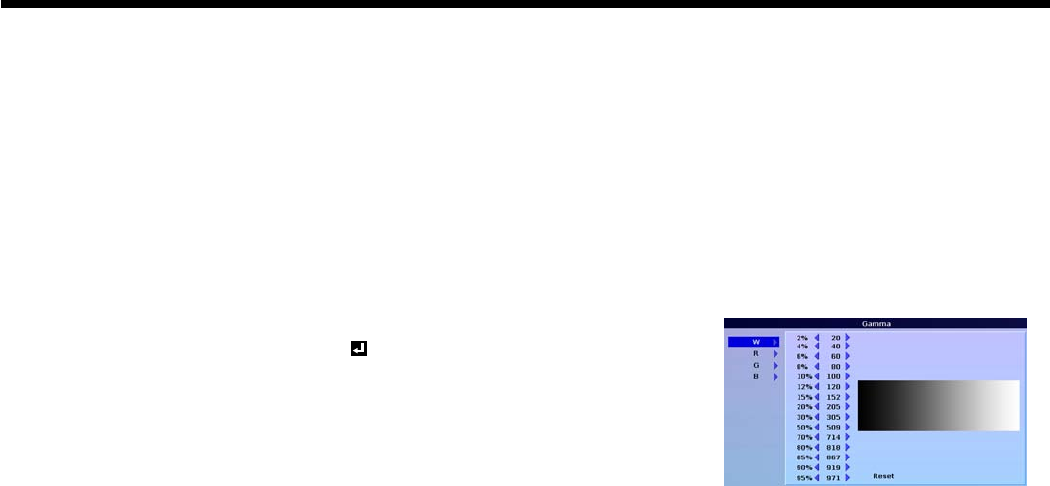
To adjust the original ratio of change in brightness (To customize the Gamma Correction):
To customize (and store) the Gamma Correction to your preference, carry out the following procedure.
(See page 34 for menu setting.)
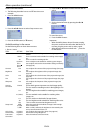
1. Select Gamma Correction in the Picture 1 menu.
2. Press the t or u button to select User .
3. Press the ENTER button.
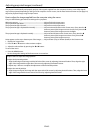
4. Press the p or q button to select desired Adjust item(W,R,G,B).
5. Press the ENTER button.
6. Press the p or q button to select desired item.
7. Press the t or u button to adjust the gamma of vaule.
8. Repeat steps 6 - 7 for optimum adjustment results.
To cancel the menu:
9. Press the MENU button.
To enable the stored gamma mode:
1. Select User by pressing the GAMMA button on the remote control.
• Change in the brightness may be hard to recognize in some images.
Noise reduction
This projector has the following noise reduction functions. However, these functions don’t work with 720p, 1080i, and
1080p signals and signals supplied from computer.
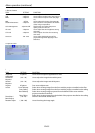
TNR (temporal recursive noise reduction)
Reduces random noise appearing in projected images. Adjust the reduction level using the t or u button.
MNR (mosquito noise reduction)
Reduces mosquito noise appearing around sharp edges in DVD images. Adjust the reduction level using the t or u
button.
BAR (block artifact removal)
Reduces block noise or mosaic-like patterns appearing in DVD images. Turn on this function using the t or u
button.
How to Use Color Management
This projector can individual adjusts each tone in red, green, blue, cyan, magenta, and yellow. You can adjust the tone colors
using Color Management in Picture 2 menu.
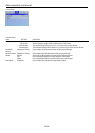
1. Select Color Management from the Picture 2 menu to turn on the Color Management.
2. Once the Color Management is turned on, it will show the O, Custom 1, Custom 2, and Custom 3 options. Press the p
qbutton to select the desired item and press the ENTER button to select it.
3. Select O, then the color management function will be shut o.
Select Custom 1, Custom 2, or Custom 3, then the Color Management will be enable and shows the red, green, blue, cyan,
magenta, and yellow options.
4. Select the color you willing to ne tune by press the p, qbutton then press ENTER button to selected, and then the gain,
Situation, Hue selections will appeared for user to tune the fancy for picture.
To cancel the menu:
Press the MENU button.