EN-46
1. Turn o the main power switch and unplug the
power cord.
2. Loosen 2 screws using a Phillips screwdriver
(+) and remove the rear side Lamp cover from
projector, hang it well under the projector.
3. Loosen the screws using using a Phillips
screwdriver (+).
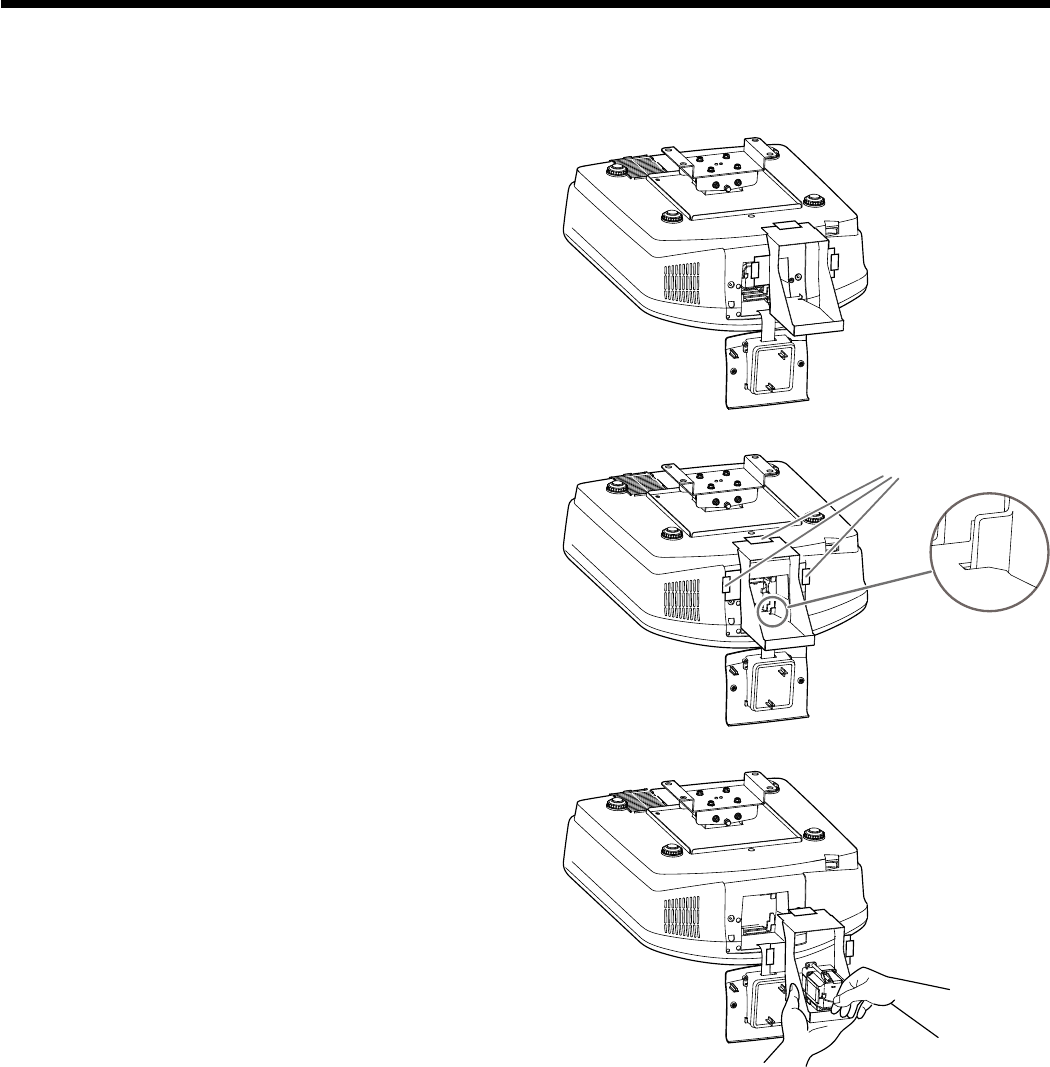
4. Attach the lamp replacement tray to the
projector as shown in the gure.
5. Secure the lamp replacement tray on the
projector using the tapes packed with the tray.
6. Pull out the lamp box by the handle while
holding the projector.
• Hold the lamp replacement tray to prevent
glass fragments from scattering.
• Don’t put the lamp directly on the lamp
replacement tray because it may fall.
7. Detach the lamp replacement tray together
with the removed lamp.
8. Follow steps 6 to 15 on page 45.
When removing the lamp from the ceiling-mounted projector
When removing the lamp from the ceiling-mounted projector, use the lamp replacement tray packed with the projector or
option lamp to prevent glass fragments from scattering.
• Assemble the lamp replacement tray according to the procedure shown on it.
Replacing the lamp (continued)
Tapes


