


158 C2630M-B (4/08)
7. Click Edit. The Add / Edit NTP Server dialog box opens.
8. Make the desired change.
9. Click OK.
10. Click Apply.
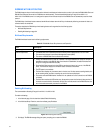
Deleting a NTP Server
To delete a NTP time server:
1. On the DX8100 toolbar, click . The Setup dialog opens to the Camera page.
2. In the Setup dialog box, click . The Network page is displayed.
3. Click the NTP tab. The NTP page is displayed.
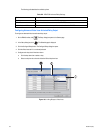
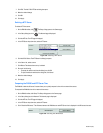
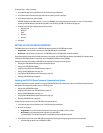
4. In the NTP Server drop-down box, select a NTP server.
Figure 138. Selecting a NTP Server
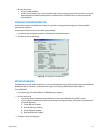
5. Click Add/Edit/Delete. The NTP Server List dialog box opens.
6. In the Server List, select a server.
7. Click Delete. The selected server entry is deleted.
8. Do one of the following:
• To accept the deletion and close the dialog box, click OK.
• To reject the deletion and close the dialog box, click Cancel.
9. Make the desired change.
10. Click Apply.
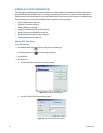
Comparing the DX8100 and NTP Server Time
The DX8100’s “check the difference” feature allows you to quickly compare its time with an external time source.
To compared the DX8100’s time with an external time source:
1. On the DX8100 toolbar, click Setup. The Setup dialog opens to the Camera page.
2. In the Setup dialog box, click Network. The Network page is displayed.
3. Click the NTP tab. The NTP page is displayed.
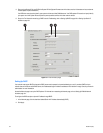
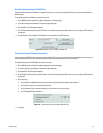
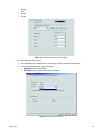
4. In the NTP Server drop-down box, select a NTP server.
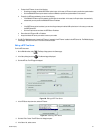
5. Click “Check the Difference.” The difference between the DX8100 server and NTP Server time is displayed in the Difference time area.
Figure 139. Checking Time Differences