


C2630M-B (4/08) 201
MODIFYING A REMOTE SITE
This section describes how to modify a remote site and includes the following topics:
• Editing a Remote Site on page 201
• Deleting a Remote Site on page 201
Editing a Remote Site
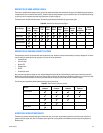
To change the attributes of a remote site:
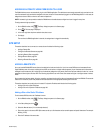
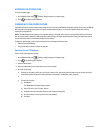
1. On the DX8100 toolbar, click . The Setup dialog box opens to the Camera page.
2. In the Setup dialog box, click .
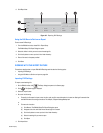
3. Select the site name you want to edit from the “Site IP list” by clicking its site name.
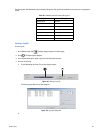
4. Click Edit. The Server Information dialog box opens.
5. Enter a new site name for the remote DVR.
6. Enter the new IP address of the remote site.
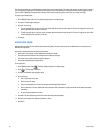
7. If necessary, enter a base port number (9002 is the default).
Unless there is a conflict on your network, you should not change port numbers from their default values. Make sure any changes to port
numbers are made consistently across all DX8100 servers and clients on a network. Client and server ports must be identical.
8. If necessary, enter an upgrade port number (9003 is the default).
9. Click OK.
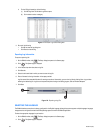
10. Click Apply.
Deleting a Remote Site
To delete an existing site from the site list:
1. Select the site name you want to delete from the “Site IP list” by clicking its site name.
2. Click Delete.
3. Click OK to confirm, or click Cancel to abort the deletion.
4. Click Apply.
SYSTEM SETUP
Users with Power User access and higher can save configuration settings using the system export feature. Previously saved settings can be
loaded into the DVR using system import.
This section describes how to configure system options and parameters, including the following topics:
• Accessing the System Page on page 202
• Working with the Export Feature on page 202
• Working with the Import Feature on page 203
• Using System Logs on page 204
• Selecting the Language on page 206
• Setting the System Time on page 207
• Selecting the Video Format on page 208
• Working with Ctrl+Alt+Del Function on page 208
• Setting Up Auto Reboot on page 209
• Specifying the Data Retention Time Limit on page 209
• Working with Online Help on page 210