


22
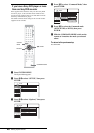
Step 6: Inserting the Batteries
Step 6: Inserting the
Batteries
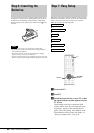
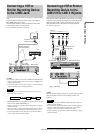
You can control the recorder using the supplied remote. Insert
two R6 (size AA) batteries by matching the 3 and # ends on
the batteries to the markings inside the battery compartment.
When using the remote, point it at the remote sensor on the
recorder.
Notes
• Do not leave the remote in an extremely hot or humid place.
• Do not drop any foreign object into the remote casing, particularly
when replacing the batteries.
• Do not expose the remote sensor to direct sunlight or a lighting
apparatus. Doing so may cause a malfunction.
• If you do not use the remote for an extended period of time, remove the
batteries to avoid possible damage from battery leakage and corrosion.
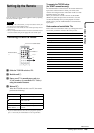
Step 7: Easy Setup
Follow the steps below to make the minimum number of basic
adjustments for using the recorder. If you do not complete Easy
Setup, it will appear each time you turn on your recorder.
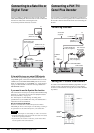
Make the settings in the following order.
m
m
m
m
m
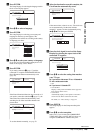
a Turn on the TV.
b Press [/1.
c Switch the input selector on your TV so that
the signal from the recorder appears on your
TV screen.
“Initial settings necessary to operate the DVD
recorder will be made. You can change them later
using Setup.” appears. If this message does not
appear, select “Easy Setup” from “SETUP” in the
System Menu to run Easy Setup. For details, see
“Settings and Adjustments” on page 76.
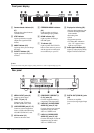
OSD Language Setup
Tuner and Channel Setup
Clock Setup
TV Type Setup
Video Connection Setup
Audio Connection Setup
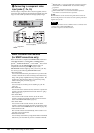
"/1
</M/m/,,
ENTER
RETURN