70
Advanced Editing (Playlist Edit)
l Press </, to select an option on the screen,
then press ENTER.
To capture a scene from the same title, select
“More,” and repeat the steps above.
To capture a scene from another title, select “New
Title,” and repeat the steps above.
m To end scene capture, press </, to select
“No More” and press ENTER.
The display returns to the list of selected titles.
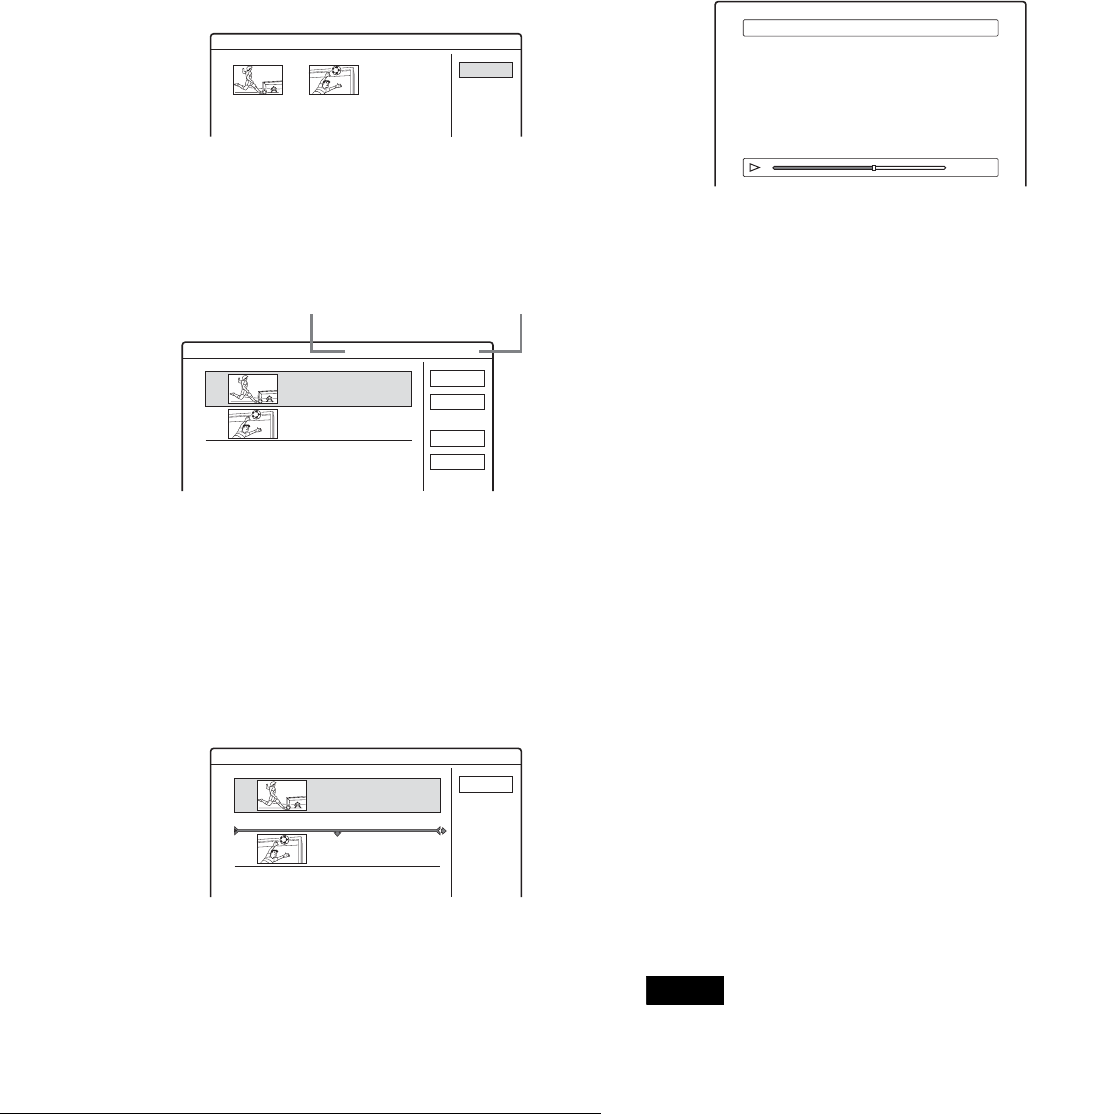
◆ To check the captured scenes in a single title
A Press M/m to select a title from the list of
selected titles, then press ENTER.
The sub-menu appears.
B Press M/m to select “Check Scenes,” then press
ENTER.
The thumbnail pictures of the captured scenes
within the title appear.
n Press </M/m/, to select “Scene List,” then
press ENTER.
The Scene List menu appears with all of the selected
scenes.
◆ To change the scene order (Move)
A Press M/m to select the scene you want to
move, then press ENTER.
The sub-menu appears.
B Press M/m to select “Move,” then press
ENTER.
The display for selecting the insertion point
appears.
C Press M/m to select the insertion point, then
press ENTER.
The scene moves to its new position, and the
display returns to the Scene List menu.
◆ To erase the scene (Erase)
A Press M/m to select the scene you want to
erase, then press ENTER.
The sub-menu appears.
B Press M/m to select “Erase,” then press
ENTER.
C When the display asks for confirmation, press
</, to select “OK,” then press ENTER.
◆ To change the scene contents (Change IN/
Change OUT)
A Press M/m to select the scene you want to
change, then press ENTER.
The sub-menu appears.
B Press M/m to select “Change IN,” then press
ENTER.
The display for setting the IN point appears.
C Repeat steps 9 to 14.
To reset the OUT point, select “Change OUT,”
then repeat steps 10 to 14.
The display returns to the Scene List menu.
◆ To add another scene
Press </M/m/, to select “Add,” then press
ENTER. Repeat steps above.
◆ To preview the entire Playlist title
Press </M/m/, to select “Preview,” then press
ENTER. The captured scenes start to play in the
listed order. When the playback is finished, the
display returns to the Scene List menu.
o Press </, to select “OK,” then press
ENTER.
The scenes are connected to create a new Playlist
title, and the display for entering the title name
appears.
◆ To enter a new name
Select “Enter” and follow the explanations on
page 34.
◆ To use the default name
Press </, to select “OK,” then press ENTER.
A new Title List menu appears with the title of the
entered name.
z Hint
When a Playlist title is created, the “IN” point and “OUT” point will
become chapter marks, and each scene will become a chapter.
Notes
• The picture may pause when the edited scene is played.
• You can capture, move, or change the IN and OUT points for a
maximum of 50 scenes per title.
Check Scenes
2 DEF 20:00-21:00
Close
1 2
Scene List
Total 0:33:28 Scenes 2
OK
Quit
Add
Preview
DEF 20:00-21:00 -1
0:10:26 - 0:23:45
1
2
DEF 20:00-21:00 -2
0:25:00 - 0:45:08
Total number of scenes
Total duration of the selected scene
Move
Cancel
DEF 20:00-21:00 -1
0:10:26 - 0:23:45
Where do you want to move this scene to?
1
2
DEF 20:00-21:00 -2
0:25:00 - 0:45:08
Capture (Set IN point) 2 DEF 20:00-21:00
IN
0:10:26
OUT
0:23:45


