117
6-1 Basic Automatic Editing
Chapter 6 Editing
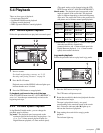
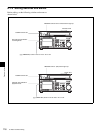
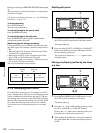
6-1-3 Selecting the Edit Mode
Select assemble or insert mode.
Press one of the following buttons to select the respective
edit mode:
• Assemble mode: [F3] (ASSEMBLE) button in the
HOME menu
• Insert mode: the appropriate INSERT button in the
HOME menu, [F4] (INS TC), [F5] (INS VIDEO), [F6]
(INS AUDIO)
6-1-4 Setting Edit Points
This section describes how to set edit points (IN and OUT
points). In insert mode, a technique called split editing
allows you to set edit points separately for video and audio.
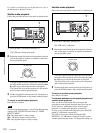
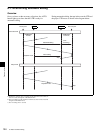
Positioning and setting edit points
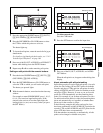
1
Press the RECORDER or PLAYER button to select
the VTR for which edit points are to be set.
The button lights up.
2
Rotate the search dial in jog or shuttle mode to position
the edit point.
For details on jog or shuttle playback, see “5-4-2
Variable Speed Playback” on page 109.
3
Press the IN (or OUT) button while holding down the
ENTRY button.
The time data for the IN (or OUT) point appears in the
menu display.
4
Repeat steps 1 to 3 to set the remaining edit points.
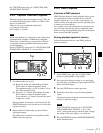
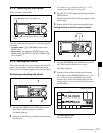
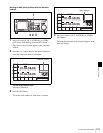
Setting edit points with the numeric buttons
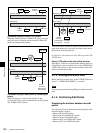
1
Press the RECORDER or PLAYER button to select
the VTR for which edit points are to be set.
The button lights up.
2
Enter the edit point data with the numeric buttons.
For example, to enter 01H00M30S00F, press 1, 0, 0, 3,
0, 0, 0. (You need not input leading zeros. If the
entered value consists of less than eight digits, the
leading digit(s) is (are) set to zero(s) when you press
the SET button.)
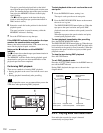
To delete entered data
Press the CLR button.
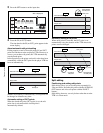
[F3] (ASSEMBLE) button in the HOME menu
[F4] (INS TC) to [F6] (INS AUDIO) buttons in the HOME
menu
32
1
1
34
2
CLR button
PB/EE
PB
RECINH
off
ASSEM-
BLE
off
INS
TC
off
STILL HDCAM-SR
REMAIN:01H06M
! ALT+TC
PLAY LOCK
01
H
04
M
58
S
00
F
01
H
04
M
58
S
00
F
AIN 00:01:10:00 AOUT 00:02:10:00
IN 00:01:10:00 OUT 00:02:10:00
INS
VIDEO
off
INS
AUDIO
INTRP DF F2
INTRP DF 2FO F2
LTC
TCR
LTC
TCR
SS
Data entry window


