


Chapter 4: Media server configuration
40 Installing and Configuring the Avaya S8500 Media Server February 2007
Opening the Maintenance Web Interface
You can use the Maintenance Web Interface to copy license files and authentication files,
service packs, and SAMP update files from the Services laptop to the media server. For how to
open the Maintenance Web Interface, see Accessing the Maintenance Web Interface
on
page 92.
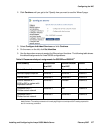
Copying files to the media server
1. From the Maintenance Web Interface, under Miscellaneous, click Download Files.
2. Select File(s) to download from the machine I’m using to connect to the server.
3. Click Browse next to the top field to open the Choose File window on your computer. Find
the files that you need to copy to the media server.
4. Click Download to copy the files to the media server.
The files are automatically copied to the default file location.
Creating a super-user login
Note:
Note: A craft level login can create the super-user login in Release 4.0 or later.
Make sure you have a login name and password that the customer would like for the superuser
login. If you are a business partner, you can also repeat this procedure to add the dadmin login.
To create a login:
Note:
Note: Make sure the customer can change this login, its password, or its permissions
later.
1. Under Security, select Administrator Accounts.
2. Type the login name in the Enter Login ID or Group Name field.
3. Select Add Login, and click Submit.
4. Type susers in the login group field.
5. Type prof18 in the additional groups field. prof18 is the code for the customer superuser.