7. Basic set up procedures
7.3 Install the OLite rental feet
Necessary tools
•19mmwrench.
• Spirit level.
Necessary parts
• OLite rental feet.
• 2 foot beams per rental foot.
• Four M12 bolts per rental foot.
•Shimplates.
How to install the OLite rental feet ?
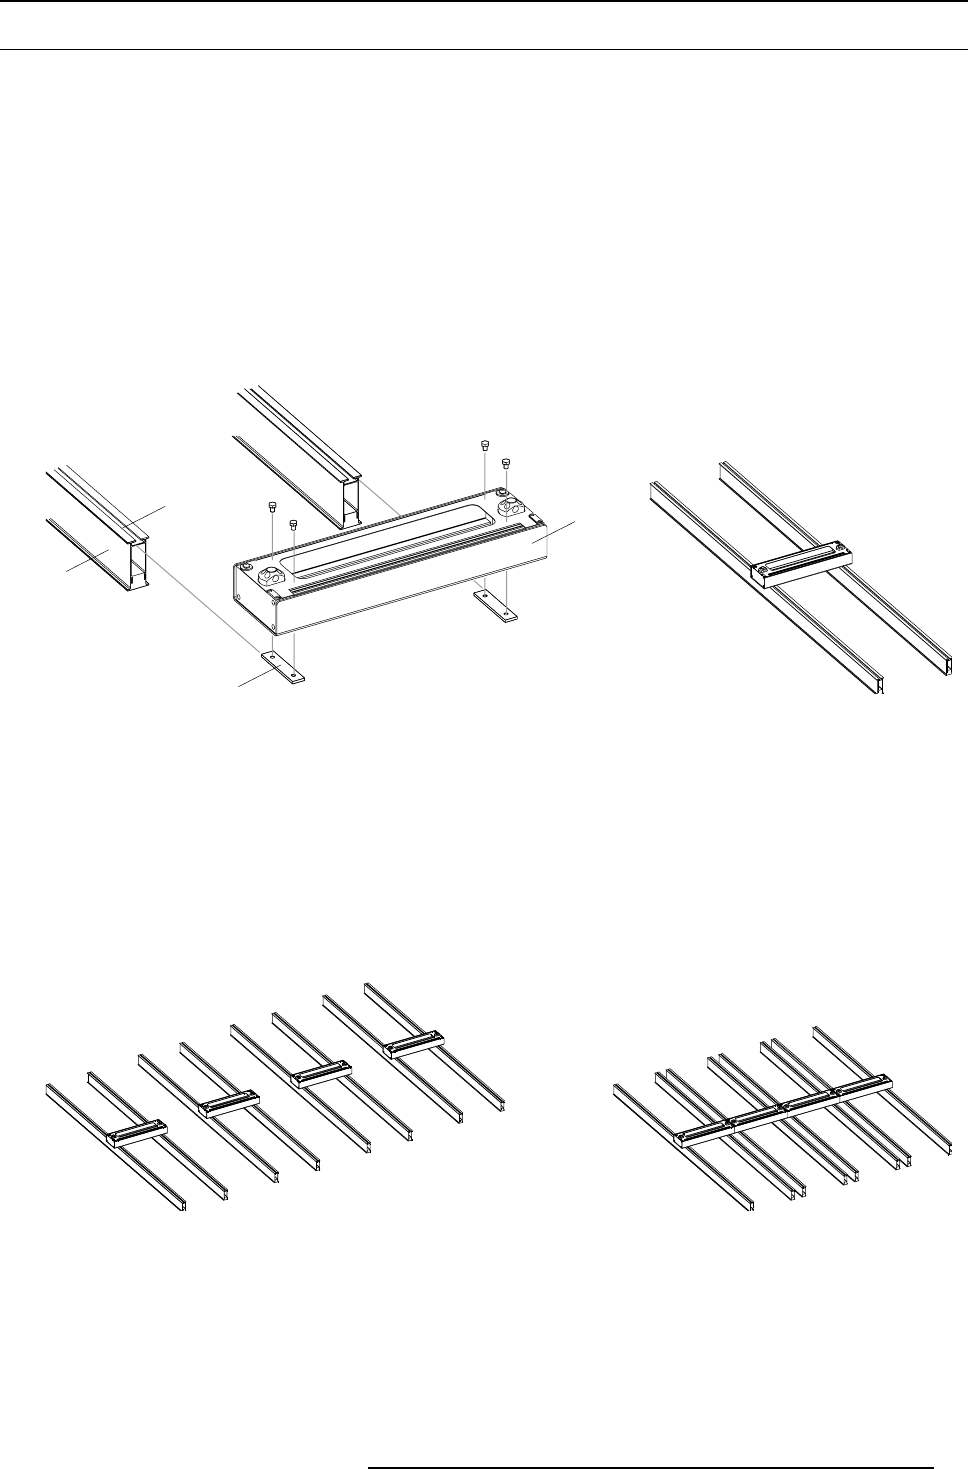
1. Place two foot beams parallel per OLite rental foot on a flat surface.
2. Attach the rental foot rails to the rental foot loosely, using four M12 bolts.
B
D
C
A
Image 7-6
Install rental foot.
A Foot beam.
B Foot beam slot.
C Rental foot rail.
D Rental foot
3. Slide the rental foot with attached rails into the slots of the foot beams. Ensure the front side of the foot will be at the same side
as the LED’s.
4. Fasten the four bolts when the rental foot is in the desired position.
5. Assemble such a rental foot assembly per OLite rental column.
6. Place all assemblies next to each other on their final position. leave a small gap, few millimeters, between the rental feet. Ensure
the rental feet are correctly and equally oriented.
Image 7-7
Placeallassembliesnexttoeachother.
7. Level out the foot beams. If necessary place every 50 centimeters shim plates underneath the foot beams. This to prevent that
the beams bend.
8. Firmly attach the foot assemblies to the floor with fixings, or ballast, or both as required.
R5976832 OLITE RENTAL DISPLAY 29/05/2007
41


