118
Connecting an Over-the-Air Antenna
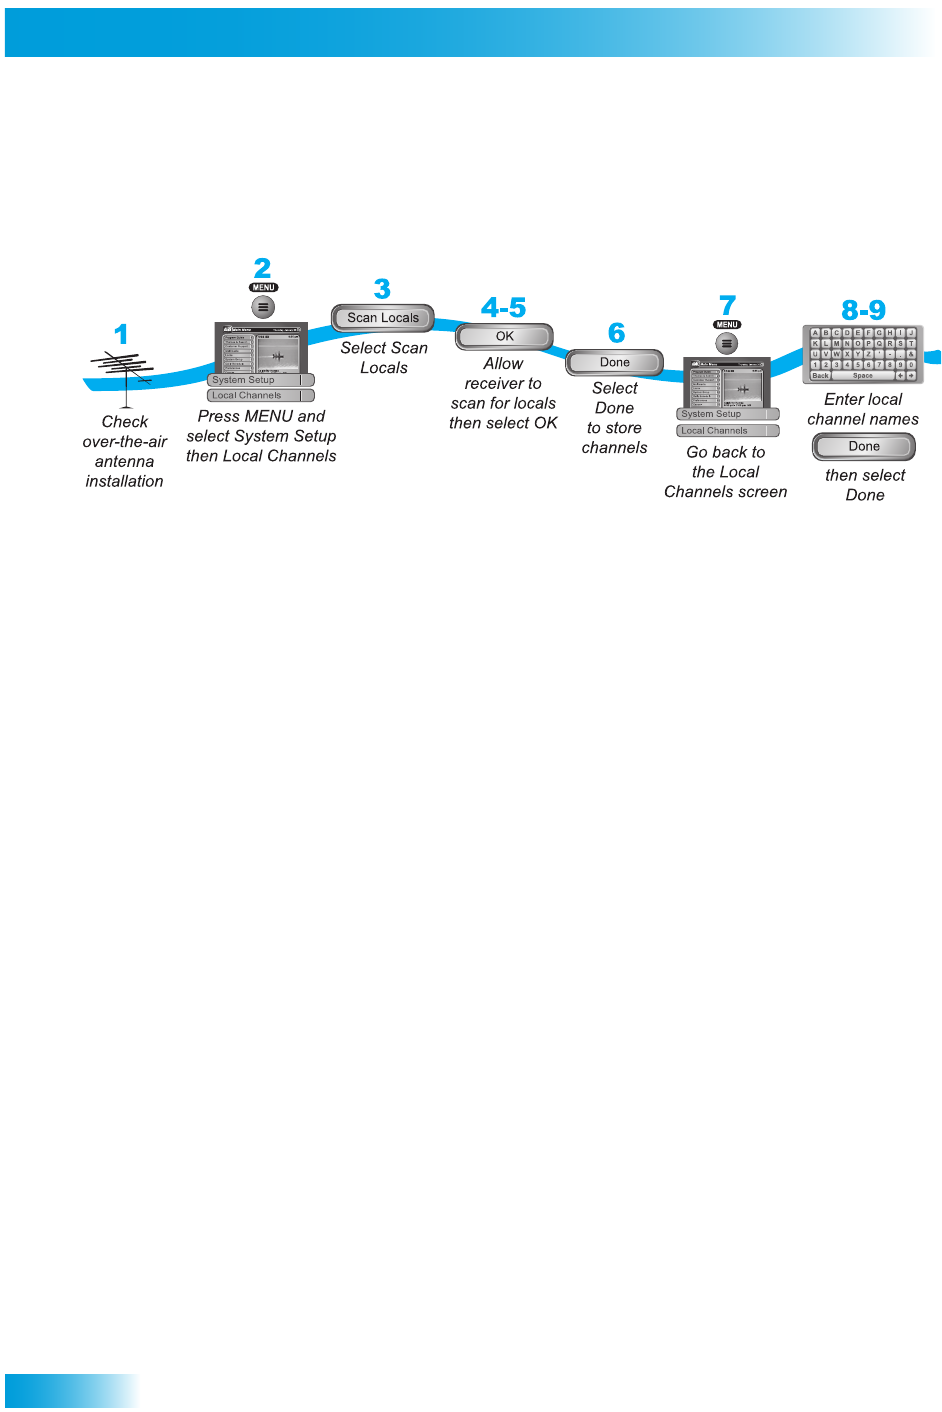
Scanning for Over-the-Air Channels
With your over-the-air antenna adjusted for best reception, use these instructions to scan
for over-the-air channels for the nearby TV.
1 Make sure you have your over-the-air antenna connected to the optional module’s OVER-
THE-AIR ANTENNA IN connection.
2 Press MENU, select System Setup, and then Local Channels. If this is the first time you
have opened the Local Channels screen, it will have no channels listed.
3 Scan for channels by selecting Scan Locals.
4 The scan will take a few minutes to complete. When it finishes, the results will show how
many channels the scan found.
Note: If the scan does not find any channels, verify that the Analog Type is set to Offair
on the HDTV Setup screen. Press MENU, select System Setup, and then HDTV Setup. If
necessary, use the left or right ARROW keys to navigate to Analog Type and then the up
or down ARROW keys to change the setting to Offair. Select Done when finished.
5 Select OK to go back to the Local Channels screen.
Note: If the channel number says None, you have not yet assigned this channel a network
affiliation or name. The arrow at the bottom left means that there are more channels off the
bottom of the screen, which you can get to with the ARROW keys if you wish to edit their
names or remove them.
6 If you want to name the over-the-air channels, continue to the next step. If you do not want
to name these channels, select Done. You will then be taken out of the menus and back to
watching TV.
7 Select a channel and then select Edit Name to modify the way the channel name displays
on your screen.
8 Use the virtual keyboard on the screen to select the letters of your channel name.
9 When you are finished making changes, select Done.
