


46 THIS ITEM IS NOT AVAILABLE. PLEASE CONTACT PIONEER FOR INFORMATION
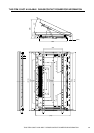
3)Mounting the plasma display
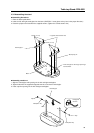
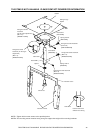
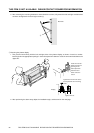
1Remove the hole rivets (quantity: six) from the rear of the plasma display.
2Mount the supplied monitor mount bolt assembly (three per side) to the mount openings at the rear of the display.
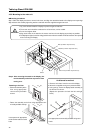
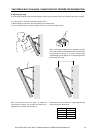
3Loosen the upper mount screws securing the left and right monitor bracket and tilt the brackets to full extension. (Do
NOT loosen the lower screws.)
4Lift the plasma display and insert the monitor mount bolt assemblies into the monitor brackets.
5
To avoid twisting and deforming the plasma display, always tighten the nut for the monitor mount bolt assembly
(three per side) after loosening the upper mount screws of the monitor brackets.
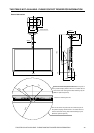
6Adjust the tilt of the plasma display (tiltable 25 degrees for horizontal).
Determine the desired angle, then retighten the upper mount screws for both the left and right monitor brackets.
Holes in the monitor brackets serve as angle marks (in 5- degree increments).
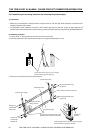
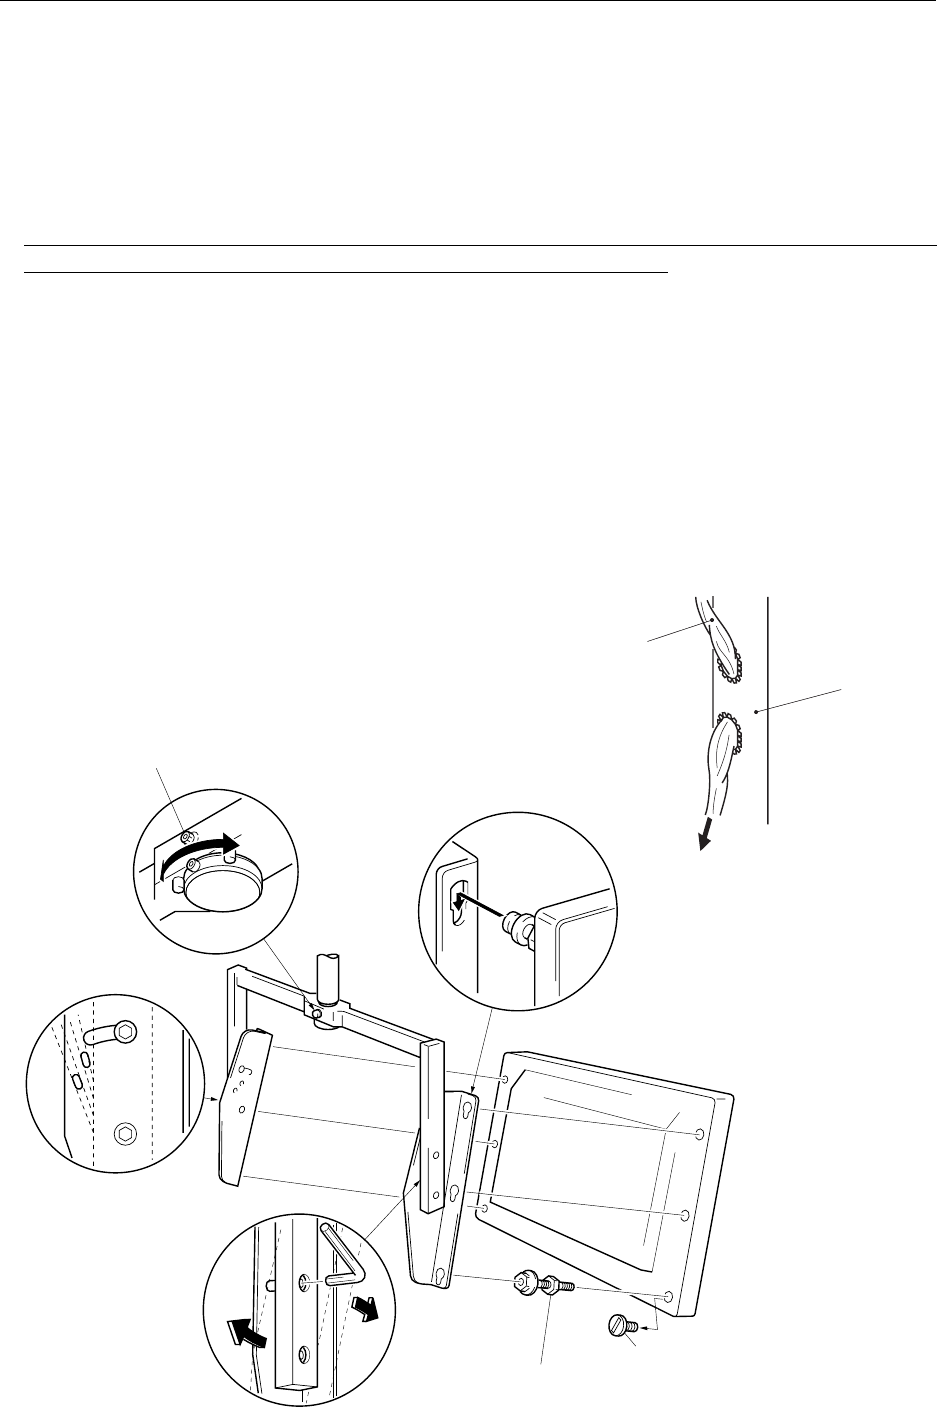
7Adjust the left and right rotational angle of the plasma display (panning over a range of 45 degrees on each side).
Hold the monitor frame and rotate the display to the desired angle, then secure the display assembly by tightening
the vibration-preventing hexagonal socket head bolts (M6 x 30).
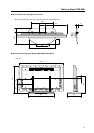
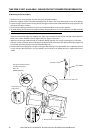
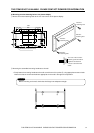
8Connect cables to the display by running them through cable openings in the post COMP. If the cables are too thick
to pass through cable openings in the post COMP, connect them to the display directly or replace with thinner
cables.
Hexagonal socket head bolt
(vibration preventive)
(M6 x 30)
[SME60H300FZK]
2 Monitor mount bolt assembly
1 Hole rivet
Holes serving as
angle marks
7
4
6
3
THIS ITEM IS NOT AVAILABLE. PLEASE CONTACT PIONEER FOR INFORMATION
Connection cable
Post COMP
To connector on the main unit