


88
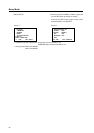
Integrator Mode
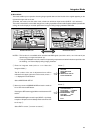
Screen 1
]
MENU – –
WHITE BALANCE
SCREEN
ADDITIONAL SET UP
TOTAL INITIALIZE
3PICTURE
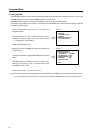
Screen 2
]
PICTURE – –
BRIGHT 128
COLOUR 64
TINT 64
SHARP 128
DETAIL 128
3CONTRAST 128
INITIALIZE
EXIT
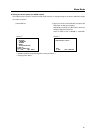
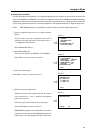
Screen 3
]
PICTURE – –
CONTRAST 128
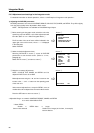
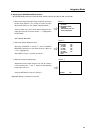
1 Before entering the Integrator mode, switch the unit to the
specific input (one of INPUTs 1-4) in which adjustments will
be made. (Refer to “5.4.1 About Integrator Mode.”)
The ID number of the set of items will be indicated in the
upper right corner of the screen, where “– –” is displayed
in the illustration.
Select PICTURE.
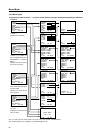
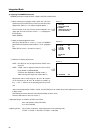
2 Select the desired adjustment item.
Selecting INITIALIZE in screen 2 resets all PICTURE
parameters to their default values. (Refer to “5.4.3,”
paragraph 9).)
Select EXIT in screen 2 to return to screen 1.
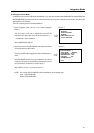
3 Make the necessary adjustments.
NOTE: COLOUR, TINT, SHARP, and DETAIL can’t be
adjusted if INPUT 3/4 is set to RGB.
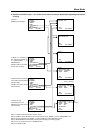
Make adjustments using the “2“ and “3” buttons on the
remote or the “–” and “+” buttons on the operating panel
of the main unit.
Values set and adjusted here, except for DETAIL, serve as
median values when adjustments are made in Menu mode.
Press the SET button to return to screen 2.
5.4.3 Adjustments and settings in the Integrator mode
For detailed information on button operations, refer to “5.4.2 Example of Integrator mode operation.”
1) Adjusting the PICTURE parameters
PICTURE parameters here include CONTRAST, BRIGHT, COLOUR, TINT, SHARP, and DETAIL. They differ slightly
from the picture quality items adjustable in Menu mode.
NOTE: TINT adjustment is unavailable for PAL/SECAM signal inputs.
<Adjustable Range> 0 to 255 for CONTRAST, BRIGHT, SHARP, and DETAIL
0 to 127 for COLOUR and TINT
* About DETAIL
Smaller + DETAIL Value = Larger
Screen noise reduced Details of fine images (of the lawn, for example)
become distinct.