English 3
Network Connection Procedure
To operate the DVR through a network, first setup the DVR and computer and then perform the predetermined connection
operations using the computer.
1 NETWORK SET Settings of DVR
Select NETWORK SET from the main menu of the DVR and
make the following settings to allow the DVR to work with a
network connection. Refer to the instruction manual of the
DVR for details.
1 NETWORK CONTROL
To use network operation change to "ON (NETWORK)"
or "ON (DVR)".
Selections:
• ON (NETWORK):
Gives priority to network operations and allows all
users (ID1 to ID3) to access.
• ON (DVR):
Gives priority to DVR operations and limits the users
who can access the network to ID1 users only.
• OFF:
Network operations are not allowed.
2 NETWORK STATUS
Sets whether or not the "NETWORK CONTROL"
message will display on the monitor connected to the
DVR when connected to the network.
3 IP ADDRESS/SUBNET MASK/GATEWAY
Set each item in a range of 0 to 255.
Ask the network administrator for IP addresses and
subnet masks required to set the network.
4 PORT
Normally set to "80".
5 ID/PASSWORD
An individual PASSWORD can be set according to the
operation authority.
2 TCP/IP Settings of the Computer
Setup TCP/IP according to each OS for the computer being
used.
The setup example shown below is for Windows XP.
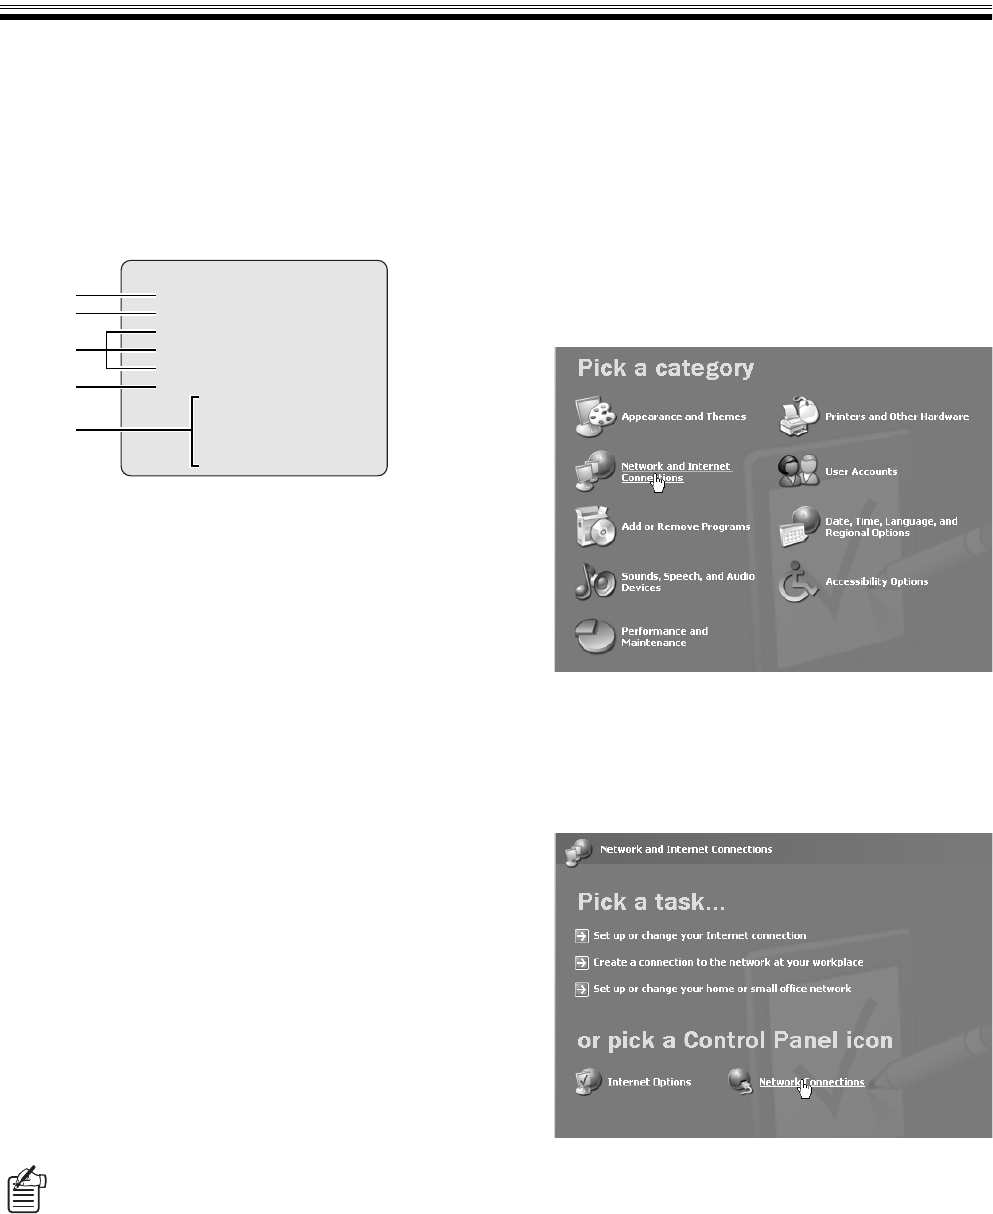
1
Click [Network and Internet Connections] of
[Control Panel].
The "Network and Internet Connections" screen will
display.
2
Click [Network Connections].
The "Network Connections" screen will display.
The settings of the LAN card being used (Ethernet
adapter) display in the [LAN or High-Speed Internet]
column.
The IP address, subnet mask, gateway, port, and
password settings can be changed using the
computer. (Refer to P34)
<NETWORK SET>
NETWORK CONTROL : OFF
NETWORK STATUS : ON
IP ADDRESS : 192.168. 0. 1
SUBNET MASK : 255.255.255. 0
GATEWAY : 0. 0. 0. 0
PORT : 00080
ID PASSWORD (4-8)
ID1 : 1111----
ID2 : 2222----
ID3 : 3333----
1
2
3
5
4


