


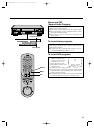
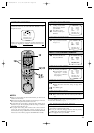
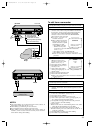
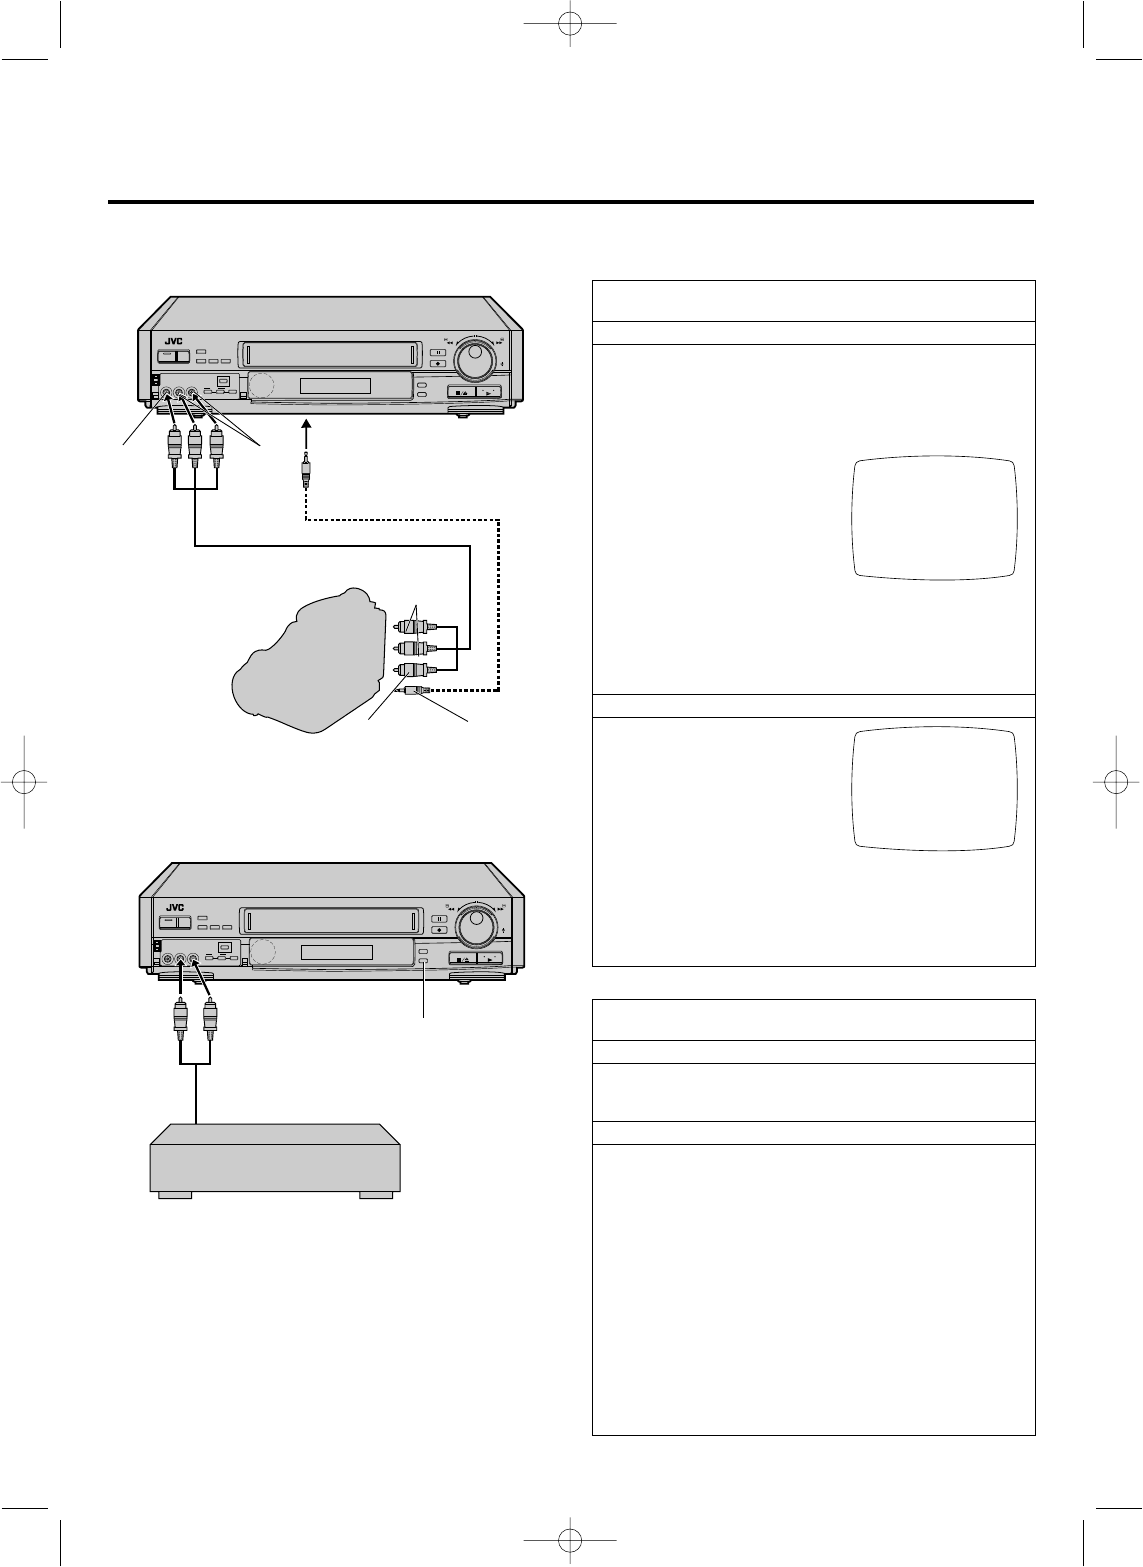
Tape-to-tape editing is also possible using a camcorder (equipped
with playback facility) as the player and your VCR as the recorder.
PREPARATION
1 Connect the camcorder's VIDEO OUT and AUDIO OUT
connectors to the VCR's front panel VIDEO IN and AUDIO
IN connectors. If using a master edit control equipped JVC
camcorder connect the PAUSE/SPECIAL FUNCTION
connector on the rear of the VCR to the REMOTE/EDIT
OUT connector on the comcorder.
Ⅲ Use the L connector for
monaural connection.
Ⅲ When a Master Edit Control-
equipped JVC camcorder is
used, the camcorder is capable
of controlling your VCR.
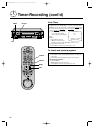
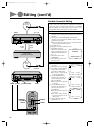
1 Press MENU, SET, and
SELECT as many times
as necessary to access the SPECIAL FUNCTION
screen. (
੬ p. 7)
2 Press SET to choose "R.A.EDIT/PAUSE".
3 Press MENU as many times as necessary to exit.
● Refer to camcorder's instruction manual for set-up
procedure.
OPERATION
2 Press MENU, SET and
SELECT as many times as
necessary to access the "AUX
INPUT" screen. (
੬ p. 7)
3 Press SET to choose "FRONT".
4 Press MENU as many times as
necessary to exit.
5 Set the VCR's input mode to
AUX by pressing digit key "0". "AU" will appear instead of a
channel number.
6 Put the camcorder in the Play mode.
7 Put the VCR in the Record mode.
● Refer to the camcorder/recorder's instruction manual for
operation instructions.
33
+
–
0
0
0
0
0
0
0
0
0
0
0
0
0
0
0
0
0
0
0
0
0
0
0
0
0
0
0
0
0
0
0
0
0
0
0
0
0
0
0
0
0
0
Recorder Your VCR
Player
AUDIO
IN
To the rear panel
PAUSE/SPECIAL
FUNCTION connector
Mini-plug Cable (provided)
(JVC camcorder only)
VIDEO
IN
Camcorder
To edit from a camcorder
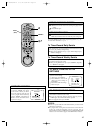
AUX INPUT
Ł FRONT
REAR
PRESS (SET +/–) FOR CHOICE
PRESS (MENU) TO END
AUDIO OUT
VIDEO OUT
EDIT
+
–
0
0
0
0
0
0
0
0
0
0
0
0
0
0
0
0
0
0
0
0
0
0
0
0
0
0
0
0
0
0
0
0
0
0
0
0
0
0
0
0
0
0
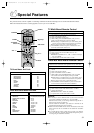
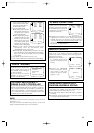
A.DUB
Audio conponent
(CD player etc.)
Audio Dubbing replaces the normal audio sound of a previously
recorded tape with a new soundtrack.
PREPARATION
1 Connect an audio component to the recorder's front panel
AUDIO L, R connectors. (For monaural equipment, use the L
connector.)
OPERATION
2 Press MENU, SET and SELECT as many times as necessary
to access the "AUX INPUT" screen. (
੬ p. 7)
3 Press SET to choose "FRONT".
4 Press MENU as many times as necessary to exit.
5 Set the VCR's input mode to AUX by pressing digit key "0".
"AU" will appear instead of channel number.
6 Start playback and engage the Still mode at the point from
which you wish to start audio dubbing.
7 Press A. DUB.
Ⅲ Your VCR enters the Audio Dubbing-Pause mode. (REC
blinks, PLAY and PAUSE light up on the FDP.)
8 Start playback of the audio source, and then press PLAY.
Ⅲ Audio dubbing will start. (REC blinks and PLAY is
displayed on the FDP.)
9 Pressing PAUSE temporarily stops audio dubbing.
0 Press STOP to stop audio dubbing.
Audio Dubbing
NOTES:
Ⅲ After audio dubbing, the normal audio track remains selected. To
hear the Hi-Fi tracks, select "Hi-Fi"
੬ p.18.
Ⅲ Audio dubbing is possible using the rear connectors.
Ⅲ The AUX INPUT must be selected as the audio source.
Ⅲ Audio dubbing will stop automatically at the counter reading of
"0:00:00", and the recorder will enter the Play mode. Check the
counter before starting audio dubbing.
SPECIAL FUNCTION
ŁR.A.EDIT/PAUSE
AV COMPU-LINK
PRESS (SET +/–) FOR CHOICE
PRESS (MENU) TO END
HR-IP820U-EN-2 97.5.20 5:33 PM Page 33