


15
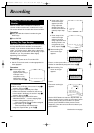
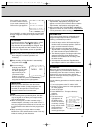
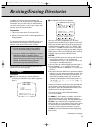
If the number you entered
is not in the VCR's memory
(if you made a mistake), the
screen to the right appears:
Press CANCEL, or wait a few seconds, and the TAPE
# screen reappears. Reinput the Tape Number. Go to
step 6.
4 Start recording. Since a Tape Number has already
been assigned, no further operations are
necessary.
5 Start recording. A Tape Number is automatically
assigned. Go to step 6.
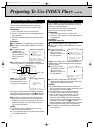
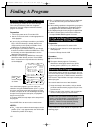
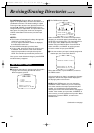
6 Once recording is
finished, press STOP/
EJECT to take the tape
out. When ejecting a
tape for which you've
just entered a tape
number, or a tape to
which a number has just been automatically
assigned, the display to the right appears:
NOTES:
● If the recording time is particularly short, the data
may not register in the library and a tape number
may not be assigned.
● When recording onto a VHS-C cassette using a
cassette adapter, a directory is not made. Even if it
were, the program times would not be accurate, and
the VCR would not be able to find the program start
points.
● When recording over a tape made on another
INDEX Plus+ VCR, old directories remain. This may
inhibit the making of new directories.
● During recording, if you press INDEX Plus+, the
Tape Number, tape position and program title
appear on screen (if the VCR was able to read the
Tape Number, tape position and program title).
● After recording ends, "PLEASE WAIT A MOMENT"
appears on screen for a few seconds.
No operations
can be performed until the message disappears.
NO DIRECTORY
AVAILABLE FOR TAPE#0123
PRESS(CANCEL)TO RETURN
PRESS(INDEXPlus+)TO EXIT
PLEASE LABEL THE TAPE
TAPE# 123
IF OK,PRESS(ENTER)
IMPORTANT
Before you press ENTER to clear the screen,
write the tape number (if newly assigned or not
recorded) on the tape label. This will help to
eliminate accidents and confusion later.
ATTENTION
If you don't input the Tape Number within 1 minute
after the first screen in step 3 first appears, a
Tape Number will automatically be assigned. That
means that tape will have two numbers. Be sure
to input your Tape Number as soon as possible.
INFORMATION:
In the case of a tape that has accidentally been
assigned multiple Tape Numbers, perform the
following consolidation procedure:
1. Insert the tape, and the VCR reads the Tape
Number at the current tape position. (Refer to
page 13 of this instruction manual.)
2. Find a location on the tape where another
Tape Number is recognized, play the tape back
for a few seconds and press INDEX Plus+.
3. The directory appears, and program titles that
appeared separately under different Tape
Numbers are combined into one listing, under
the older number.
4. If the tape has more than two Tape Numbers,
repeat steps 2 and 3 for each additional number.
ATTENTION:
When this VCR's memory becomes full, you
cannot register any more directories. Be sure to
occasionally check the status of memory. When it
becomes full, cancel unnecessary directories.
(Refer to "Erasing A Directory" on page 21 of this
instruction manual.)
Use the following procedure to check the status of
memory.
1. Turn on the power to the TV and the VCR.
2. Set the TV to the channel or mode appropriate
for video playback.
3. Insert an HR tape.
4. Press INDEX Plus+. The tape's directory
appears.
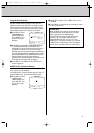
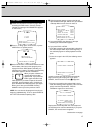
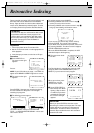
5. Press F3.
6. The screen to the
right appears. At
the bottom of the
screen, the amount
of memory currently
being used is shown.
It begins blinking
when there's no
memory space open.
UTILITY
1 IMPORT OTHER LIBRARY
2 DISABLE INDEX PLUS+
3 ERASE LIBRARY
4 BACK-UP INFORMATION
MEMORY USED
PRESS(1),(2),(3)or(4)
PRESS(CANCEL)TO RETURN
HR-IP820U INDEX Plus+ 97.5.20 5:45 PM Page 15