5-3SectionL: Data Link
70
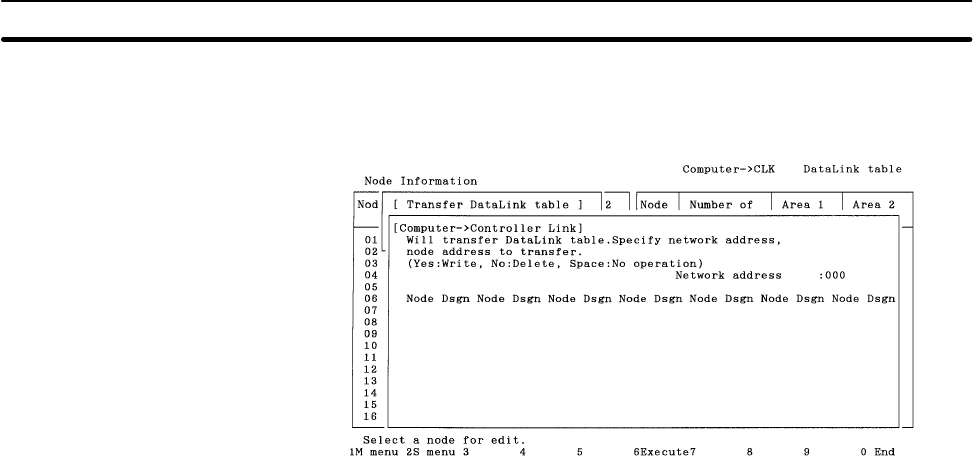
1, 2, 3... 1. Select “W: Computer → Controller Link” from the Transfer Data Link table
Menu. The following window will be displayed to prompt you to specify the
target nodes.
2. Specify the address of the Controller Link Network containing the nodes to
which data link tables are to be written. Enter the network address with Nu-
meric Keys, then press the Enter Key.
When the Enter Key is pressed, the nodes on the specified network will be
checked and displayed in ascending order of node address.
When node addresses are displayed, Yes or No will be displayed as follows,
depending on the number of nodes set in the data link table in the memory:
Nodes for which the number of nodes is not 0: Yes (data link tables written)
Nodes for which the number of nodes is 0: No (data link tables removed)
3. Specify the processing for each node. Use the Cursor Keys to move the cur-
sor to the node, then press the Enter Key. Each time the Enter Key is
pressed, the display will change in the following order.
Yes (data link tables written)
↓
No (data link tables removed)
↓
No display (nothing done, i.e., data link tables not transferred nor removed)
↓
Yes (data link tables written)
4. After specifying the processing for each node, press the F6 (Execute) Key.
The transfer results screen will be displayed and data link tables will be writ-
ten or removed as specified.
