Connecting up
02
10
En
Chapter 2
Connecting up
Basic connections
Important
• When connecting this system or changing connections, be sure to switch power off and disconnect the power
cord from the wall socket.
After completing all connections, connect the power cords to the wall socket.
Note
• When using the display unit in a wall-mounted
location, take full precautions to prevent the unit
from accidentally falling.
• Screws and other fixtures for use in wall mounting
are not included.
WARNING
• Pioneer bears no responsibility for accidents
resulting from faulty assembly or installation,
insufficient mounting strength of walls, mounting
fixtures (or other building fixtures), misuse or natural
disasters.
AC IN
DIGITAL
AUDIO OUT
COAXIAL
HDMI OUT
CONTROL
G-LINK
IN
AV 1 (RGB) ñ TV
AV 2 (INPUT 1/DECO
DER)
S-VIDEO
VIDEOAUDIO
L
R
INPUT 3
COMPONENT VIDEO OUT
Y
P
B
P
R
ANTENNA
IN
OUT
ANTENNA(DIGITAL)
IN
OUT
5 V
30 mA
OUTPUT
MCACC
SETUP MIC
SYSTEM CONNECTOR
AC IN
CONTROL IN
CONTROL
USE ONLY WITH DISPLAY UNIT.
SEE INSTRUCTION MANUAL.
OUT
SUBWOOFER
CENTER FRONT
SURROUND
DVD/DVR1
(COAXIAL)
DVD/DVR2
(OPTICAL)
DIGITAL
(OPTICAL)
SPEAKERS
DIGITAL
AUDIO INPUT
ANALOG
AM LOOP ANTENNA
ANTENNA
FM UNBAL 75
RL
RL
R
L
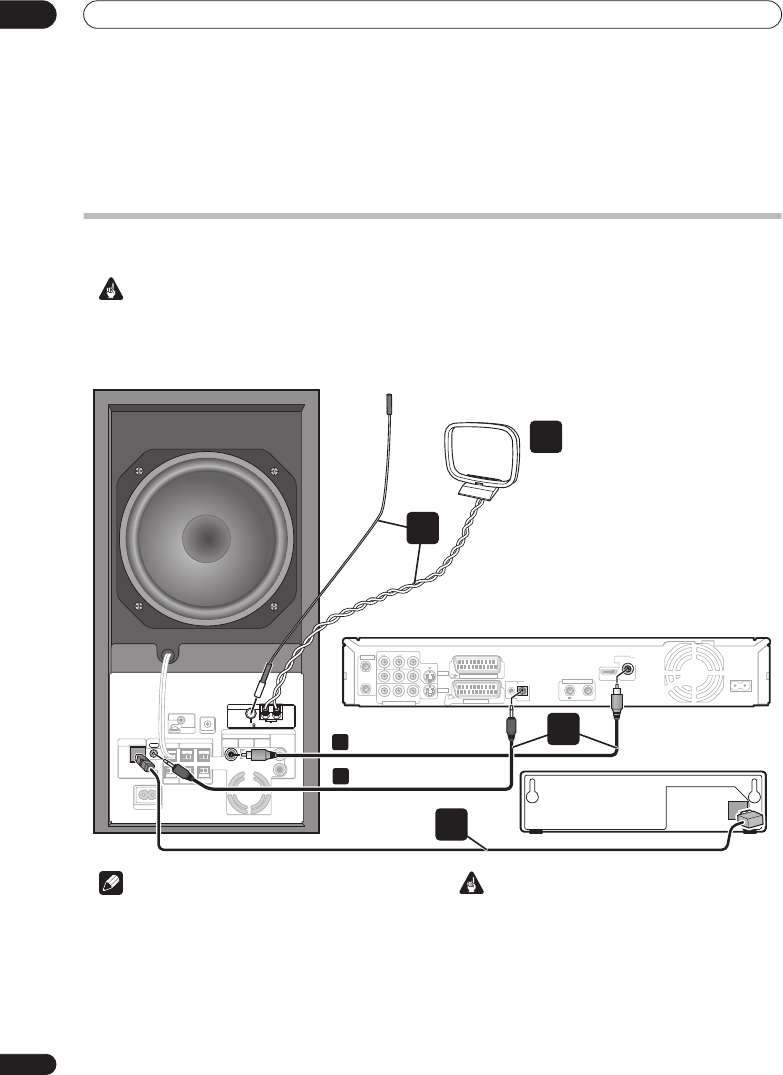
AM loop antenna
Display unit
Receiver subwoofer (SX-LX60D)
3
Display cable
FM antenna
4
HDD/DVD Recorder (DVR-LX60D)
Coaxial cable
Control cable
1
a
b
2
RCS-LX60D_WV.book 10 ページ 2007年4月24日 火曜日 午後7時57分


