


62
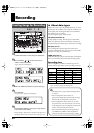
Re-recording Only a Mistake (Punch-in/out)
Rev0.10
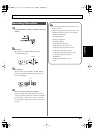
• To erase an auto punch-in location, press and hold
AUTO PUNCH [ON/OFF] and then press [IN].
• To erase an auto punch-out location, press and hold
AUTO PUNCH [ON/OFF] and then press [OUT].
When the settings are erased, the AUTO PUNCH
[ON/OFF], [IN], and [OUT] go out.
If you want to save the auto punch in/out settings in
the currently selected song, hold down [STOP], and
press [REC].
* During updating, “Keep power on!” appears in the upper
line of the display, while the lower line shows what is being
processed.
As an example of use, the explanation below assumes you
are using the auto punch in/out to re-record a portion of
track 1, which is a track to which you have already
recorded.
1
Press REC TRACK [1].
REC TRACK [1] lights alternately in orange and green.
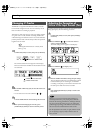
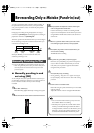
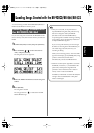
2
Place the fader for track 1 at the location shown
below.
fig.01-180
3
Start playback and adjust the volume of the input
source using the REC LEVEL dial.
Listen to the track you will be re-recording and the
input source and adjust the volume of the input source
using the REC LEVEL dial so that it is the same level as
the track.
4
Move to a position before where you want to start re-
recording and press AUTO PUNCH [ON/OFF].
The button lights up, showing that the auto punch in
and out have been set.
5
Press [REC] to place the BR-600 in recording standby
and then press [PLAY].
Recording automatically starts at the auto punch-in
location, so start playing what you want to record.
At the point you specified for punch-out, the track will
automatically change back to play mode.
6
Press [STOP] to stop recording.
* During updating, “Keep power on!” appears in the upper
line of the display, while the lower line shows what is being
processed.
7
Listen to the re-recorded results.
Return the song to a point earlier than you re-recorded,
and play it back.
Adjust the volume of track 1 using the TRACK fader.
■
Erasing a registered auto
punch in/out location
■
How to record
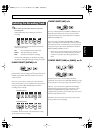
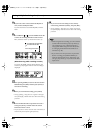
If you want to punch in/out at a previously set locator
point, press [LOCATOR] to move to the locator point
(p. 72), and press AUTO PUNCH [IN] or AUTO
PUNCH [OUT].
BR600_e2 62 ページ 2006年4月17日 月曜日 午前9時3分