Operation Instruction
6
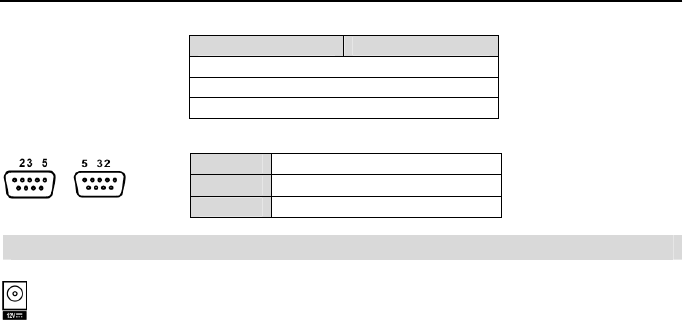
Connector Pin Outs:
Master Unit Slave Unit
RX → To → TXD
TX → To → RXD
GND → To → GND
NOTE: Refer to the following for pin-out details for the 9-pin connector of the slave unit.
Male
Female
Pin 2
RXD (Receive Data)
Pin 3
TXD (Transmit Data)
Pin 5
GND (Ground)
Power Cord Connector
Connect the connector from the adaptor to the DVR, and connect the AC power cord
to the adaptor and then to the wall outlet.
WARNING: ROUTE POWER CORDS SO THAT THEY ARE NOT A TRIPPING HAZARD.
MAKE CERTAIN THE POWER CORD WILL NOT BE PINCHED OR ABRADED BY
FURNITURE. DO NOT INSTALL POWER CORDS UNDER RUGS OR CARPET.
THE POWER CORD HAS A GROUNDING PIN. IF YOUR POWER OUTLET DOES NOT
HAVE A GROUNDING PIN RECEPTACLE, DO NOT MODIFY THE PLUG. DO NOT
OVERLOAD THE CIRCUIT BY PLUGGING TOO MANY DEVICES IN TO ONE CIRCUIT
.
CAUTION: Ensure the DVR is not near any heat source that could cause overheating.
CAUTION: The DVR does not have an internal fan so leave a clearance of at least 6
inches near ventilation hole areas on each side panel of the unit for proper ventilation.
Your DVR is now ready to operate. Refer to Chapter 3 ─ Configuration and Chapter 4 ─ Operation.


