


37
•••••••••••••••••••••••••••••••••••••••••••••••••••••••••••••••••••••••••••••••••••••••••••••••••••••••••••••••••••••••••••••••••••••••••••• Operations
ENGLISH
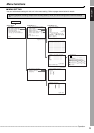
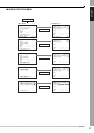
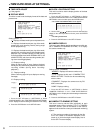
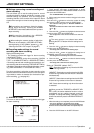
■ SPLIT4 SCREEN SETTING
This menu is used to set the camera number to be displayed
in the screen splited in 4.
1. Press the SET UP button
}
<SETTINGS>
}
Select
“SPLIT4 SCREEN SETTING” in the <MPX DISPLAY
SETTINGS> screen and then press the ENTER button.
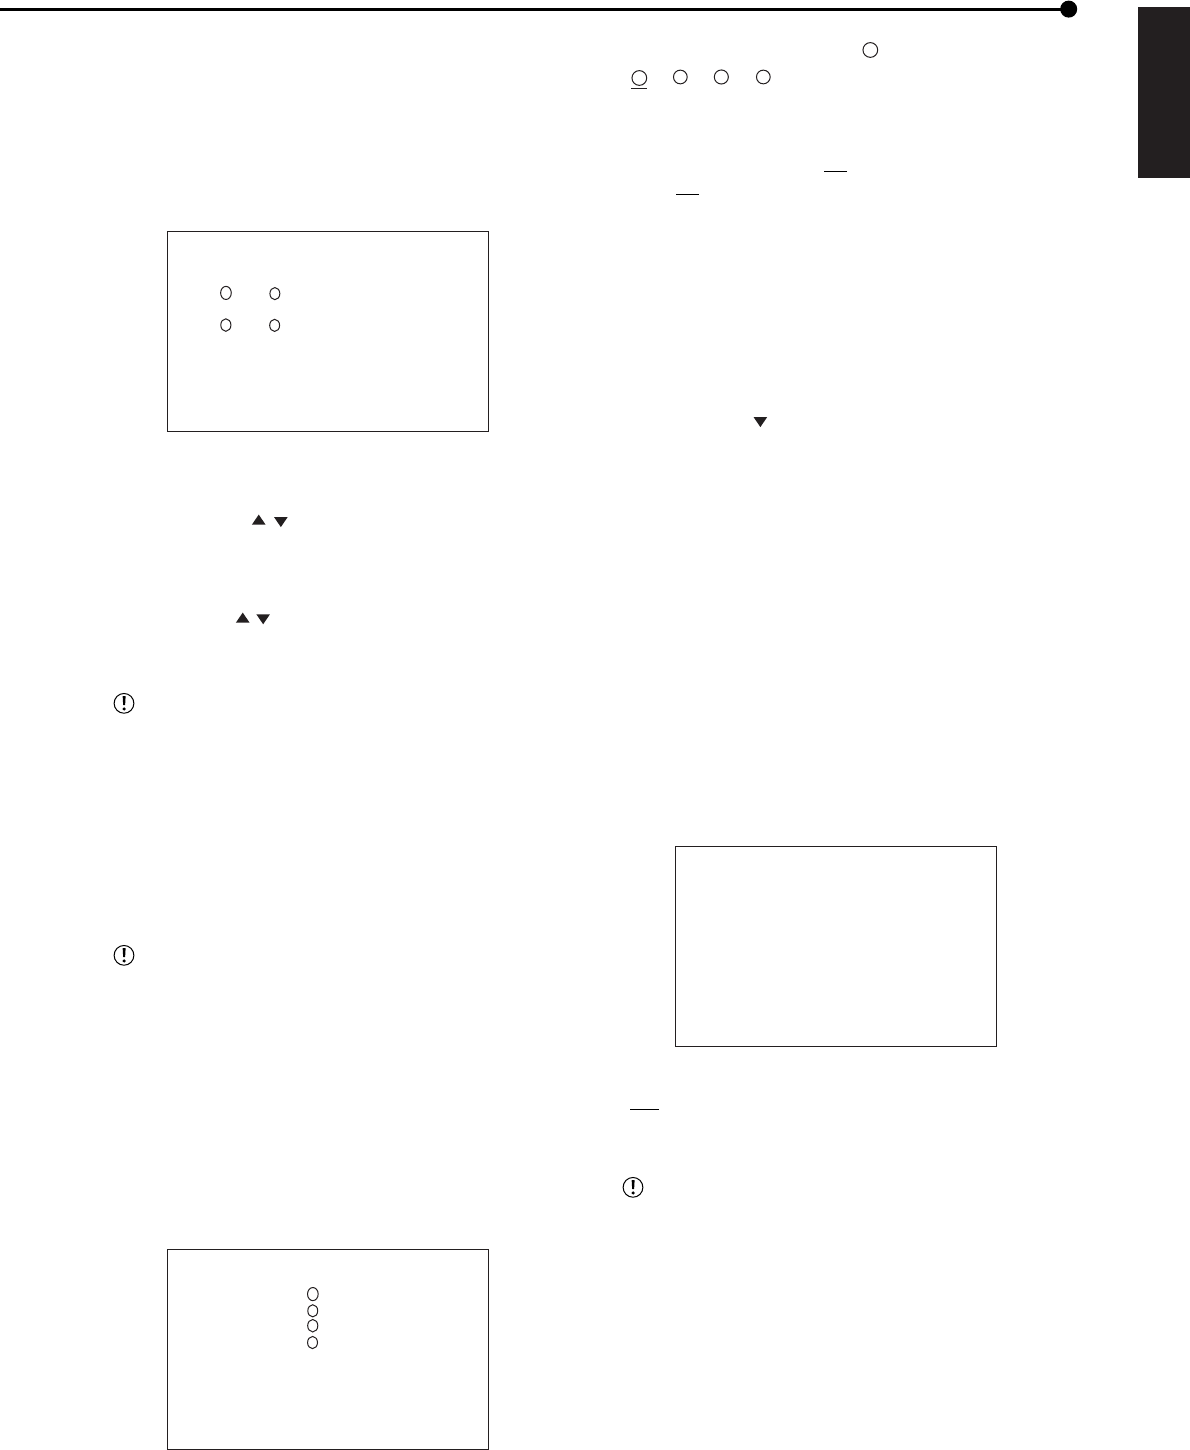
• The <SPLIT4 SCREEN SETTING> screen appears.
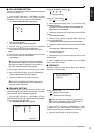
4
1
2
3
<SPLIT4 SCREEN SETTING>
>>
SPLIT4
( ) ( )
( ) ( )
2. Press the ENTER button.
• The (upper left) camera number is highlighted.
3. Press the JOG , buttons to move the highlighted
camera number and then press the ENTER button.
• The background of the camera number turns red and
flashes.
4. Press the JOG , buttons to display the camera number
to be set and then press the ENTER button.
• Flashing stops.
The same camera number can be set repeatedly
in one split screen display. In this case, the video of
that camera number is displayed in the position of
the lowest camera number during playback.
5. Repeat steps 3 and 4 to set the desired camera number.
6. When completed with setting, press the CLEAR button.
• Setting is determined and the cursor reappears.
7. Press the CLEAR button or the SET UP button.
The <SPLIT4 SCREEN SETTING> screen is not
cleared even when pressing the SET UP button while
a camera number is flashing.
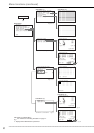
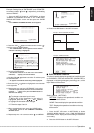
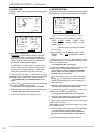
■ SEQUENCE SETTING
This menu is used to set the switching order of the
connected cameras, or to set the switching time. (The same
camera number can be displayed repeatedly.)
1. Press the SET UP button
}
<SETTINGS>
}
Select
“SEQUENCE SETTING” in the <MPX DISPLAY SETTINGS>
screen and press the ENTER button.
• The <SEQUENCE SETTING> screen appears.
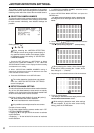
4
1
2
3
<SEQUENCE SETTING>
SEQUENCE NUMBER TIME
>>
1 2S
2 2S
3 2S
4 2S
CLEAR:BACK
Setting of “NUMBER” (default: “
1
”)
“
1
,” “
2
,” “
3
,” “
4
,” “ - ”
“ - ”: Displays nothing.
Setting of “TIME” (default: “
2S”)
“1S,” “
2S,” • • • • • “30S”
2. Select the desired display order (1 to 4) and press the
ENTER button twice.
• The camera number is highlighted when the ENTER button
is pressed once. When the button is pressed again, the
background turns red and flashes.
3. Display the desired camera number and press the ENTER
button.
• The setting is determined.
4. Press the JOG button to highlight “TIME” setting and
press the ENTER button.
• The background of the setting item turns red and flashes.
5. Display the desired switching time and press the ENTER
button.
• The setting item is determined and flashing stops.
6. Press the CLEAR button.
• The cursor reappears.
7. Repeat steps 2 to 5 to set other displaying order and the
switching time.
8. When completed with all the settings, press the CLEAR
button or the SET UP button.
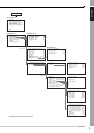
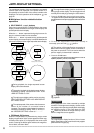
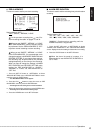
■ INTERLACE
This item is used to set the picture quality when splitting
the screen of camera video.
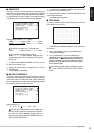
<MPX DISPLAY SETTINGS>
SPLIT4 SCREEN SETTING
SEQUENCE SETTING
>>
INTERLACE ON
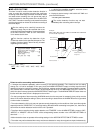
Setting (default: “ON”)
“
ON”: Displays video in detail.
“OFF”: Reduces screen flickering.
Although flickering of video during split screen
display can be reduced by setting “INTERLACE” to
“OFF,” the vertical resolution gets lower.
1. Press the SET UP button
}
<SETTINGS>
}
Select
“INTERLACE” in the <MPX DISPLAY SETTINGS> screen.
Display the desired setting and determine such setting.
2. Press the CLEAR button or the SET UP button.