60
7-2 Recording UMIDs
Chapter 7 UMID Functions
For more information about setup menu item 654, see
page 92.
To select the SDI VANC line to inset the
UMID
You can select the VANC
1)
line of the SDI signal into
which the generated UMID should be inserted. Make this
selection by using setup menu item 653 “UMID HD
VANC LINE”.
1) VANC: Vertical ancillary (data)
For more information about setup menu item 653, see
page 91.
To set Stored Ownership
To set Stored Ownership (data in the Source Pack which
indicates “who”) when generating a UMID, use setup
menu item 029 “STORED OWNERSHIP” and following
procedure.
For more information about basic setup menu operations,
see Section “9-2 Setup Menu Operations” (page 74).
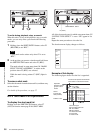
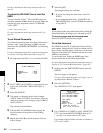
1
Set setup menu item 029 to “on” and select F9 (SET).
2
Use F1 (PREV) or F2 (NEXT) to select the item you
want to set (COUNTRY, ORGANIZATION, or
USER).
3
Select F6 (SELECT).
4
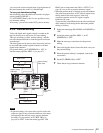
The setting is a character string (in this example
“ABCD” when COUNTRY was selected). Select any
character to change in the string by using F1 (PREV)
and F2 (NEXT).
The selected character flashes.
5
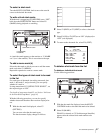
Turn the MULTI CONTROL knob to display the
desired character in the position of the flashing
character.
6
Repeat steps 4 and 5 for all the characters that you
want to change.
7
Select F9 (SET).
The changed settings are confirmed.
8
• If you do not change the other items, select F10
(EXIT).
• If you change the other items, (COUNTRY and
ORGANIZATION) , select F5 (ITEM) and repeat as
in steps 2 to 7.
If you changed other setup menu items before setting the
Stored Ownership, the changes are confirmed by step 7.
To cancel changes and exit the setup menu
Select F10 (EXIT) before finishing step 6.
To set the time zone
The UMID uses the UTC (Coordinated Universal Time)
time standard. Setting this unit’s built-in calendar clock to
the local time, and then setting a time zone to indicate the
difference from global UTC standard time allows correct
UMIDs to be generated.
To set the time zone, display the HOME page of the
function menu and use the following procedure.
For more information about function menu operations,see
Section “8-1-2 Function Menu Operations” (page 63).
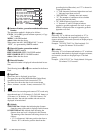
1
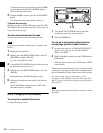
Holding down the SHIFT/ENTRY button, select F9
(MENU).
The error logger screen appears.
For more information about the error logger, refer to
the Maintenance Manual Volume 1.
2
Select F5 (SETTING).
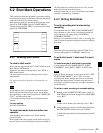
The “OFFSET TO UTC” item appears.
3
Use F1 (PREV) or F2 (NEXT) to select “OFFSET TO
UTC”, and use the MULTI CONTROL knob or F3
(–) and F4 (+) to set the offset to UTC time.
For example, if the local time is 9 hours in advance of
UTC, set to “+9:00”.
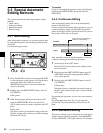
ITEM-029
ORGANIZATION - EFGH
*COUNTRY - ABCD
USER - IJKL
STORED OWNERSHIP
Note
(014/023)
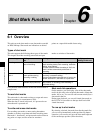
015 A PB DATA ERROR
ERROR LOGGER
016 V PB DATA ERROR
TAPE ERROR ON
WARNING ON
CONDITION ON
*OFFSET TO UTC +09:00
Push SET button
2001 12 24 23:59:59
014 REFERENCE MISSING


