


Removing and Replacing Parts 4-13
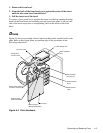
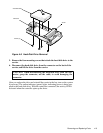
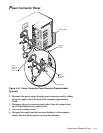
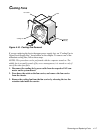
4. Using a screwdriver, pry the top of the fan carrier away from the
chassis.
5. Lift the fan carrier up and away from the chassis. Make sure the power
cable is not caught inside the chassis.
6. Remove the fan by removing the two screws in the top corners of the
fan.
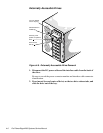
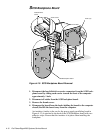
To install the fan, use the following procedure:
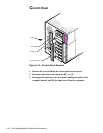
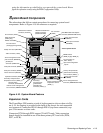
1. Insert the replacement cooling fan into the carrier, and replace the two
screws in the top corners of the fan.
2. Align the tabs on the bottom of the fan carrier with the notches in the
power supply bay opening.
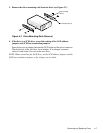
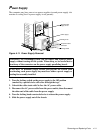
3. Thread the power supply cable through the opening in the top of the
power supply bay, over the system board and connect it to the fan con-
nector on the system board.
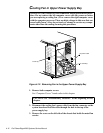
4. Swing the fan carrier up so that the top is flush with the chassis.
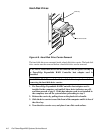
5. Replace the screw on the left side of the fan carrier.
6. Replace both computer covers.