


36
Routine Uses (continued)
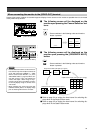
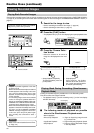
Recording Camera Images
Recording in the Normal Mode
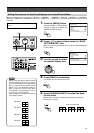
• Recording will not be executed if all cameras
within a block are set to “OFF” in Step
1
.
•Audio recording will be disabled if “1/6 IPS” or
“1/12 IPS” is selected for “FRAME RATE”.
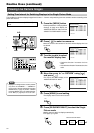
2.
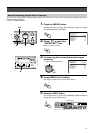
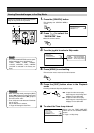
Press [MENU] to end setting
• This exits the menu to return to the normal screen.
3.
Press the [REC] button
• The recording mark [_] on the front display lights up and recording
starts.
Ⅵ To stop recording
Press the [STOP] button
Notes
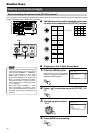
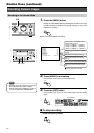
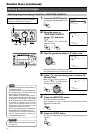
1.
Press the [MENU] button
• Display the “REC MODE” Menu by following the procedures in ‘Chang-
ing Menu Settings’ on page 22 and specify settings for menu items
required for recording.
● Main menu items related to recording:
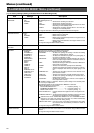
Front Display
[STOP]
A
Y
L
SEARCH
MENU
REV
SKIP
FWD
HDD
OPERATE
LOCK
VIDEO AUDIO
OUT
EXECUTE
R
1.2.
SEQUENCE
MULTI
REC STOP PLAY STILL
DISPLAY
CANCEL
SEARCH
8
6
14
16
TIMER
3.
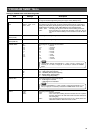
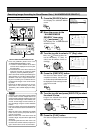
MENU
REC MODE
1.BLOCK
2.CAMERA 1
3.CAMERA 2
4.CAMERA 3
5.CAMERA 4
6.FRAME RATE
7.REC QUALITY
8.AUDIO REC
RECORDABLE HOUR
1
ON
OFF
OFF
OFF
25 IPS
H
ON
APPROX. 25H
MENU
REC
STOP
Specify settings for each block.
Select the camera channel block for which
recording mode is to be set.
• “BLOCK 1”: “CAMERA 1” ~ “CAMERA 4”
• “BLOCK 2”: “CAMERA 5” ~ “CAMERA 8”
• “BLOCK 3”: “CAMERA 9” ~ “CAMERA 12”
• “BLOCK 4”: “CAMERA 13” ~ “CAMERA 16”
Specify for each camera whether to execute
recording.
Select the frame rate during recording.
Select the picture quality of the recording
image.
Select whether to execute audio recording.
Displays an estimate of remaining recording
time.