


58
L
L
DISPLAY
CANCEL
SEARCH
MENU
REV
SKIP
FWD
HDD
OPER
LO
C
VIDEO
OU
T
EXECUTE
TIMER
1.
3.2.3 4.5
MENU
EXECUTE
EXECUTE
REV FWD
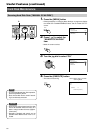
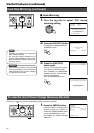
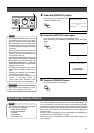
FORMAT
BUILT-IN HDD 1 : 76GB OK
BUILT-IN HDD 2 : 76GB OK
EXTERNAL HDD 1 :
EXTERNAL HDD 2 :
EXTERNAL HDD 3 :
EXTERNAL HDD 4 :
START FORMAT
ALL RECORDED HDD DATA IS DELETED!!
1.SET FORMATTING HDD TO [YES]
2.SET [START FORMAT] TO [YES]
YES
YES
NO
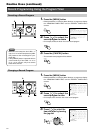
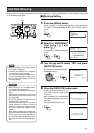
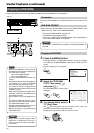
1.AUTO SCAN DISK
2.MANUAL SCAN DISK OFF
OFF
3.DEFRAG DATABASE
4.FORMAT
5.MIRRORING
DISK UTILITY
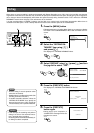
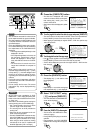
ALL RECORDED HDD DATA IS DELETED!!
START?
FORMAT CONFIRMATION
[CANCEL]:CANCEL [EXEC]:START
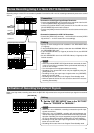
BUILD-IN HDD 1 : FORMAT SUCCEEDED
BUILD-IN HDD 2 : FORMAT SUCCEEDED
MIRRORING SETING
HDD UPDATE IS COMPLETED
PRESS [OPERATE] FOR OPERATION
1.
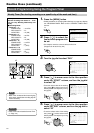
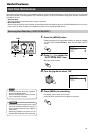
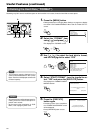
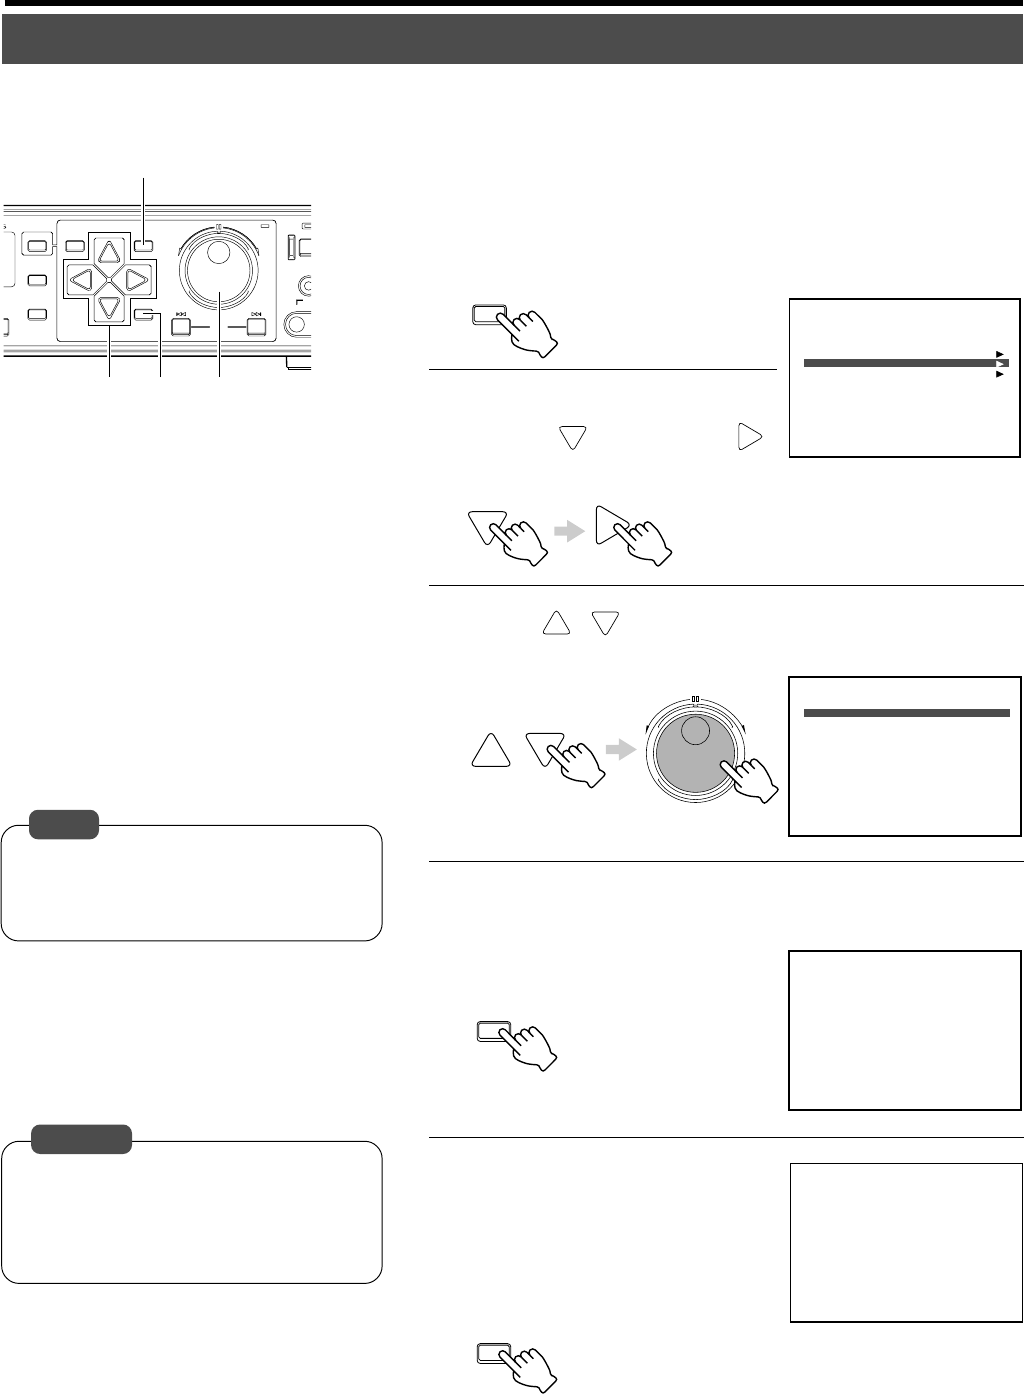
Press the [MENU] button
•Follow procedures in ‘Changing Menu Settings’ on page 22 to display
the “DISK UTILITY/MAINTENANCE” Menu and the “DISK UTILITY”
screen.
2.
Select the “FORMAT” item
using [ ] and press [ ]
• This displays the “FORMAT” screen.
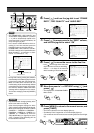
3.
Use [ / ] to select the hard disk to format,
and turn the jog dial to select “YES”
4.
Select “START FORMAT”, turn the jog dial to se-
lect “YES” and press the [EXECUTE] button.
• This displays the “FORMAT CONFIR-
MATION” Screen.
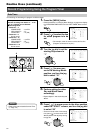
5.
Press the [EXECUTE]
button again
•Formatting starts. Upon completion,
the “FORMAT SUCCEEDED” screen
will be displayed.
• Press [OPERATE] button to start.
• All recorded events will be deleted upon for-
matting. Ensure to create a backup for im-
portant event records.
• At the screen upon completion of “FOR-
MAT”, never unplug the power cord.
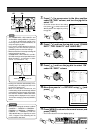
Recording may fail if there is insufficient space on the hard disk. In this case, format the hard disk to create space.
Useful Features (continued)
Caution
• The hard disk capacity displayed on the
screen is calculated based on 1 GB = (1024)
3
Bytes. Therefore it is displayed as lower than
the actual capacity.
Note
Initializing the Hard Disk (“FORMAT”)